Friday, December 28, 2007

Bouchon!


Let’s ring in the New Year with some chocolate!

Bouchon is the French term for a type of restaurant found in the region of Lyon. These places are known for wonderfully rustic, robust, lusty meals prepared and presented in a simple and warm atmosphere. They are places where local wares and ingredients are shared at an open table in the best of the communal spirit. Bouchon is also the French word for “cork” and is perfectly applied to the little French chocolate cakes that are baked to resemble the shape of a cork. So it is fitting to celebrate New Year’s Eve by sharing a bouchon with those you love. Or those you want to love.

These cakes take just a few moments to mix and another few minutes to bake. They are cakey but also a bit fudgy, with a crunchy-chewy exterior – a sort of Frenchy brownie but not as rich or cloying. My recipe is decidedly not overly sweet in an effort to emphasize the glories of the main ingredient. If you love chocolate, this is your roadmap to a quick fix. Voila.


Bench notes:

- While I usually favor Dutched cocoa by Valrhona, I’ve made this recipe with both Dutched and unDutched cocoa and both are great.
- I baked these bouchon in 2” cylindrical timbales, each holding about 1/3 C batter (or roughly 1 1/2 oz). They took about 24 minutes to bake. Adjust your baking time depending on your baking tins and the vagaries of your oven. You can use a mini-muffin tin if you have one of those. I’ve also seen mini-popover pans used and they make gorgeous bouchon. In any case, start checking your bouchon around the 15 minute-mark. An inserted toothpick should come out with a moist crumb. Nothing worse than dry cake and the difference between perfect cake and dry cake is less than 2 minutes. Keep checking every couple of minutes once you get to the 15-minute mark!
- These are best eaten the same day but can be stored in an airtight container for a couple of days.


Bouchon
Makes 10 using 2" timbale molds

4 oz (1 stick) butter
4 oz bittersweet chocolate
3 eggs @ room temperature
3/4 C + 2 T sugar
heaping 1/4 t salt
1 1/2 t vanilla
1/4 C cocoa powder
3/4 C flour
2/3 C chopped bittersweet chocolate

Preheat oven to 350 degrees. Butter 2” timbale molds and place on a sheet pan.

Melt chocolate and butter over a water bath or bain marie and stir to blend.
Whisk the eggs, sugar and salt together and add vanilla. Add chocolate to egg mixture and stir until smooth.
Whisk together the flour and the cocoa and add to the chocolate mixture, stirring just until it is nearly blended. Add the chopped chocolate and stir until blended. Spoon batter into molds, filling them to the top.

Bake for 20 to 24 minutes, but start checking around the 15-minute mark, depending on the size of your baking tins. A toothpick inserted into the bouchon should come out with some moist crumbs. Cool briefly and remove from molds. And with that…..

Happy New Year!


2007 has been an incredible year for me. I’ve worked with people who inspire me in countless ways. I’ve enjoyed great humor, wisdom and lots of new ideas. I’ve joined causes that have lifted me up and introduced me to a whole new world that reinforces the strength and generosity of the human spirit. I have learned so much from every endeavor and encounter. I hope you also savor some great memories from the year’s many activities and moments of quiet pleasure. Let's now turn to a new year filled with a fresh excitement for everything life has to offer.

This blog is one way I share my passion and curiosity for the beauty of the culinary world. I hope you have enjoyed it as much as I have. Special thanks to everyone who taste-tested countless bites and proved once again that good food is the universal language of the gods. And a very special note of appreciation to all who supported pastrystudio from its very inception. My deepest gratitude for your love, advice and encouragement.

Be it resolved to have only the most delicious morsels in your life!

Friday, December 21, 2007

Panforte Siena


Panforte is a dense chewy confection made with honey, nuts, spice and candied citrus with origins dating back to the Middle Ages in Siena, Italy. It was once used as a tithe to the monasteries at the beginning of each new year, so you will often find it in abundance throughout Italy at this time of year. Each regional shop carries its own distinctive brand. Some say a proper panforte should have 17 ingredients to reflect the 17 different contrade, or city subdivisions, within the city walls. The most famous contrade are the 17 Contrade de Siena that form the teams of the Palio di Siena.

As new ingredients were discovered over the centuries, many different recipes for panforte evolved throughout the regions. The Parenti bakery developed a chocolate one in the 1820’s. There are now three principal varieties, Panforte Margherita, a lighter and sweeter version named after Queen Margherita; Panforte Nero, made with an emphasis on bitter almonds; and my favorite, Panforte Panpepato, typically the highly spiced version that comes from 13th century Siena.

The best recipe I’ve found so far has hazelnuts, almonds, candied citron (or Buddha’s Hand), cocoa and an intriguing combination of spice. It comes from Room for Dessert by David Lebovitz. A warm and personal cookbook, every recipe is timeless, well tested and easily employed. I used to work with one of the recipe testers for the book, so I jumped right in when it was first published in 1999. Over the years, I think I’ve prepared nearly every recipe. David lives in Paris these days and has since published more cookbooks. You can follow his adventures at http://www.davidlebovitz.com/

Bench notes:
- You will need a candy thermometer or be able to test for the softball stage (240 degrees).
- I candy Buddha’s Hand each year for panforte. It is an essential ingredient! The unique aroma and flavor will knock you out. And, no! It bears no resemblance to those icky fruits you see in plastic containers! Buddha’s Hand or citron can sometimes be found at farmer’s markets or specialty markets. In an absolute pinch, you can use candied lemon peel.
- I added a pinch of cardamom to the recipe because I just had to.
- You can also bake in eight 3 1/2” tartlet pans for individual gifts.
- Traditionally, panforte is baked on a piece of edible wafer paper to make removal from the pan a bit easier. I use butter and cocoa as stated in the recipe. The trick is to remove from the pan while it is still warm. But if you wish to remain true to tradition, you can order wafer paper online.
- Enjoy with a good cup of coffee or a little glass of vin santo.


Panforte
adapted from Room for Dessert by David Lebovitz
Makes 1 9 1/2” disc, 16 to 20 servings

5 T unsweetened cocoa, plus 2 teaspoons more for dusting pan
3 oz bittersweet chocolate
1 C hazelnuts, toasted and loose skins removed
1 1/2 C almonds, toasted
3/4 C flour
3/4 C chopped candied citrus peel (preferably candied citron)
1 T ground cinnamon
2 t ground ginger
1 1/2 t freshly ground black pepper
Pinch grated nutmeg
Pinch chili pepper
Pinch of cardamom (optional)
1 C granulated sugar
3/4 C honey

Powdered sugar for dusting

Prepare a 9 1/2" springform pan with butter. Dust with 2 teaspoons of cocoa, tapping out the excess. Preheat your oven to 300 degrees.

Chop chocolate into small pieces and melt in a bowl set over simmering water. Be sure the bowl is not touching the water.
Chop the nuts coarsely but leave a few whole.
Stir together nuts, flour, 5 tablespoons cocoa, candied citrus and spices in a large mixing bowl.

Attach a candy thermometer to a small heavy saucepan. Place granulated sugar and honey in the pan and heat to 240 degrees F.

Mix melted chocolate into nut, fruit and spice mixture. Stir in honey syrup. Work very quickly because the batter will begin to stiffen very rapidly. Transfer batter to prepared pan. Dampen your fingers or the back of a spoon with a bit of water and spread batter evenly, smoothing the surface.

Bake for 50 minutes and cool for about 30 minutes. While still warm, loosen the edges from the pan with a thin knife. Remove from pan with the help of a metal pastry spatula, if necessary. When cooled completely, rub powdered sugar into the top and sides of the panforte with your hands.

Panforte improves with age and will keep up to one year wrapped and packed away in a cool dry place for your journey to the New World. When you open the container, you will be completely blown away by the absolutely other-worldly fragrance of panforte. Buen appetito!

Saturday, December 15, 2007

Linzer Love


In an appreciative bow to tradition, what would the season be without Linzer Cookies? These crisp spicy cookies filled with jam are a mini permutation of the Linzertorte, the oldest known torte that originates from the city of Linz in Austria. The first recorded recipe for the Linzertorte dates back to 1653 and comes from the archive of the Benedictine monastery Admont Abbey, renowned for its Baroque architecture and its vast library and art collection.

The basics of the Linzertorte are very simple: a thin layer of nut pastry filled with jam and then topped with a criss-cross lattice of nut pastry. The torte is most often filled with raspberry or red currant jam, but apricot is another favorite. The modern version is a sandwich cookie with the same elements.

This cookie is an easy mix that combines the earthy crunch of hazelnuts, the warmth of aromatic spice and the lusciousness of fruit all in one bite. Once you begin the baking process, the smell of roasting nuts and spices emanating from your oven will surely send you into a state of delight powerful enough to soothe any holiday angst. A light dusting of confectioner’s sugar on top reminds us of the snow-filled fairy tales that include our favorite fantasies. Take it to the next level by dipping a portion of each cookie in melted bittersweet chocolate and you have the dreamiest cookie in your midst. Resistance is futile!

Linzer Cookies showcase the best pastry traditions of Austria and will remind you just how easy it is to join in this season of giving. Share these delicious old fashioned cookies with your guests as they gather to celebrate the warmth of your table.

Bench notes:
- The secret to well shaped crisp cookies is chilling. Lots of chilling! Once the dough is mixed, roll it out to 1/8” and chill it so that it’s firm enough to make the job of using a cookie cutter a snap and so your cut cookies maintain their shape. Once cut, chill them again to be sure they hold their shape during baking.
- I added an egg yolk to the original recipe for added richness and tenderness. I also left out the almond extract and added a teaspoon of rum for a bit of holiday cheer as well as a pinch of freshly grated nutmeg.
- Unfilled, these cookies will store a couple of weeks in an airtight container. As with all pastries that contain a good measure of spice, they taste best the next day when all that goodness has a chance to co-mingle and become an even greater temptation.
- When cutting out cookies, handle the scraps gently and reroll.
- My cookies took about 17 minutes to bake. The test for doneness for most cookies is if they move easily when gently nudged. If they show any resistance, bake another minute.

Linzer Cookies
adapted from Alice Medrich's Cookies and Brownies
Makes about 20 3 1/2” cookies

2 C flour
1 C hazelnuts and/or almonds
1/2 C sugar
1/4 t salt
2 1/2 t cinnamon
1/4 t cloves
8 oz (2 sticks) butter cut into small pieces
1/4 t almond extract
1 t lemon zest
1 t orange zest
1 t rum (optional)
1 egg yolk (optional)
pinch of freshly grated nutmeg (optional)

Good quality fruit preserves
Powdered sugar for dusting

Place the flour, nuts, sugar, salt, spices and zest in the bowl of a food processor. Pulse until the mixture is finely ground. Add the pieces of butter, extract and/or rum and egg yolk if using and pulse until the mixture has a damp appearance and starts to clump around the center of the bowl. Remove the mixture and gather into a ball, gently kneading a bit if necessary to bring the dough together. Divide into two packets and using two pieces of plastic wrap for each packet, roll out to 1/8” thickness. Place on a sheet pan or flat surface and chill until firm, preferably overnight.

Using your favorite cookie cutter or a thin sharp knife for simple geometric shapes, cut out the cookies and place on a parchment lined pan. If you have a smaller version of your cookie cutter, cut out a center on half the cookies so the color of the jam can shine through. If the dough has softened at all, refrigerate again until firm.

Preheat oven to 325 degrees. Bake the cookies in the upper and lower third of the oven for about 13 – 15 minutes, rotating front to back and top to bottom half-way through the baking. The cookies should just start to take on a little color around the edges. The smaller cutout centers will only take 8 – 10 minutes.

Cool cookies completely before filling or storing. Dust the cookie tops with confectioner’s sugar, put a thin layer of preserves on the bottoms and sandwich together. If desired, skip the dusting of sugar, melt a bit of bittersweet chocolate and decorate as you wish. If you have not cut out a window, you can dip a portion of the cookie into the chocolate, scraping off the excess from the bottom and placing on a cooling rack or piece of parchment to dry. If you have a cut out on the cookie top, you can simply drizzle some chocolate across the surface.

Friday, December 7, 2007

The Curious Case of Quince


If you’ve never had a bowl of fresh quince in your kitchen, you probably haven’t experienced the most floral winter fruit fragrance imaginable. As they continue to ripen, they fill the room with an almost tropical aroma.

With their lumpy exterior and gnarled shape, quince are often thought of as apple’s ugly cousin. They have a form similar to an apple and the texture of a hard pear, but caution! They are not to be eaten raw. They are very hard, bitter and astringent and that is definitely not the way to be introduced to these gems. However, once they’ve been cooked in a nice poaching liquid they truly are a lovely and unusual treat.

Although quince have a yellowish green surface with an ivory interior, the poaching process transforms them into a deep rosy orange, which may account for some of their mystery. They do take some work before you can coax them into a palatable pleasure, but it is worth every minute to get there. Brimming with natural pectin, quinces are perfect for making jams, jellies and membrillo, the Spanish fruit paste often served with Manchego cheese. Quinces are also a staple in savory Moroccan tagines, North African and Middle Eastern stews, Chinese teas and Hindu chutneys.

The cultivation of quince likely originated in Mesopotamia, somewhere between the Caspian and the Black Seas. They also appear in ancient Greek writings and were thought to be the favorite of Aphrodite, which made them a ritual offering in wedding ceremonies. Charlemagne also introduced the fruit to France and they are mentioned for the first time in the English language in the later part of the 13th Century. By the early 18th Century, quinces had found their way through the Massachusetts Bay and on to Virginia.

Knowing my love of quince, a friend recently sent me a recipe for Quince Pound Cake from Epicurious. Since I'm definitely intrigued by anything having to do with fresh fruit, I was game to try it and I'm glad I did. The combination of the cake, with its almost imperceptible yet fabulous hint of spice, and the mildly sweet flavor of the fruit make this a great way to enjoy the brief quince season.


Bench notes:
- I’ve substituted Cindy Mushet’s recipe for poaching quince from Desserts: Mediterranean Flavors, California Style. However, you may prefer to try the original recipe. I also made additional quince because I wanted a higher fruit to cake ratio.
- Although the process may seem a bit daunting, once you have the quinces poached you only need to complete a simple mix for a pound cake. The best way to do this recipe is to poach the quinces on one day and make the cake the next.
- This cake is very dense and it took a freaky 1 hour and 13 minutes to bake. If I were to do this again, I’d probably make a couple loaves for smaller portioning and shorten the baking time accordingly.
- Be careful when peeling and cutting into quince. They are very hard and will take steady but careful force.
- Due to the high ratio of butter, it will take about 3 to 5 minutes before the butter and sugar are properly creamed. It won’t look right for the first couple of minutes but it will come together.
- You can reduce the poaching liquid and serve over ice cream or mix into sparkling water or your favorite drink.


Poached Quince
adapted from Desserts: Mediterranean Flavors, California Style by Cindy Mushet
3 - 4 quinces
4 C water
3/4 C sugar
1/2 vanilla bean, split
Orange peel strips from 1/2 orange
Lemon peel strips from 1/2 lemon
1 cinnamon stick
3 slices fresh ginger
2 T lemon juice

Peel, quarter, and core fruit. Cut into 1/2” slices. Place the peel and the cores in a saucepan with the water, sugar, and flavorings. Simmer for 30 minutes.

Strain and return the liquid, vanilla bean, and cinnamon to the pan. Add fruit and bring to a boil. Lower heat and simmer for 1 1/2 to 2 hours until the fruit is a deep rose color. Cool completely. Refrigerate in an airtight container.

Quince Pound Cake
Gourmet | January 1998
Serves 10 to 12.

1 3/4 C cake flour
1/4 t cinnamon
1/4 t salt
4 oz (1 stick) unsalted butter, softened
1 1/2 C sugar
1 large egg yolk
3 whole large eggs
1/2 C heavy cream
1 t vanilla
Poached quince

Preheat oven to 350°F. Prepare a 9- by 2-inch round cake pan with butter and flour and a parchment round.

Place quince slices on a paper towel to absorb excess moisture. Cut into 1/4” slices or into smaller chunks if you prefer. Reserve poaching liquid for another use.
Sift together flour, cinnamon, and salt twice.
Beat butter and sugar until light and fully combined, about 3 to 5 minutes. Add eggs, 1 at a time, beating well after each addition and scraping down the bowl to be sure the entire mixture is creamed.
Beat in half of flour mixture and then add all of cream until just combined.
Add remaining flour mixture and vanilla, mixing until just combined. Fold quince slices into batter and spread batter evenly in pan.

Bake cake in middle of oven 1 1/4 hours, or until a toothpick comes out clean.
Cool in pan on a rack 20 minutes.
Turn cake out onto rack and cool completely.

Friday, November 30, 2007

Regional Riches


With its rich soil, rolling hills and temperate climate, northern California has given rise to extraordinary winemakers, organic farmers, ranchers and stellar artisan cheesemakers. In many cases, this abundance extends beyond the boutique groceries of the region to find a welcome place on shelves in metropolitan areas across the nation. But many of our region’s wonderful products do not travel to the far reaches of our world and I fully realize how very lucky I am to have this incredible wealth of talent and dedication available to me just steps away in my neighborhood.

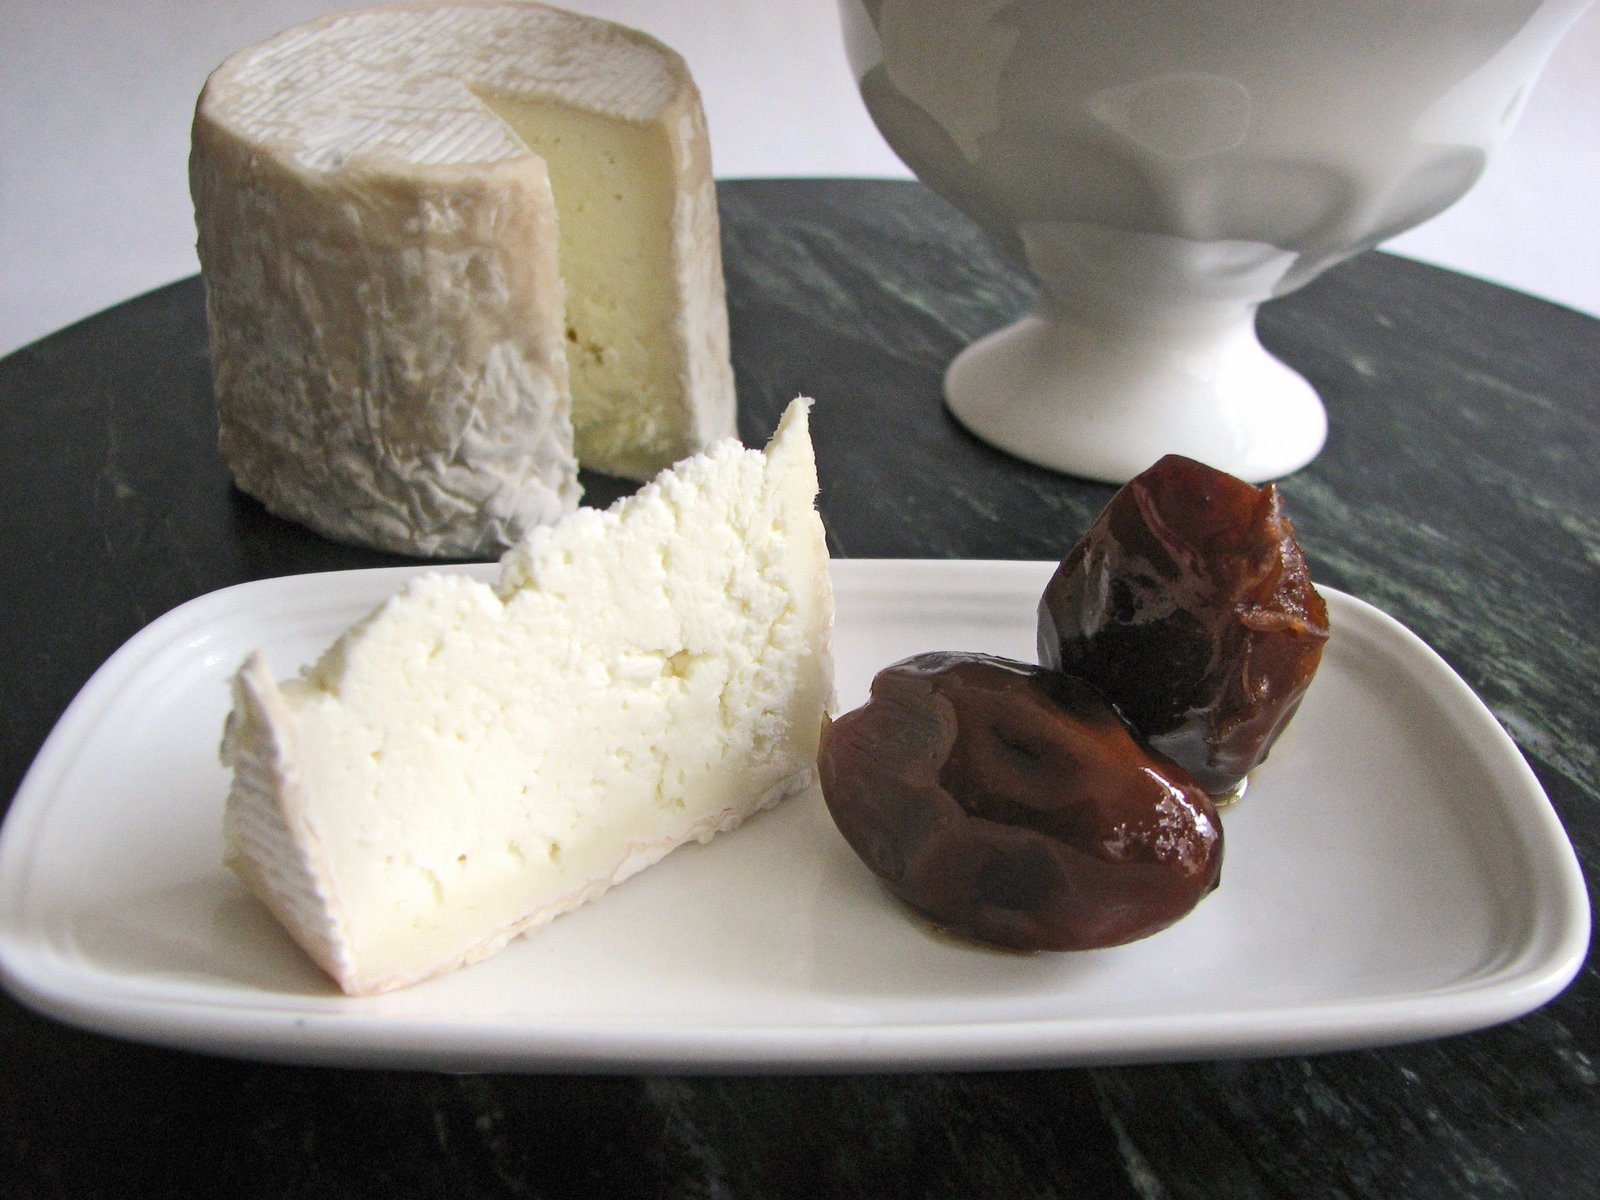
One such local producer is Soyoung Scanlan, cheesemaker extraordinaire of Andante Dairy. I met Soyoung while I was working in the pastry kitchen of a fine dining restaurant a few years ago. She was our cheesemonger and I had the great fortune of being on the receiving end of her finely crafted delectable cheese. She crafts only small batches and every piece is exquisite. Her care and close attention to production and affinage are evident in every bite. Also an accomplished musician, Soyoung names each of her cheeses in keeping with her musical inclinations. If you live in the Bay Area or are ever in the region, please take the time to seek out Andante cheese. Although most of her cheeses go to the region’s finest restaurants, the French Laundry among them, they are available at the Saturday San Francisco Farmer’s Market and at our local Whole Foods.


In contrast to the region's emerging artisans, I pair Soyoung’s amazing cheese with one of the world’s oldest gifts from nature, Medjool dates. Dating back to 5th Century Egypt, dates were transported by the Moors to Spain and thrived throughout the Middle East and the Mediterranean. Medjool plantings originating from Morocco and Jordan are now cultivated in the Coachella Valley of California. Medjools are considered the largest, plumpest and most prized of all the varieties and should be readily available in your area.

Andante’s Minuet is a soft-ripened goat’s milk triple crème made by adding crème fraîche to the curds. Mélange is a fabulous blend of goat’s milk and cow’s milk that results in a beautiful tanginess and richness made in the style of the best brie. It has a light luscious texture combined with a nice acidic bite, which pairs perfectly with all of the wonderful elements found in a recipe for Roasted Dates with Sherry and Spices from The Last Course by Claudia Fleming. It’s an astonishing combination of old world and new world that will leave you happy for having found these abundant pleasures.

If you are unable to locate Andante cheese to serve with these dates, there are so very many other great choices. I would recommend just about anything, from a tangy goat to a gooey brie, a nutty gruyere, a tomme or a grand Parmigiano Reggiano. And of course there’s always ice cream: vanilla, chocolate, caramel, coffee or perhaps a fruit sorbet such as orange or mango, to name a few.

Bench notes:
- You may sometimes see a white powdery film forming on the surface of dates. This is due to their high level of natural sugar and is not a cause for alarm. It’s just sugar crystal formation. You can warm them in the oven or steam them and the crystals will dissolve.
- I used a Lustau Amontillado Los Arcos Sherry. I also think a Rainwater Madeira, with its caramel, orange and hazelnut notes, might work very well in place of the sherry.


Roasted Dates with Sherry and Spices

adapted from The Last Course by Claudia Fleming

24 Medjool dates, pitted
1 C Fino or Amontillado Sherry
1/4 C dark brown sugar
4 cardamom pods, crushed
1 cinnamon stick
1 orange peel strip, 1” x 3”
1 C water
2 oz (4 T) butter, diced

Preheat oven to 350 degrees. Place dates, sherry, brown sugar, spices, orange peel and water in a saucepan. Bring to a simmer to dissolve and blend ingredients. Pour in a shallow baking dish and bake @ 350 degrees for 15 minutes, basting every 5 minutes.

Remove the dates from the syrup. Cool and remove skins if you prefer. Strain the syrup back into the saucepan and discard spices. Bring syrup to a simmer and reduce by a third, about 7 minutes. Whisk in butter until the sauce is completely emulsified. Pour over dates and serve.

Friday, November 23, 2007

Walnut Cake with Apple Sauté and Caramel


‘Tis the season for nut recipes. The holidays always come with plenty of festive nut-filled cookies, cakes, tarts and tortes that feature almonds, hazelnuts, pistachios, pine nuts or walnuts. Spices, dried fruits and booze also figure prominently in our holiday pastries.

The first nut dessert of the season's line-up is one I adapted from In the Sweet Kitchen by Regan Daley. She offers a Walnut Layer Cake with Coffee Buttercream, but I wanted something lighter and more in keeping with the season. So I halved the recipe to produce just one layer, added a pinch of orange zest and decided to plate it with some sautéed apples and a caramel sauce to really give it the full autumn treatment. The cake has a warm walnut flavor, is buttery moist and has just the right crumb. When combined with fruit and a hint of citrus, this composition brings some of the best winter flavors into full bloom.

This recipe is a perfect match for many, many different flavors. You can add a bit of brandy to the cake or some spices to the caramel. You can sauté the apples with some rosemary sugar. You can add a bit of espresso or orange juice to the caramel or you can omit the caramel and serve with caramel ice cream. Or make a ginger orange syrup. Omit the apples and the caramel and serve with coffee ice cream. You can substitute bananas for the apples. Or some variation on all of the above. You get the picture! Experiment with your favorite combinations.


Bench notes:
- This is more of a cake than a dense walnut torte, which is also on my list of projects.
- As always with caramel, give it your undivided attention. It will turn on you in a second! Try to take it to a deep amber color to avoid it being too sweet. Take it off the heat the moment it reaches the right color and add the other ingredients to stop the cooking. And remember, whenever you add an ingredient to hot caramel, it’s going to bubble viciously. Just stand back and let it unwind. Also, be sure the cream and butter are at room temperature. Adding cold ingredients to hot caramel will likely cause it to seize on you. To fix a seized caramel, place it on low heat and whisk gently until dissolved.
- The ratios for the butter and cream in the caramel can be adjusted to your own taste, as well as the salt. I prefer a salty caramel!
- If you fear the caramel, you can make a simple sauce by bringing 1 C of brown sugar and 1/3 C water to a boil. Add 2 T butter and 2 T heavy cream and whisk to combine. Stir in 1 T cider vinegar to finish the sauce. The amount of butter, cream and cider vinegar can all be adjusted to suit your own personal preferences.
- I always grind nuts with a bit of sugar from the recipe to avoid releasing the oils and producing a nut paste.
- Use your favorite apple of the season that will hold up to cooking. I like the tartness of Granny Smith.

Walnut Cake with Apple Sauté and Caramel
adapted from In the Sweet Kitchen by Regan Daley

Cake
6 oz butter (1 1/2 sticks) @ room temperature
1/2 C + 2 T + 2t sugar
1/2 t orange zest (optional)
2 eggs @ room temperature
1 T maple syrup
1/2 t vanilla extract
1/2 C walnuts
1 C flour
1 t baking powder
1/4 t salt

Caramel Sauce
1/4 C water
1 C sugar
1 t light corn syrup
2 T butter @ room temperature
1/4 C heavy cream @ room temperature
1/2 vanilla bean or 1 t vanilla extract
salt to taste

Apple Sauté
4 apples
1 T butter
3 T sugar

Preheat the oven to 350 degrees. Brush an 8-inch cake pan with butter and line the bottom with a parchment round. Butter the parchment and dust the bottom and sides with flour.

Place the walnuts in a food processor with the 2T and 2t of sugar. Process until the nuts are finely ground and resemble bread crumbs. Be sure to stop if the mixture looks like it’s starting to clump.

Sift flour, baking powder and salt.

Beat the butter until smooth. Add the 1/2 C sugar and orange zest. Cream the mixture on medium speed until pale, light and very fluffy, about 4 to 5 minutes. Add eggs one at a time, mixing thoroughly before adding the next and scraping down the bowl after each addition. Add maple syrup and vanilla. Blend in ground walnuts. Using a large rubber spatula, fold in the flour by hand in three batches, mixing just enough to moisten and blend. The batter will be quite thick. Scrape into the prepared cake pan and smooth out the top.

Bake in the center of the oven for about 28 minutes or until a toothpick comes out clean. Cool on a wire rack for 10 minutes. Run a thin blade knife around the cake to loosen and invert. Flip the cake back over to right side up and cool completely.

For the caramel sauce:
Place 1/4 C water, sugar and corn syrup in a saucepan and turn up the heat. Cook the sugar mixture until it turns an amber color, about 7 minutes. Watch closely. Once the sugar starts to color it accelerates very quickly and will darken to a burnt and bitter stage very fast. If it's not coloring evenly, swirl the pan just a bit to circulate. Once it has reached the right color, take it off the heat and slowly add the cream. It will bubble up vigorously. Once it subsides a bit, add the butter and whisk until thoroughly combined. If there are any seized bits of caramel, return to low heat and stir continuously until dissolved. Stir in the scraped vanilla seeds or vanilla extract and salt to taste. Set aside.

For the apple sauté:
Peel, core and slice apples into thin wedges. Melt 1 T butter in large skillet over medium-high heat. Add apples; sprinkle with 1 T sugar. Sauté apples, shaking the pan to toss, until almost tender and beginning to brown, about 5 minutes. Sprinkle with remaining 2 T sugar and continue to cook and toss until sugar melts and apples are caramelized. Set aside.

Assembly:
Lightly brush the top and sides of the cake with the caramel sauce. Plate a piece of the cake and top with apple slices and drizzle with sauce.