Showing posts with label yeasted pastries. Show all posts

Friday, August 28, 2015

Fruit Rolls


As we slide into the end of the summer, I have a few different fruit compotes sitting in my refrigerator that I need to use up.  There’s apricot, peach and plum – so delicious served alongside cake, over ice cream or stirred into yogurt or oatmeal.

I decided to use the last of my seasonal stash to create some rolls using my easy basic yeast dough recipe.  I filled the rolls with a dollop of my compote preserves and they baked to a jammy deliciousness that will make your weekend brunch just that much brighter.  But you can also bake them plain to enjoy simply with butter.  Sometimes the basics are all we need to keep company with our favorite morning beverage.

It’s hard to believe it’s almost September but it’s been a great year for fruit, thankfully.  I’m still savoring nectarines and figs at the moment, but as children head back to school and fashion turns to sweaters and boots, we’ll be into apples and pears in no time.  I hope you’ve had a chance to enjoy this year’s extraordinary goodness.

Bench notes:
- Yeast feeds on sugar but yeast activity may decrease if it comes into direct contact with sugar or salt, so dissolve the yeast in water first, then add the sugar. 
- Don’t add any more than 3 cups of flour to the dough or your pastries will be tough and dry.
- As you’re forming the rolls, don’t coil too tightly so they can expand during the second rise.  Here’s an illustration of how to shape the rolls.
- I place each baking sheet of rolls on top of another baking sheet (“double pan”) before they go into the oven to prevent the bottoms from getting too brown.
- You can dust the rolls with powdered sugar or, for a sweeter bite, drizzle with glaze: whisk together 1/3 cup (40 g) powdered sugar, 1 tablespoon milk, a couple drops of vanilla or lemon juice and a few grains salt.


Fruit Rolls
Makes 12 rolls

1 pkg (2 1/4 teaspoons) active dry yeast
1/4 cup (2 oz) warm water (110 -115 degrees F; warm but not hot on your wrist)
slight pinch sugar
1/2 cup (4 oz) milk
3 oz (6 tablespoons) unsalted butter, cut into 1/2" pieces
1/4 cup (1 3/4 oz) sugar
1/2 teaspoon salt   
1 1/2 teaspoons vanilla
2 eggs @ room temperature
2 3/4 (13 3/4 oz) - 3 cups (15 oz) flour

1 egg + 1 tablespoon water + few grains of salt = egg wash
1/2 - 3/4 cup fruit preserves
powdered sugar for dusting

Whisk together 1/4 cup warm water (110 - 115 degrees F), yeast and a pinch of sugar.  Set aside for 10 minutes.

Place the milk, butter, 1/4 cup sugar and salt in a saucepan.  Warm on low heat just until the butter is melted, whisking to combine all the ingredients.  Take off the heat, add the vanilla and cool to room temperature.

Combine the proofed yeast with the milk mixture.  Whisk in the eggs.  Switch to a fork and stir in 2 3/4 cups of flour.  Keep adding 1 tablespoon of flour at a time (no more than 4) until the dough is no longer sticky.  Transfer to a very lightly floured work surface and knead until the dough is soft and elastic, about 5 - 8 minutes.

Wash and dry the mixing bowl and lightly grease with canola oil.  Place the dough in the bowl, turning it over once to lightly coat the entire surface with oil.  Cover the bowl with a piece of plastic wrap and set in a warm draft-free place to rise for 2 hours.

Line two baking sheets with parchment or silpats.

When the dough has completed its first rise, press down on it to release the air.   Divide the dough in two equal pieces and transfer one piece to a lightly floured work surface.  Dust the dough very lightly with flour.  Roll out to a 12" x 16" rectangle.  Brush off any excess flour and cut into six 8” x 4” rectangles. 

Cut diagonal slashes about every 1/2” in each piece.  Loosely roll up each piece into a log and then form each log into a coil, tucking the tail underneath.  Place the six rolls on a baking sheet.  Repeat with the second piece of dough.   If you’re adding fruit preserves, press your thumb down into the center of each coil and place a tablespoon or so into the indentation.  Set the baking sheets in a warm place for 1 hour.

When the rolls are just about finished with the second rise, preheat the oven to 350 degrees F.  

Prepare the egg wash and lightly brush each roll.  (You won’t use all the egg wash.)  Place each baking sheet on top of another baking sheet (double pan) and bake until the rolls are a golden brown, about 20 -25 minutes, rotating them front to back and top to bottom about halfway through.  Remove from the oven and place the pans on a wire rack to cool.  Dust generously with powdered sugar.

Friday, March 27, 2015

Espresso Cinnamon Buns


One of my favorite ingredients to work with is yeast.  I know a lot of people have a terrible fear of it but I think it’s just about one of most fun food experiments to undertake in the kitchen.  There are so many ways to shape and fill yeast dough and when you pull the pastries out of the oven, it’s really magic to see what has transpired in the baking. The great pleasure you get from working with yeast, the aromas yeasted pastries bring to your kitchen and the great fresh baked taste and texture - it's really super fun.

This is a morning bun that is all about the wonderful flavor of espresso in the filling.  Extending our coffee culture to a yeasted bun turned out to be a very delicious experiment.  Since I absolutely love coffee flavored pastries and desserts, this was a particular pleasure for me. 

The filling for these buns is also rich with cinnamon.  There’s brown sugar, a hint of cocoa powder and toasted walnuts.  The whole mixture is finely ground in a food processor for a svelte bite.  And for a change in visual appeal, instead of baking them in the traditional way, I placed them on their sides and flattened them slightly to create an oblong shape.  As they baked, the slides slid out to create a beautiful little fan.  I also finished them with a shiny espresso glaze.

One last thing: the aroma of these baking will make you crazy.  Let them cool a bit.  By the time you brew a good pot of coffee, they'll be ready for your unbridled enjoyment.


Bench notes:
- Instant espresso powder is very handy to have on hand.  My favorite brand is Medaglia D'Oro because the granules are superfine and if it’s kept free of moisture, it doesn’t clump. I've also used Ferrara.  It stores indefinitely and can be used in lots of pastry recipes when you want to strengthen a coffee flavor.
- The most important rule to follow is to dissolve your yeast in liquid that is 110 - 115 degrees F.  It should feel very warm, not hot.  I usually just let my tap water run to its hottest temperature, measure out what I need and place a thermometer in the measuring cup.  I let it cool just a bit and when it reads 110 - 115 degrees, I whisk in the yeast and then a pinch of sugar.  (Yeast feeds on sugar but yeast activity may decrease if it comes into direct contact with sugar or salt, so dissolve the yeast in water first, then add the sugar.)   I then set it aside to proof for about 10 minutes while I assemble all the other ingredients.  By the time I'm set to work on the recipe, the yeast is foamy and ready to go.
- Salt is important in yeast dough because it slows the rising time and allows the full flavor of the dough to develop.  It also strengthens the gluten and builds the structure of the bread by keeping the carbon dioxide bubbles from expanding too quickly.  Sugar not only adds flavor, it's also a browning agent.
- After the first rise, the dough is "punched down" to release the carbon dioxide and even out the temperature.  But rather than punching, gently press the air out with your hands.
- To avoid adding any additional excess flour when shaping the dough, I like to roll it out on a silpat.  You’ll only need a very light dusting of flour.
- Lightly toast walnuts in a single layer on a baking sheet at 350 degrees F for about 8 - 10 minutes or until they just start to turn golden and give off a light toasty aroma.  Watch them closely so they don’t burn and become bitter.
- The ground nuts really add to the texture and flavor of the filling.  If walnuts aren’t your thing, try almonds or hazelnuts.
- I place the baking sheet of buns on top of another baking sheet (“double pan”) before it goes into the oven to prevent the bottoms from getting too brown.
- Everything you wanted to know about working with yeast can be found at Red Star.


Espresso Cinnamon Buns
Makes 12 buns

Yeast Dough
1 pkg (2 1/4 teaspoons) active dry yeast
1/4 cup (2 oz) warm water (110 -115 degrees F; warm but not hot on your wrist)
slight pinch sugar
1/2 cup (4 oz) milk
3 oz (6 tablespoons) unsalted butter, cut into 1/2" pieces
1/4 cup (1 3/4 oz) sugar
1/2 teaspoon salt
1 1/2 teaspoons vanilla
2 eggs @ room temperature
2 3/4 (13 3/4 oz) - 3 cups (15 oz) flour

Filling
1/2 cup (3 1/2 oz) dark brown sugar, packed
1 1/2 teaspoons cinnamon
1 tablespoon instant espresso powder
1 1/2 tablespoons (8 grams) cocoa powder
1/2 cup (1 3/4 oz) walnuts, toasted

1 1/2 oz (3 tablespoons) unsalted butter, melted
1 egg + 1 tablespoon water + few grains of salt for egg wash

Glaze
2 tablespoons (1 oz) boiling water
1/4 teaspoon instant espresso powder
3 tablespoons (3/4 oz) powdered sugar, sifted
1/8 teaspoon vanilla

For the dough, whisk together 1/4 cup warm water (110 - 115 degrees F) and yeast until thoroughly combined.  Add a very slight pinch of sugar.  Set aside for 10 minutes.

Place the milk, butter, sugar and salt in a saucepan on low heat just until the butter is melted, whisking to combine all the ingredients.  Take off the heat, add the vanilla and cool to room temperature.

Combine the proofed yeast with the milk mixture.  Whisk in the eggs.  Switch to a fork and stir in 2 3/4 cups of flour.  Keep adding 1 tablespoon of flour at a time until the dough is no longer sticky.  Transfer to a lightly floured work surface and knead until the dough is soft, smooth and elastic.

Wash and dry the mixing bowl and lightly grease with canola oil.   Place the dough in the bowl, turning it over once to lightly coat the entire surface with oil.  Cover the bowl with a piece of plastic wrap and set in a warm draft-free place to rise for 1 1/2 hours.

Prepare two baking sheets with silpats or parchment. 

For the filling, place the brown sugar, cinnamon, instant espresso powder, cocoa and walnuts in the bowl of a food processor and process until the nuts are pretty finely ground.  Pour into a bowl and set aside.  

Melt 1 1/2 oz (3 tablespoons) butter and set aside.  Make the egg wash by combining 1 egg, 1 tablespoon water and a few grains of salt and set aside.

When the dough has completed its first rise, press down on it to release the air.  Transfer to a lightly floured work surface and dust the dough very lightly with flour.  Roll it out to a 12" x 18" rectangle. Place it so the long side is nearest you.

Brush the entire surface with the melted butter.  Evenly distribute the filling to within 1" of the top of the long edge.  Gently press down on the filling.  Starting with the long side nearest you, roll the dough into a tight log and seal the end.  Place the seal on the bottom and slice into 12 equal pieces (1 1/2” wide) using a serrated knife.  Arrange them on the prepared baking pans, smooth side up.  Gently flatten them just a bit so they won’t topple over.  They will naturally fan out as they bake.  Set the baking sheets in a warm place for 1/2 hour.  

Preheat the oven to 350 degrees F.

For the glaze, combine the boiling water and instant espresso powder together.  Add the sifted powdered sugar and vanilla.  Whisk until the sugar is fully dissolved.  Set aside.

Place the baking sheets on top of another two baking sheets (double pan).  Brush the top of the buns with the egg wash (you’ll have a lot left over). 

Bake until the buns are a golden brown, about 24 - 25 minutes.  Place the pans on a wire rack and brush the buns with the glaze.  Cool. 

Friday, October 17, 2014

Pumpkin Pecan Cinnamon Rolls


I’m finally getting into the swing of October and the seasonal enjoyment of pumpkin.  It’s hard to believe it’s that time of the year but here we are.  The chill is in the air and the leaves are swirling at our feet.  I love the light at this time, bright and overcast mingling together, the fog horn bellowing the incoming rush of morning dew.

I do really love pumpkin desserts and pastries so this preparation comes easily and with pleasure.  I’ve been wanting to get my hands back to working with yeast so I’ve made some basic cinnamon rolls with an added layer of pumpkin that’s been sweetened and spiced.  It’s just enough to ease into the pumpkin season and add a note of fall to your brunch table.  It won’t be long before we’re assembling our favorite pumpkin pies, swooning with glee at the bounty of fall.


Bench notes:
- If you're leery of working with yeast, this is a pretty simple formulation and one that isn't likely to cause any panic.  The simple and most important rule to follow is to dissolve your yeast in liquid that is 110 - 115 degrees F.  It should feel very warm, not hot.  I usually just let my tap water run to its hottest temperature, measure out what I need and place a thermometer in the measuring cup.  I let it cool just a bit and when it reads 110 - 115 degrees, I whisk in the yeast and then a pinch of sugar.  (Yeast feeds on sugar but yeast activity may decrease if it comes into direct contact with sugar or salt, so dissolve the yeast in water first, then add the sugar.)   I then set it aside to proof for about 10 minutes while I assemble all the other ingredients.  By the time I'm set to work on the recipe, the yeast is foamy and ready to go.
- If you're not sure whether the dough is ready after the first rise, just press your index finger about 1 1/2" into the dough.  If the indentation stays, the dough has completed the first rise.
- After the first rise, the dough is "punched down" to release the carbon dioxide and even out the temperature.  But rather than punching, gently press the air out with your hands.
- To avoid adding any additional excess flour when shaping the dough, I like to roll it out on a silpat.  No need for any dusting of flour.
- If you're using a glass pyrex baking pan, check the rolls after about 20 - 25 minutes in the oven.  Glass conducts heat more efficiently than metal.
- I place the pan of rolls on a baking sheet before it goes into the oven to prevent the bottoms from getting too brown.
- Everything you wanted to know about working with yeast can be found at Red Star.
- Some more of my favorite delicious pastries for pumpkin mania:  Pumpkin Pear & Pecan Streusel CakePumpkin Pecan Madeleines, Pumpkin Pie Pecan Squares and Pumpkin Cinnamon Swirl Yeast Bread


Pumpkin Pecan Cinnamon Rolls
Makes 9 rolls

Yeast Dough
1/4 cup (2 oz) warm water (110 -115 degrees F; warm but not hot on your wrist)
1 packet active dry yeast
pinch sugar
3 oz (6 tablespoons) unsalted butter
1/2 cup (4 oz) milk                                                                   
1/4 cup (1 3/4 oz) sugar
1/2 teaspoon salt
1 1/2 teaspoons vanilla                                                                 
2 eggs
2 3/4 (13 3/4 oz) - 3 cups (15 oz) flour

Pumpkin Filling
15 oz can of unsweetened pumpkin puree                   
1/4 cup (1 3/4 oz) granulated sugar
3 tablespoons (39 grams) dark brown sugar, packed                                                           
1/4 teaspoon salt
1/2 teaspoon cinnamon                
1/4 teaspoon ginger                                  
scant 1/8 teaspoon cloves
1/2 teaspoon vanilla extract

Pecan Streusel Filling
3/4 cup (5 1/4 oz) brown sugar, packed
3/4 cup (2 1/2 oz) chopped toasted pecans                  
1 teaspoon cinnamon                   
zest of 1 medium orange
2 oz (4 tablespoons) cold unsalted butter

Glaze
1/3 cup (40 g) powdered sugar
1 tablespoon milk
1 1/2 teaspoons orange juice                  
1/2 teaspoon lemon juice             
few grains salt
           
For the yeast dough, place warm, not hot, water into a bowl and sprinkle the yeast over it.  Whisk to combine and add a slight pinch of sugar.  Whisk and set aside while you gather and prepare the other ingredients.

Cut the butter into 1/2” pieces and place in a saucepan with the milk.  Heat the milk and butter together just until the butter melts.  Take off the heat and add the sugar, salt and vanilla.  Combine with the yeast mixture and whisk in the eggs.  Switch to a fork and stir in 2 3/4 cups of flour.  If necessary, keep adding flour 1 tablespoon at a time until the dough is no longer sticky. 

Place the dough on a work surface and knead until soft and elastic.  Grease a large bowl with oil and transfer the dough to the bowl.  Toss the dough over once to coat the top of it with oil.  Place a piece of plastic wrap across the top of the bowl and set in a warm place to double in size, about 1 hour.

For the pumpkin filling, whisk together all ingredients until thoroughly blended.  Chill until ready to assemble.

Prepare the streusel by combining the brown sugar, pecans, cinnamon and orange zest. Cut the butter into small pieces and work it into the nut mixture with your fingers until it's moist and crumbly.  Chill until ready to assemble.

Lightly grease a 9” square baking pan and line with a piece of parchment paper large enough to form an overhang on two sides.  Set aside.

When the dough has completed its first rise, gently press on it to deflate it.  Place on a work surface with a very light dusting of flour.  Roll the dough out evenly to an 12” x 18" rectangle.  Spread the pumpkin filling over the surface, leaving a 1 1/2” border along the top of the long side.  Sprinkle the pecan filling evenly over the pumpkin.  

Starting with the long side nearest you, gently lift the dough and fold it over about 1”.  Continue rolling up the pastry until you get to the end, doing your best to keep the sides of the roll even.  Pinch and seal the dough.

Using a sharp serrated knife, cut the roll into 9 pieces, each one about 2” wide.  Carefully place the slices cut side up in the prepared pan 3 per row, leaving some space between for the rolls to expand.  Set the pan aside in a warm spot to rise for an additional 45 minutes.

Preheat the oven to 350 degrees F.  

When the oven is ready, place the pan of rolls on a baking sheet and bake until lightly browned, about 30 minutes.  Set on a wire rack for 10 minutes.  Gently lift the rolls out of the pan using the paper overhang to assist.  Cool completely. 

For the glaze, sift the powdered sugar into a bowl and whisk in the milk, orange and lemon juice and a few grains of salt until smooth.  Drizzle over the top of the cooled rolls.

Friday, March 28, 2014

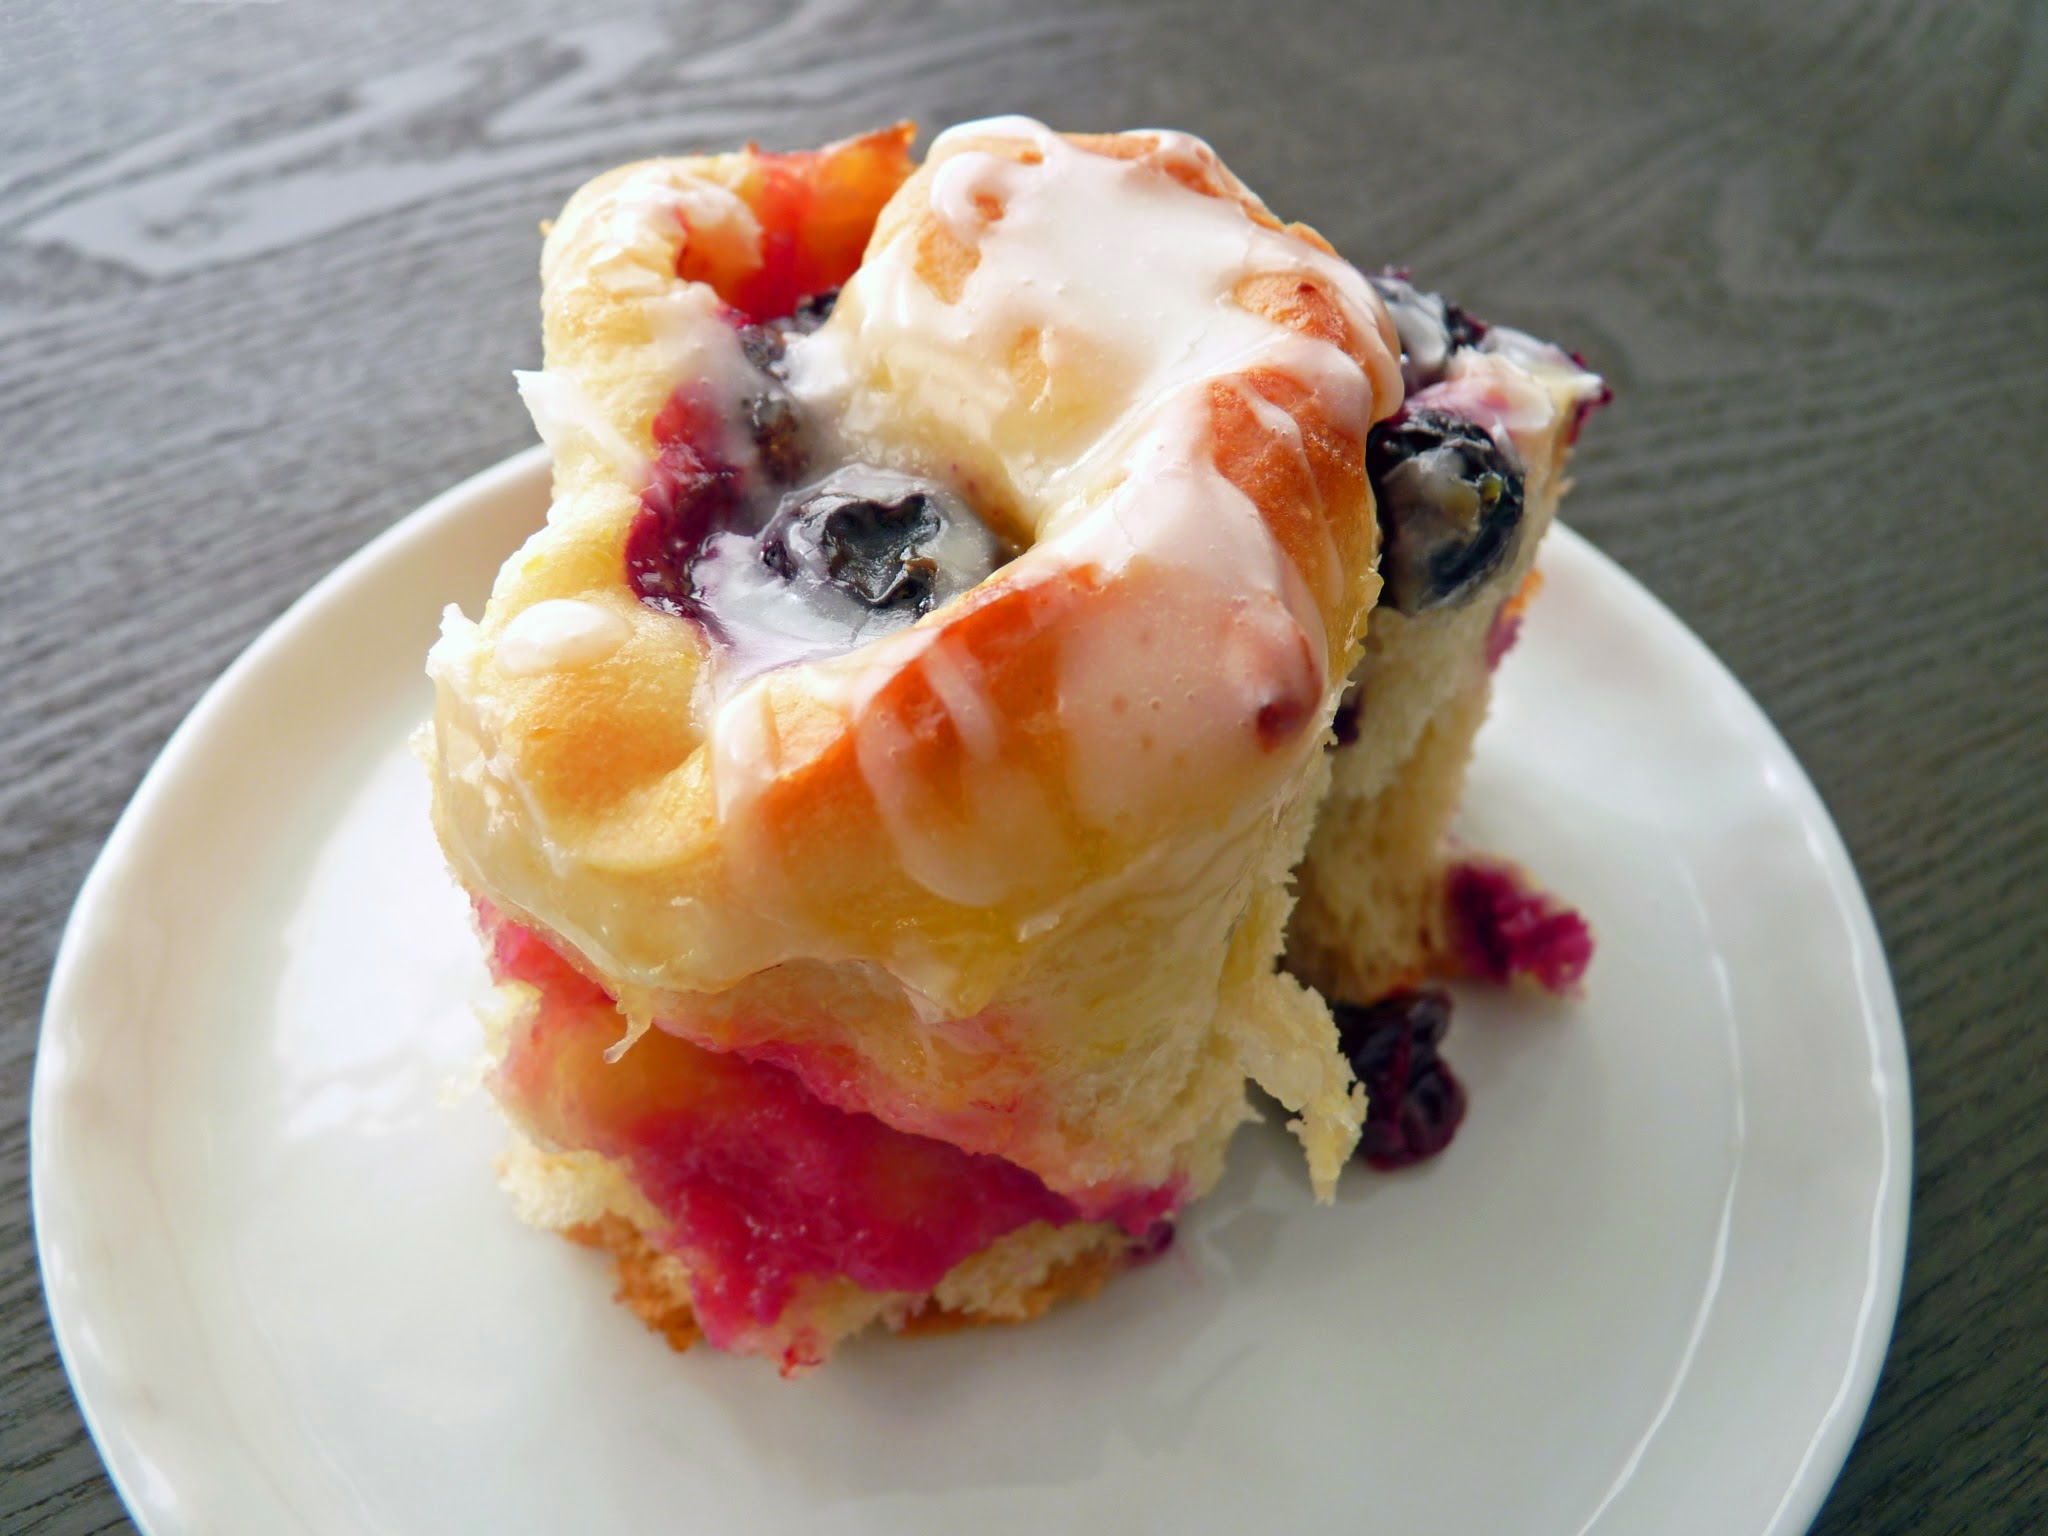
Lemon Blueberry Rolls


Today's mantra: when life hands you lemons, make lemon curd.  Which is to say, since I was recently gifted with a bagful of lemons from my mother's tree, I couldn't be happier to find ways to use them in pastries and desserts.  I have a sneaking suspicion she feels the same way.

Spring always puts me in the mood for lemon and berries.  And as we head into April, May and June, there likely will be several brunch opportunities so I thought I'd make some yeast rolls that would fit right in.  With each tart and luscious bite, these Lemon Blueberry Rolls are a little diversion from the usual cinnamon.  But they are made the same way: instead of smearing the dough with butter, sugar and spice, you spread a thin layer of lemon curd and blueberries.  Roll it all up, cut into slices and set them aside in a warm place to go through their second rise.  Then into the oven for about 25 - 30 minutes to fill your home with an irresistible aroma, a grand reward in and of itself.

Making lemon curd takes about 10 minutes.  Simply whisk together lemon juice, zest, sugar and eggs and cook over a double boiler or bain marie for about 3 - 5 minutes until thickened.  Add butter and let it cool.  It can be made ahead and stored in your refrigerator.  It's great spread on toast, scones or biscuits or used as a topping for vanilla ice cream or plain yogurt.  Fold it into whipped cream and serve with fresh strawberries or gingerbread, swirl it into cheesecake or use as a filling for sandwich cookies, a lemon tart or between cake layers.

If you're leery of working with yeast, this is a pretty simple formulation and one that isn't likely to cause any panic.  The simple and most important rule to follow is to dissolve your yeast in liquid that is 110 - 115 degrees F.  It should feel warm, not hot.  I usually just let my tap water run to its hottest temperature, measure out what I need and place a thermometer in the measuring cup.  I let it cool just a bit and when it reads 110 - 115 degrees, I whisk in the yeast and then a pinch of sugar.  (Yeast feeds on sugar but yeast activity may decrease if it comes into direct contact with sugar or salt, so dissolve the yeast in water first, then add the sugar.)   I then set it aside to proof for about 10 minutes while I prepare my baking pan and assemble all the other ingredients.  By the time I'm set to work on the recipe, the yeast is foamy and ready to go.

I do hope you'll stretch your pastry skills and get into the swing of working with yeast.  It's such a joy to experience the magic of seeing how it transforms and then finally pulling out a luscious pan of freshly baked yeasted pastry.

Here's to the coming of Spring!


Bench notes:
- The recipe for lemon curd makes twice as much as you'll need for this recipe.  Store in an airtight container and press a piece of plastic wrap onto the surface.  Cover and refrigerate up to 1 week.
- If you like lemon curd with less pucker, add the zest of just 1 lemon.
- Be sure to use a non-reactive heatproof bowl when cooking the lemon curd, such as stainless steel or glass.  Acidic or alkaline ingredients cooked in aluminum will pick up a metallic flavor and discolor.
- Cook the lemon curd, stirring constantly, until it coats the back of a spoon but is still liquid enough to pour (It will continue to thicken as it cools).  Unlike pastry cream, which has flour and/or cornstarch to stabilize it, do not let lemon curd come to boil or it will curdle. Cooking it over a bain marie helps to control the temperature.
- Lemon curd can be frozen in an airtight container for several months.
- Don't be tempted to use more than about 1/2 cup of lemon curd in this recipe or your rolls will be too gooey and the centers won't bake thoroughly.
- Everything you wanted to know about working with yeast is here from Red Star.  Lots of links and troubleshooting info.
- If you're not sure whether the dough is ready after the first rise, just press your index finger about 1 1/2" into the dough.  If the indentation stays, the dough has completed the first rise.
- After the first rise, the dough is "punched down" to release the carbon dioxide and even out the temperature.  But rather than punching, gently press the air out with your hands.
- If you're using a glass pyrex baking pan, check the rolls after about 20 minutes in the oven.  Glass conducts heat more efficiently than metal.
- I place the pan on a baking sheet before it goes into the oven to prevent the bottom of the rolls from getting too brown.
- More really delicious yeast breads: Chocolate Orange Cardamom Pull-Apart, Whole Wheat Honey Oatmeal Rolls, Challah Knots and Pumpkin Cinnamon Swirl Yeast Bread.


Lemon Blueberry Rolls
Makes 12 rolls

Lemon Curd
Makes 1 - 1 1/4 cups

1/2 cup (4 oz) lemon juice
zest of 2 lemons
1/2 cup + 2 tablespoons (4 1/2 oz) sugar
2 egg yolks
1 egg
2 oz (4 tablespoons) unsalted butter @ room temperature

Yeast Dough
1 pkg (2 1/4 teaspoons) active dry yeast
1/4 cup (2 oz) warm water (110 -115 degrees F; warm but not hot on your wrist)
pinch sugar
1/2 cup (4 oz) milk
3 oz (6 tablespoons) unsalted butter, cut into 1/2" pieces
1/4 cup (1 3/4 oz) sugar
1/2 teaspoon salt
1 1/2 teaspoons vanilla
2 eggs @ room temperature
2 3/4 (13 3/4 oz) - 3 cups (15 oz) flour

1/2 cup lemon curd
1 1/2 cups (11 oz) fresh blueberries

1/3 cup (40 g) powdered sugar
1 tablespoon milk
1 1/2 teaspoons lemon juice
few grains salt

For the lemon curd, whisk the lemon juice, zest, sugar and eggs in a non-reactive heatproof bowl.  Place the bowl over a pan of simmering water, making sure the bottom of the bowl isn't touching the water.  Cook, stirring constantly, until the mixture begins to thicken, about 3 - 5 minutes.  Pour through a strainer into a bowl and add the butter.  Stir thoroughly to combine.  Press a piece of plastic wrap onto the surface and set aside to cool completely.  Refrigerate.

For the dough, whisk together 1/4 cup warm water (110 - 115 degrees F), yeast and a pinch of sugar.  Set aside for 10 minutes.

Place the milk, butter, sugar and salt in a saucepan on low heat just until the butter is melted, whisking to combine all the ingredients.  Take off the heat, add the vanilla and cool to room temperature.

Combine the proofed yeast with the milk mixture.  Whisk in the eggs.  Switch to a fork and stir in 2 3/4 cups of flour.  Keep adding 1 tablespoon of flour at a time until the dough is no longer sticky.  Transfer to a lightly floured work surface and knead until the dough is soft and elastic, about 8 - 10 minutes.

Wash and dry the mixing bowl and lightly grease with canola oil.   Place the dough in the bowl, turning it over once to lightly coat the entire surface with oil.  Cover the bowl with a piece of plastic wrap and set in a warm draft-free place to rise for 2 hours.

Lightly grease a 10" round cake pan or a 9" square pan and line the bottom with parchment.

When the dough has completed its first rise, press down on it to release the air.  Transfer to a lightly floured work surface and dust the dough lightly with flour.  Roll out to a 12" x 15" rectangle, lightly dusting with flour as needed.

Using 1/2 cup of lemon curd, spread a thin layer over the surface of the dough to within 1/2" of the top of the long edge.  Evenly distribute the blueberries.  Starting with the long side nearest you, roll the dough into a log.  Slice into 12 equal pieces using a serrated knife.  Arrange them in the prepared baking pan, leaving enough space around each one for the second rise.  Set the pan in a warm place for 1 hour.

When the rolls are just about finishing with the second rise, preheat the oven to 350 degrees F.

Place the pan on a baking sheet and bake until the rolls are a golden brown, about 25 - 30 minutes.  Place the pan on a wire rack to cool for about 15 minutes.  Remove from the pan and let cool completely.

For the glaze, whisk the powdered sugar, milk, lemon juice and a few grains of salt until smooth.  Drizzle over the top of the cooled rolls.

Friday, November 22, 2013

Challah Knots


As I was browsing through my collection of recipes looking for some sort of yeasted rolls to make, I ran across this recipe from Saveur magazine.  I’ve never made challah before so I thought I should remedy that ASAP.  I love working with yeast so I jumped at the chance to try my hand at this traditional Jewish egg bread.

This recipe is really very easy.  The ingredients are basic and are likely easily located in your cupboard.  If you’re accustomed to making yeast breads, the only difference here is that there are three rises or proofing periods rather than two, so plan an additional 45 minutes for the preparation.  The extra proofing helps to develop the flavor.  The shaping is a breeze and adds a bit of interest to the presentation.

These are fluffy rolls.  The use of water rather than milk and oil instead of butter makes them extra light.  They are a great accompaniment to a holiday meal or any time at all.


Bench notes:
- When dissolving or proofing yeast, use liquid temperatures of 110°F-115°F water.  It should be warm, not hot.
- The dough is very sticky so I added about 1 1/2 tablespoons more flour during the mixing and about another 1 - 1 1/2 tablespoons in the kneading and shaping as I went along.  Add just a little bit at a time until it’s manageable. 
- Ideal rise temperature for yeast dough is between 80°F - 90°F.
- I lightly greased the pan and lined with parchment to prevent sticking.
- Everything you want to know about yeast from Red Star.
- Other really delicious yeast breads for this time of year: Pumpkin Cinnamon Swirl Yeast Bread and Whole Wheat Honey Oatmeal Rolls
- If you're looking for Thanksgiving treats, I've gotten a lot of great feedback and emails about my recent post, Pumpkin Pear & Pecan Streusel Cake.  I also highly recommend the Pumpkin Pie Pecan Squares.


Challah Knots
adapted from Saveur magazine
Makes 12 rolls

4 teaspoons active dry yeast                             
1 cup (8 oz) warm water                                                
1/4 cup (1 3/4 oz) sugar  [I used 2 tablespoons (26 g) sugar + 2 tablespoons (28g) honey]         
1/4 cup (2 oz) canola oil  [I used olive oil]                             
4 egg yolks                                                  
3 1/4 cups (16 1/4 oz) flour  [I used about 2 - 3 tablespoons more]
1 1/4 tsp. kosher salt  [I used a slightly generous 1 1/2 teaspoons table salt]

1 egg + 1 tablespoon water + slight pinch of salt for egg wash

Whisk the yeast, a pinch of sugar and 1 cup warm water (about 115°) to combine.  Set aside for 10 minutes.

Whisk the sugar, oil, egg yolks and salt with the yeast mixture and blend thoroughly.  Add flour and stir with a fork to form a dough.  Knead on a lightly floured work surface until smooth.  Lightly oil a wide bowl and place the dough in the bowl, turning once to grease on both sides.  Cover with bowl with plastic wrap and set in a warm place until doubled in size, about 1 hour. Gently press down the dough to release the gases.  Cover again and let sit for another 45 minutes.

Preheat oven to 350°F.   Lightly grease a 9” x 13” baking pan and line with parchment.

Place the dough on a lightly floured work surface.  Form dough into twelve 10” long ropes.  Tie each rope into a knot, tucking both of the ends underneath.  Place in the prepared pan, leaving room to rise between each one.  Return to a warm, draft-free place for 30 minutes.  

Combine the remaining egg, water and slight pinch of salt for the egg wash. Brush the rolls generously (you’ll have a lot left over).  Bake until browned, about 20 – 22 minutes.  Cool completely on a wire rack.


Friday, May 17, 2013

Whole Wheat Honey Oatmeal Rolls


It’s a weekend morning and the coffee is brewing.  You’ve got plenty of reading material and there’s a relaxing quiet that surrounds the morning sunlight.  There’s also an incredibly intoxicating aroma wafting from the oven.  It’s freshly baked rolls and it’s enough to bring anyone out of their slumber to join you at the table. 

For something different and a bit more on the wholesome end of the spectrum for your brunch table, consider these rolls fresh from the oven.   They have a good ratio of whole wheat flour, some oatmeal and they’re just slightly sweetened with honey and a touch of molasses. Serve them with butter and honey or your favorite jam or fruit compote to add another element of bliss to your weekend.

On another note, I’m going to include metric weights in my recipes going forward for those who use scales and for my overseas readers.  I hope you find this useful.


Bench notes:
- I use old-fashioned oats rather than “quick” oats in this recipe.
- Ideal rise temperature for yeast dough is between 80° F - 90° F.
- This dough doesn’t exactly double in size during the first rise, so use the finger test to determine if it’s ready for the next process.  Just press your index finger about 1 1/2 " into the dough.  If the indentation stays, the dough has completed the first rise.
- After the first rise, the dough is “punched down” to release the carbon dioxide and even out the temperature.  But rather than punching, gently press the air out with your fingers. 
- To form a roll, take the portion of dough and tuck the ends under the smooth side.  Place seam side down in the pan.
- Whole wheat flour contains bran, which inhibits elasticity of the dough, so I like to mix it with a good portion of all-purpose flour to produce a lighter pastry.


Whole Wheat Honey Oatmeal Rolls
Makes 12 rolls

1 pkg (1/4 oz; 7 g) active dry yeast
1/4 cup (2 oz; 57 g) lukewarm water
2 oz (4 tablespoons; 57 g) butter
1 cup (8 oz; 227 g) buttermilk
1/4 cup + 2 tablespoons (3 oz; 85 g) honey
2 tablespoons (1 1/8 oz; 32 g) molasses
1 1/2 teaspoons salt
1 teaspoon cinnamon                                                                   
1 large egg @ room temperature
3/4 cup (2 1/4 oz; 66 g) old-fashioned oats
1 1/4 cups (6 1/4 oz; 177 g) whole wheat flour                         
1 1/2 cups + 3 T (8 1/2 oz; 240 g) all-purpose flour                 

1 oz (2 tablespoons; 28 g) butter
2 teaspoons (10 g) honey
2 tablespoons (10g) oats

Sprinkle yeast into lukewarm water, whisk and let it sit for 5 minutes.

Melt the butter and whisk in the buttermilk, honey, molasses, salt, cinnamon and the egg.  Whisk in the yeast mixture.  Using a fork, stir in the oats.  Add the whole wheat flour and stir to combine.  Add 1 1/2 cups of all-purpose flour.  Keep adding flour 1 tablespoon at a time until the dough is no longer sticky.   Place the dough on the work surface and knead until smooth and elastic, about 5 – 8 minutes.

Smooth the dough into a round ball and place it in a bowl lightly greased with oil.  Cover with plastic wrap and place in a warm, draft-free area for 1 – 1 1/2 hours.  To test if it’s ready, press your finger about 1 1/2" into the dough.  If it holds the indentation, it's ready.

Grease a 9” x 3” cake pan.  Gently press down the dough and place it on a work surface.  Using a bench scraper or a knife, divide the dough into 12 equal pieces.  Take each piece and form a ball.  Place 9 rolls around the perimeter of the pan and 3 rolls in the center.  Set in a warm place to rise for 45 minutes.

When ready to bake, preheat the oven to 350° F. 

Melt 1 oz of butter with 2 teaspoons of honey.  Brush half of it over the tops of the rolls and sprinkle with 2 tablespoons of oats.  Place in the middle rack of the oven and bake until rolls are golden brown, about 25 - 28 minutes.  Remove from the pan and brush generously with remaining melted butter and honey mixture.  Cool on a rack.


Friday, March 22, 2013

Chocolate Orange Cardamom Pull-Apart


This yeasted pastry is very reminiscent of old-fashioned fantail biscuits.  It's a wonderfully soft yeast dough that is layered with a loose paste of butter, cocoa and Grand Marnier and sprinkled with cardamom sugar.  Instead of forming individual biscuits, the dough is cut and stacked and placed upright in a loaf pan.  The components are very simple and it's an appealing presentation that definitely does beg to be pulled apart.

As the loaf bakes, the layers expand beautifully, displaying a bit like the pages of a well-worn book.  I love the crusty sweet exterior of the loaf and the tender delicious interior.  It's not overly rich or sweet but just right.  If you like working with yeast, this definitely ranks as an easy alternative to cinnamon rolls.  And as we head into brunch season, it would be the perfect thing for your guests to tear into and enjoy along with a steaming hot cup of good coffee.


Bench notes:
- The water to proof the yeast should be warm, not hot, to the touch.  Technically, if you have a thermometer, the temperature of the liquids for yeast should be 110 - 115 degrees F.  This is just above body temperature.  If adding liquid to yeast that has been mixed with dry ingredients, the temperature has to be higher, about 120 - 130 degrees F.
- Salt is important in yeast dough because it slows the rising time and allows the full flavor of the dough to develop.  It also strengthens the gluten and builds the structure of the bread by keeping the carbon dioxide bubbles from expanding too quickly.  Sugar not only adds flavor, it's also a browning agent.
- As you line the loaf pan, the pieces may slouch and the sugar may shift a bit.  That's all OK.  Each loaf has its own character!
- There are other ways to prepare the layers.  You can also spread and sprinkle the filling as you stack the long layers but I think that makes it a bit harder to distribute the filling evenly.
- Remove the baked loaf from the pan after a few minutes to prevent the bread from getting soggy.
- No need to cut the portions; just dig in and pull apart the layers!


Chocolate Orange Cardamom Pull-Apart
Makes 1 loaf

For the dough
1/4 C warm water
1 package (2 1/4 t) active dry yeast
tiny pinch sugar

1/3 C warm milk
2 oz (4 T) butter
1/4 C sugar
1/2 t salt
1 t vanilla
2 eggs
2 3/4 C - 3 C flour

Filling
2 oz (4 T) butter
1/4 C cocoa powder
2 t Grand Marnier

1/2 C sugar
3/4 t cardamom
1/4 t cinnamon

For the yeast dough, place warm water into a large wide bowl and sprinkle the yeast over it along with a tiny pinch of sugar.  Whisk to combine and set aside for 5 minutes.

Heat the milk and butter together just until the butter melts.  Take off the heat and add the sugar, salt and vanilla.  Add to the yeast mixture and whisk in the eggs.  Switch to a fork and stir in 2 3/4 cups of flour.  If necessary, keep adding flour 1 tablespoon at a time until the dough is no longer sticky.

Place the dough on a work surface and knead until soft and elastic.  Grease a large wide bowl with oil and transfer the dough to the bowl.   Turn the dough over to coat all sides.  Cover the bowl with plastic wrap and set aside in a warm place to rise for 1 hour until about doubled in size.

Lightly grease an 8 1/2" x 4 1/2" loaf pan and line with a piece of parchment large enough to form an overhang on both sides along the length of the pan.

For the filling, melt the butter over medium low heat.  Whisk in the cocoa.  Cook, whisking constantly, for just another minute to let the flavor and aroma of the cocoa bloom.  Take off the heat and add the Grand Marnier.  Set aside to cool.  In a separate bowl, combine the sugar, cardamom and cinnamon.  Set aside.

Gently deflate the dough.  Place on a work surface with a very light dusting of flour.  Roll the dough out to a 20" x 12" rectangle.  Using a pastry brush or a small offset spatula, spread the cocoa paste over the entire surface of the dough.  Sprinkle with all but about 2 teaspoons of the sugar and spice mixture.

Cut the dough lengthwise into five 12" x 4" strips.  Gently lift and stack them on top of each other.  Don't worry about making the stacks look too neat; they needn't be perfect.  Cut the stack into four equal pieces.

Line the prepared loaf pan with the stacked pieces, placing them upright in a row.  Adjust them so they are evenly placed across the length of the pan.  It will seem like there aren't enough but the dough will rise and expand during the second rise and the baking process. Sprinkle the top of the loaf with the remaining sugar and set the loaf aside in a warm place to rise for another 45 minutes.

Preheat the oven to 350 degrees.  Bake until the top of the loaf is golden brown, about 25 minutes.  Set on a wire rack to cool for 5 minutes.  Lift the yeast bread out of the pan using the paper overhang to assist.  Remove the parchment and cool completely.


Friday, November 9, 2012

Pumpkin Cinnamon Swirl Yeast Bread


'Tis definitely the season for baked goods that celebrate pumpkin.  With images of pumpkin pie, loaves of spicy pumpkin cake and pumpkin cheesecake dancing across our thoughts, the anticipation of enjoying the holidays is upon us!  As you gather your own thoughts to plan your special treats for the holidays, consider making this very delicious yeast bread to grace your brunch or breakfast table.

This is a recipe for Pumpkin Yeast Bread from the bakers at King Arthur flour.  Although I love working with yeast, I have to confess this is the first recipe I've tried from them.  I cut the recipe in half to make one loaf and I decided to add a cinnamon swirl for more flavor and visual interest.  The result was a smashing success and I do highly recommend it to you for something fun and different.

The dough is soft and supple and very easy to work with.  It bakes off into a flavorful bread with a nice soft and chewy open crumb.  the cinnamon swirl adds just the right amount of sweetness and spice.  In fact, you may want to consider making two loaves.  I think it would make a great slice of buttered toast or maybe as the star in a batch of French Toast.  An extra loaf would also make a lovely gift for a friend or neighbor in need of a thoughtful gesture.  So double the ingredients or follow the King Arthur link below for the full recipe.  You'll have a very easy and festive seasonal bread and your kitchen will smell fantastic.  OK, holiday revelers, it's on!


Bench notes:
- Both the water and the milk for the bread dough should feel warm (but not hot) to the touch.
- I wound up using 3 cups + 2 tablespoons of flour in the mixing of the dough and another 1 tablespoon for the kneading.  You'll also need just a light dusting of flour on the work surface when you roll it out.
- I didn't really detect the ginger or the cardamom in the finished bread, so if you don't have those spices on hand, don't let that stop you from pressing ahead.
- After you roll out the dough to the desired dimensions, brush the surface with egg wash before dusting with the cinnamon sugar.  This helps to prevent separation and gaps in the swirl as it bakes.
- Since I had extra egg wash, I brushed it on the top of the bread just before putting it in the oven.  I also loosely tented a piece of foil over the bread after 15 minutes of baking.  My bread baked in 25 minutes.
- A serrated knife works best for slicing bread.
- This bread will keep in an airtight container for about 3 days and still taste fresh and moist.
- To use up any extra bits of pumpkin puree, try Pumpkin Pecan Madeleines.
- One of my favorite pumpkin desserts for this time of year is Pumpkin Pecan Pie Squares, the best of both worlds.


Pumpkin Cinnamon Swirl Yeast Bread
adapted from King Arthur Flour
Makes 1 loaf

1/4 C warm water
1 pkg active dry yeast
1/3 C warm milk
1 egg
3/4 C pumpkin
1 T canola oil
1/4 C dark brown sugar, packed
1 t salt  [I used 1 1/8 t]
1/4 t ground ginger
1/4 t ground cardamom
3 C - 3 1/4 C flour

1/4 C granulated sugar
1 1/2 t cinnamon
1 egg + 1 tablespoon water for egg wash

Place the warm water in a large bowl and sprinkle in the yeast.  Stir and let sit for 2 - 3 minutes to soften.  Add the warm milk, egg, pumpkin, oil, brown sugar, salt, ginger and cardamom and stir together until blended.  Add 2 3/4 cups flour and combine thoroughly.  Keep adding flour 2 tablespoons at a time, kneading until you have a smooth and elastic dough.

Oil the bottom and sides of a clean bowl.  Place the dough in the bowl and turn it over once to coat the entire ball of dough with oil.  Cover with a piece of plastic wrap and set in a warm place to rise until doubled, about 1 hour.

Lightly grease an 8 1/2" x 4 1/2" loaf pan.  Combine the sugar and cinnamon and set aside.  Combine the egg and water for the egg wash and set aside.

When the dough has risen, press it down gently to release the gases.  Turn the dough out onto a lightly floured work surface.  Roll it out to a 17" x 10" rectangle.  Brush the surface of the dough with egg wash (you'll only use a small portion.)  Sprinkle the cinnamon and sugar evenly over the surface.  Starting with the short end, roll the dough into a log.  Pinch and press the ends and the seam to seal.  Gently lift the log, seam side down, and place in the loaf pan, tucking the ends underneath.  Set in a warm place for the second rise for 45 minutes.

Preheat the oven to 375 degrees.  Brush the top of the loaf with egg wash or oil if you want a shiny crust (check on it and tent the bread loosely with foil after 15 minutes, if needed).  Bake for 25 - 30 minutes.

Remove the bread from the oven and gently loosen it from the pan with a small spatula or a table knife.  Turn the bread out of the pan and place on a wire rack to cool completely before slicing.

Friday, April 6, 2012

Baked Lemon Ricotta Doughnuts


As we enter the beauty of spring, there are certain pastry ingredients that for me are iconic of the season. Lemon is certainly one of them and ricotta seems to belong there as well. Along with all the fruit that’s about to arrive, lemon just really evokes the desserts I gravitate toward at this time of year.

Over the last few weeks I’ve been getting back into playing with yeast and this recipe looked like something fun to do for a spring table. These are yeast doughnuts that have a simple lemon ricotta filling just sweet enough to make the pastry special. The other thing that distinguishes these doughnuts is that they are baked rather than fried. They are nevertheless puffy, delicious, much lighter than expected and very tender. And they certainly make spring all the brighter.

Preparing these little pastries does require some planning. There are two proofing sessions but once they have properly risen, they bake off in just 10 - 12 minutes. A roll in some melted butter and the sprightly mix of sugar and lemon zest complete the package. Great rustic textures and flavors for these long sunny days.


Bench notes:
- You’ll need a total of 4 lemons for all three elements: the dough, ricotta filling and the lemon sugar.
- I always mix yeast doughs by hand but I've provided the recipe directions for mixing in a stand mixer.
- To test if your yeast dough has proofed long enough in the first rise, gently press two fingertips about 1/2" into the dough. The indentations should remain or only come back out minimally and very slowly. For more yeast troubleshooting, see the Red Star guide. Check out the entire site. Lots and lots of clear information there about working with yeast.
- The recipe says to mix the ricotta filling in a food processor but I think mixing it by hand just enough to combine the ingredients results in a less runny filling in addition to chilling it thoroughly.
- I used a small truffle scoop to portion the filling. It’s tempting to portion more than recommended but try to stick to a heaping teaspoon or the ricotta will seep out as you try to seal them.
- I used a brush to coat the doughnuts in warm butter and then rolled them in the lemon sugar.
- I served the doughnuts with fresh raspberries macerated in a bit of sugar.


Baked Lemon Ricotta Doughnuts
adapted from Australian Gourmet Traveller
Serves 12 (24 doughnuts)

Yeast Dough

5 C flour + extra for dusting
1/2 C + 3 T sugar
1 pkg yeast
zest of 2 lemons
1 C lukewarm whole milk + extra for brushing
1/3 C buttermilk @ room temperature
2 eggs @ room temperature
1 oz (2 T) butter, melted

Lemon Ricotta Filling


8 oz ricotta
1/4 C sugar
zest and juice of 1 lemon
1 large egg

Finishing

4 oz (8 T) butter
1 C sugar
finely grated zest of 1 1/2 lemons

Prepare one large or two medium sized baking sheets with parchment paper or silpats.

Combine flour, sugar, yeast and lemon zest in the bowl of an electric mixer fitted with a dough hook and mix to combine. Whisk together warm milk, room temperature buttermilk and eggs and the melted butter. With the mixer running, add the liquids to the flour mixture, then mix on medium speed until dough is smooth and elastic (about 4-5 minutes). Shape into a ball, place in a lightly oiled bowl, cover with plastic wrap and stand in a warm place until doubled in size (1 – 1 1/2 hours).

For the lemon ricotta filling, whisk together ricotta, sugar, lemon zest, lemon juice and egg just until smooth. Transfer the mixture to an airtight container and chill for at least 1 hour.

Gently punch down the dough and turn onto a lightly floured surface. Roll the dough out to a very thin sheet (5mm thickness). Cut out 48 rounds using a 3” cutter. Place a heaping teaspoon of lemon ricotta filling in center of 24 rounds. Brush edges with milk, cover with the remaining rounds and press firmly to seal the edges. Transfer to baking sheet(s), cover and stand in a warm place for 1 – 1 1/2 hours.

Preheat oven to 375 degrees.

For the finishing garnish, melt the 4 oz of butter and set aside. For the lemon sugar, place the sugar and lemon zest in a bowl of a food processor and pulse until the sugar is aromatic. Pour into a bowl and fluff with a fork or a whisk.

Bake the doughnuts 10 – 12 minutes until the bottoms are golden.

Dip hot doughnuts immediately in the melted butter and then toss in lemon sugar. Serve warm.