Friday, March 16, 2012

Coffee Walnut Cookies


Crisp. Buttery. A distinctive shot of the best and brightest coffee. The richness of walnuts. All of these favorite things co-mingle deliciously in this fabulous cookie from Alice Medrich.

This is an adult cookie. In addition to the usual flour, sugar, butter and salt, there’s a bold level of coffee and a splash of brandy in the mix. It’s rich with all of these elements in perfect balance. Packed with flavor and texture, it’s all there in wonderful detail in every bite.

The cookie dough comes together in the bowl of a food processor, which means it can be assembled without much time or forethought if you have all the ingredients. The nuts are finely ground with the flour, so you’re biting into a very smooth and delicate crumbly texture. And, as we all know, it’s all about the crumbs, the ultimate cookie achievement.

Don’t you find it just a little bit difficult when you see a recipe that informs you that the cake or the cookie or whatever tastes better the next day? This is true for pastries that have a complex flavor profile with spices or strong flavors like coffee. When they are allowed to ripen and settle in over a day, the flavor does improve. This is one of those recipes so it bears repeating. Taste a couple of them and, if you can, store the remainder in an airtight container and enjoy them the next day. You may have to hide the cookie box. Good luck.

This is every bit a recipe to stash in your cookie file for those times when you need a gift or something to go with a hot beverage, when only a good cookie will do.

Bench notes:
- Alice Medrich bakes these cookies on ungreased baking sheets for better browning. She suggests foil if you want to prepare the sheets. I used parchment.
- Do be sure to garnish each cookie with a coffee bean. They bake into crunchy coffee flavor blasts.
- The cookie dough can be stored in the refrigerator for up to 3 days or frozen up to 3 months.
- If the dough begins to crumble at all when slicing into cookies, let it soften for a few minutes.
- I haven’t tried this with other nuts but I think almonds or hazelnuts would work nicely.
- The baked cookies can be stored in an airtight container for at least a month.


Coffee Walnut Cookies

adapted from Pure Dessert by Alice Medrich
Makes about 45 2” cookies

2 C flour
1 C walnuts
3/4 C sugar
1/4 t salt
2 t fresh finely ground medium-roast (not espresso-roast) coffee beans
7 oz (14 T) cold butter
1 T + 1 t brandy
1 1/2 t vanilla
45 whole coffee beans for garnish

Place the flour, walnuts, sugar and salt in the bowl of a food processor and pulse until the walnuts are finely ground. Add the ground coffee and process to combine thoroughly.

Cut the cold butter into small pieces and add to the flour mixture. Pulse until the mixture looks damp and crumbly. Add the brandy and vanilla and pulse until the dough begins to clump up around the blade. Remove the dough and gather the clumps into a ball. Form the dough into a 12” log about 2 inches in diameter. Wrap tightly in plastic wrap and refrigerate for at least 2 hours or preferably overnight.

Preheat the oven to 350 degrees.

Cut the dough into 1/4” slices and place 1” apart on baking sheets. Press a coffee bean into the center of each cookie.

Bake until light golden brown at the edges, about 12 to 15 minutes. Halfway through the baking process, rotate the baking sheets from top to bottom and front to back. Place on a cooling rack, letting the cookies firm up before removing. Cool completely.

Friday, March 9, 2012

Yogurt Mousse with Hibiscus Berry Gelée


The winter’s earth tones of chocolate, caramel and nuts are supremely delicious but every year right about this time I feel the urge for a splash of color. My calendar tells me that the first day of spring is March 20, so there is definitely something in the air. And as the new season approaches, it’s exciting to anticipate the bright palette of fresh strawberries, apricots, cherries, peaches, nectarines, figs and plums. So, in search of that brilliant spectrum, I bought some berries to brighten our table.

I love the lightness of yogurt mousse in combination with a cool gelée. This particular colorful mix incorporates the natural deep red hue of hibiscus flowers, also known as flor de Jamaica, to make a strong sweet tea. Then I just toss in a few raspberries and blackberries to brighten the flavor, add to the texture and deepen the color. In combination with a creamy mousse, it's a good way to transition to the longer and brighter days ahead. Incredibly simple to put together, it delivers a good dose of sunshine as the last days of winter fall away.

Here’s to the rapid approach of a gorgeous and fruitful spring!!

Bench notes:
- The hibiscus tea needs to be pretty sweet to counteract the tartness of the berries.
- When blooming gelatin, sprinkle the gelatin powder slowly into cold water rather than pouring water onto powdered gelatin, which causes the gelatin to form clumps that will not dissolve and will ruin the texture of the final product. Once you’ve added the gelatin to the water, do not stir. The gelatin and water mixture will turn opaque and look sort of like applesauce. When ready to proceed with incorporating it into the recipe, heat gently to liquefy so it can be combined smoothly and thoroughly with the dessert mixture. So it goes like this: gelatin powder sprinkled slowly into cold water becomes gel and then is transformed into liquid and combined with the ingredients, which are then chilled to set up.
- I don't recommend liquefying bloomed gelatin in a microwave because it will have a tendency to boil, which ruins it.
- To avoid splashing or spilling, I use a large glass measuring cup to pour the hibiscus gelée into the glasses.
- When you add the berries to the gelée, nudge them with your fingertip so they’ll submerge.
- Substitute your favorite colorful juice or tea for the hibiscus, such as rooibos tea or pomegranate juice. As always, adjust sugar to taste.


Yogurt Mousse with Hibiscus Berry Gelée

Serves 4 - 6

Yogurt Mousse

2 T cold water
1 1/2 t gelatin
2 C (16 oz) plain yogurt
1/2 C sugar
1 t vanilla
1 t lemon juice, to taste
1 C heavy cream

Hibiscus Gelée

3 T hibiscus tea leaves
2 C boiling water
1/4 C sugar
2 T honey
1/2 t lemon juice
1 3” strip of orange peel
2 T cold water
1 1/2 t gelatin

6 oz package of raspberries or blackberries or a mixture of the two

For the Yogurt Mousse, bloom the gelatin by sprinkling it into a small cup containing 2 tablespoons of cold water. Do not stir. Let it sit for 5 minutes until the water fully absorbs the powder.

Whisk together the yogurt and sugar. Add the vanilla and lemon juice and combine thoroughly.
Whip the heavy cream just to a very soft peak.
Liquefy the gelatin by placing the bottom of the cup in a small saucepan with about an inch of simmering water.
Add the liquefied gelatin to the yogurt mixture and blend thoroughly.
Fold in the whipped cream.
Pour into 4 – 6 serving glasses or cups.
Chill for about 2 hours.

When the Yogurt Mousse has set up, begin the preparation of the Hibiscus Gelée.

Place the hibiscus tea leaves in a heatproof bowl. Pour the boiling water over the tea. Add the sugar, honey, lemon juice and orange peel and steep for 20 minutes. Strain into a clean bowl.

Place 2 tablespoons of cold water in a small dish. Sprinkle the gelatin over the water. Let it sit for 5 minutes to bloom. Liquefy the gelatin by placing the bottom of the cup in a small saucepan with about an inch of simmering water. Add the liquefied gelatin to the hibiscus tea and whisk thoroughly. Pour onto the set Yogurt Mousse and distribute the berries in each serving. Refrigerate about 2 - 3 hours or until set.

Friday, March 2, 2012

Chocolate Cakes with Pears & Caramel


It’s March! And it looks like the atmosphere is determined to deliver more rain and snow. So naturally that conjures up thoughts of a cozy meet-up of spice and pears and that soother of all souls, chocolate. It feels like a good time for a dish of some down to earth dessert that delivers a good dose of comfort and pure pleasure in this wintry climate.

The Fastest Fudge Cake is from chocolate powerhouse Alice Medrich. The recipe is not at all fussy - a quick snap of the fingers and it’s ready to go in the oven. The butter is melted rather than creamed and the whole thing comes together in one bowl, so it comes in handy as a last minute preparation. For this dessert, I’ve baked just a half recipe, which amounts to seven cupcakes.

The Very Spicy Caramel Pears are out of Room for Dessert, the great first cookbook from David Lebovitz. The pears are baked in the oven in an easy caramel sauce composed of butter, brown sugar and the warmth of some very pungent spices and a blast of booze. When they’re done, the sauce is strained and reduced with a splash of cream added to smooth things out.

So if this weather has put a crimp in some of your best laid plans for getting around town, make the best of it. If you’re in the mood for a warm indulgence on a cold day, this composition from two of our best dessert authors should fill the bill.


Bench notes:
- I use an ice cream scoop for uniform portioning of the cake batter.
- Fill the empty wells of your cupcake pan 1/3 of the way with water to keep the entire pan at an even baking temperature and prevent it from over-heating.
- I list the baking time for the cakes as a spread of 15 – 18 minutes because ovens vary so greatly. Be sure to check them on the early side to avoid over-baking and dry cake, especially if your oven runs hot. The cakes are done if they spring back when touched. A toothpick test should come out with a few moist crumbs. Let them cool in the pan for just a minute and then remove the cakes to a wire rack. Removing them from the residual heat of the pan helps to keep them from becoming tough and rubbery.
- If you prefer, make the whole cake recipe and bake in an 8” or 9” cake pan. The full recipe is at Fine Cooking.
- Steam burns can be very painful. When removing the foil from the baking dish, lift the corner that is farthest and away from you to avoid burning yourself.
- You can leave the cream out of David’s spicy caramel recipe if you prefer. Substitute your favorite spices. It would also be very delicious with sliced apples, baked for about 25 minutes. David serves his recipe with vanilla ice cream.
- For presentation, I sliced off the slight dome of the cupcake and inverted onto the plate.
- Sadly, David's Room for Dessert is out of print and now costs a small fortune if you can find it, but many of those recipes (completely updated and revised) are featured in Ready for Dessert along with a selection of new recipes.


Chocolate Cakes with Pears & Caramel
Cake adapted from Alice Medrich
Pears adapted from Room for Dessert by David Lebovtiz

Serves 6 – 7

Fastest Fudge Cake (1/2 recipe)

1/2 C flour
3 T unsweetened natural cocoa powder (not Dutch processed)
1/4 t baking soda
1/8 t salt
2 oz (4 T) butter, melted and warm
1/2 C + 2 T brown sugar, packed
1 egg
1/2 t vanilla extract
1/4 C hot water

Very Spicy Caramel Pears

2 oz (4 T) butter
1/2 C light or dark brown sugar, packed
15 whole cloves
2 star anise
2 cinnamon sticks
1/2 t black peppercorns
1/4 C Cognac, brandy or rum [I used rum]
4 pears, Comice or Bosc [I used D’Anjou]
1/4 C heavy cream

For the cake, preheat oven to 350 degrees. Grease 7 wells in a standard cupcake pan.

Sift the flour, cocoa powder, baking soda and salt.

Combine the melted butter and brown sugar. Add the egg and vanilla and stir until thoroughly combined. Add the flour mixture all at once and stir just until all the flour is moistened. Pour the hot water over the batter and stir just until it’s incorporated and the batter is smooth. Scoop the batter into the prepared cupcake pan, filling each one about 3/4 full.

Bake about 15 - 18 minutes or until a toothpick inserted in the center comes out clean with just a few moist crumbs attached. Cool cakes in the pan for just a minute and then remove them to cool on a wire rack.

Increase the oven temperature to 400 degrees. Choose a baking dish large enough to hold the sliced pears in a single layer.

Cut the butter into small pieces and place it in the baking dish with the brown sugar. Place the dish in the oven for a few minutes until the butter is melted.
Crush the whole spices with a mortar and pestle or place them in a plastic bag and pound them with a rolling pin.

Peel and core the pears and cut them into quarters.

Remove the dish from the oven and add the crushed spices and liquor. Stir to combine all the ingredients. Add the pears and toss everything together to coat the fruit. Arrange the pears in a single layer.

Cover the dish with foil and bake for 30-45 minutes, depending on the size and firmness of your pears. The pears should be easily pierced with a knife but not mushy. Stir and baste them a couple times during cooking to make sure they’re evenly coated with sauce.

Remove the dish from the oven and lift the pears out of the cooking liquid and into a bowl. Scrape all the juices and spices from the baking dish into a sauté pan. Add 1/4 cup cream and cook over medium heat until the mixture turns a deep color, thickens and caramelizes. Strain the finished sauce over the pears and serve with the chocolate cake.

Friday, February 24, 2012

Cocoa Grahams with Chile Sugar


Just about everyone knows the basic goodness of graham crackers. Made with honey and graham flour, we grew up eating them as snacks, more fancifully as S’mores and now we know them as the main ingredient in crusts for cream pies and tarts.

There's a recipe for Chile-Cocoa Graham Crackers from wondrous pastry chef Alice Medrich featured in Eating Well, a magazine dedicated to promoting healthy eating and cooking. It’s a recipe that takes the familiar graham cracker into a more adult realm while trimming back some of the ingredients for a healthier approach. What also makes it unusual is Alice’s brilliant flair for cocoa and cookies and her idea to add chile powder to the cinnamon sugar sprinkled on top. It’s a great spicy note with the cocoa and really changes the whole basic idea of a graham cracker for the better. It’s a very good cookie that’s certainly lower in fat and sugar but I must confess that I couldn’t stop wondering how it would taste if it weren’t quite so healthy. Now that’s something I never do but since it seemed to hover at the back of my mind for so long I finally set about trying to make her fine work just a little more decadent. Odd, I know, but there it is.

Here is my revision, just for fun. They're just slightly sweeter and richer but still quite good. I love her idea for something so rustic yet somehow sophisticated.

Bench notes:

- Alice Medrich recommends natural cocoa rather than Dutched, although either type may be used.
- I added a pinch of smoky chipotle powder to give the topping just a tad more depth.
- This cookie is baked in a solid sheet of cookie dough and then sliced after baking, rather than cutting or shaping the dough into individual cookies. They do crisp up after cooling but depending on how evenly you roll out the dough, the crispness may vary. If they’re not as crunchy as you’d like after they've completely cooled (the center ones may be softer), simply place them on a parchment-lined baking sheet and toast for about 10 minutes. Watch them closely to avoid burning.
- I used a sharp serrated knife and a sawing motion to slice the cookies.
- Store cookies in an airtight container.
- Do yourself a great favor and stock up on Alice Medrich cookbooks. Her work is meticulous, in a class by itself.


Chile-Cocoa Graham Crackers
based on recipe by Alice Medrich in Eating Well magazine
Makes about 3 dozen 2” cookies

3/4 C whole wheat flour
1/2 C flour
1/4 C cocoa powder, preferably natural
1/3 C sugar
2 T dark brown sugar
1/2 t salt
1/2 t baking powder
1/4 t baking soda
3 oz (6 T) cold butter, cut into small pieces
1/4 C milk
3 T honey
1 t vanilla

Topping
1 T sugar
1/4 t ancho chile powder or regular chili powder
pinch of chipotle chile powder
1/4 t cinnamon
very small pinch of salt

Place the flour, cocoa, sugars, salt, baking powder and baking soda in the bowl of a food processor and pulse until thoroughly combined. Add the pieces of butter and pulse until the mixture resembles cornmeal. Whisk milk, honey and vanilla together and drizzle over the flour butter mixture. Process just until the dough forms clumps and holds together when pinched.

Place the cookie dough onto a sheet of parchment and press it together into a flat rectangle. Put a piece of plastic wrap on top and roll the dough out evenly to about a 10” square. Place on a baking sheet and refrigerate until thoroughly chilled.

Preheat oven to 350 degrees. For the topping, combine the sugar, chile powders and cinnamon.

Take the cookie dough from the refrigerator and remove the plastic wrap. Prick the dough all over with a fork. Sprinkle the dough lightly with just a tiny bit of salt. Dust the dough evenly with the spiced sugar.

Even up the edges of the cookie dough with a sharp knife but leave the edge scraps in place (for nibbling and to protect the rest of the grahams from burnt edges). Bake until the cookies just start to brown around the edges, 20 to 25 minutes. The cookies will continue to crisp up as they cool.

Cool the pan on a wire rack for 10 minutes. Cut into desired shapes and sizes. If there are any cookies that are too soft, return them to a 325 oven for about 10 minutes to crisp them up.

Friday, February 17, 2012

Oatmeal Coconut Berry Bars


Bar cookies are phenomenal. They’re chewy and moist and super easy to prepare. The mixing and layering are usually pretty forgiving, so there are endless combinations of ingredients to play with, which means you can usually wind up with something that’s totally in your wheelhouse.

I happened to have some coconut left over from another project and remembered that I wanted to try a recipe for a bar cookie from Gourmet. It has oats and coconut in the base and topping, which adds to the flavor and texture, along with a layer of fruit jam. I loved the basic idea but I wound up completely revising the recipe because I didn’t want quite so much coconut and I wanted something less sweet. I also added some leavening and vanilla to the dough and changed the size of the baking pan, as well as baking time and temperature.

This particular combination of ingredients produces very good results from a few simple ingredients. The cookies seemed to vanish as soon as they cooled, always a good sign of success.

Bench notes:

- The original recipe called for baking the bars in a 9” x 13” pan at 375 degrees. I made them in a 9” square pan because I wanted a thicker bar. I also lowered the temperature and baked them at 350 degrees for 35 minutes.
- I used less coconut and I cut back on the sugar by half, using equal parts brown and granulated sugar, and thought they were plenty sweet.
- Some of the coconut is toasted and mixed into the dough. The rest of the coconut is sprinkled on top and is left untoasted. Coconut toasts quickly in just a very few minutes and can burn in a blink of an eye, so keep a very close eye on it.
- I used homemade blackberry jam and sprinkled fresh raspberries on top of that. I really loved how the fresh berries brightened the flavor with a touch of acidity.
- I think any sort of your favorite fruit jam would be a good substitute as long as it’s a natural brand that isn’t too sweet.
- One of my favorite bar cookies is Fig & Chocolate Oatmeal Bars.


Oatmeal Coconut Berry Bars

based on a recipe from Gourmet
Makes 16 bars

1 C sweetened shredded coconut, divided
1 1/4 C flour
1 t baking powder
1/4 C dark brown sugar, packed
1/4 C granulated sugar
1/2 t salt
1 1/2 C old fashioned oats
6 oz (12 T) cold butter, cut into pieces
1 t vanilla
generous 1/2 C raspberry or blackberry jam
1/2 C fresh raspberries (optional)

Preheat oven to 350 degrees. Lightly grease an 9” square pan and line with a piece of parchment paper large enough to form an overhang along two sides of the pan.

Spread 3/4 cup coconut evenly on a baking sheet and toast until light golden brown, about 4 – 6 minutes. Keep a very close eye on it because coconut can burn very quickly. Stir as it toasts if it looks like it’s not browning evenly. Cool.

Place flour, baking powder, sugars and salt in a food processor and process to blend. Add oats and toasted coconut and pulse a few times to combine. Add butter and vanilla and process until a dough begins to form.

Press 2/3 of the dough firmly and evenly into bottom of the prepared pan. Spread a layer of jam over the dough (and distribute fresh raspberries over the jam, if using). Crumble the reserved dough evenly over the fruit layer, then sprinkle with remaining 1/4 C untoasted coconut, pressing down gently to secure.

Bake until light golden brown, about 35 minutes. Cool completely in pan on a wire rack. Run a knife around the edges and, using the parchment paper overhang, lift gently to remove. Cut into squares.

Friday, February 10, 2012

Double Chocolate Cake


It’s always the season for chocolate. And the more chocolate cake you try, the more you come to realize there are a number of routes to travel when searching for the ultimate bite. I’m always looking for the deep flavor of cocoa not masked by too much sugar; the perfect texture that is neither too soft nor too toothy; a soothing balance of crumb and moisture in each bite; a wondrous hit of chocolate without being too rich or overwhelming. These are the elements that - depending on the quality of ingredients, technique, method, baking time and temp - conspire in different ways to fulfill that dream chocolate cake experience. Sometimes you want the lightness of a genoise and sometimes you want the perfect balance of Devil’s Food. Or sometimes you want the deep charge of a flourless concoction or the density of a pound cake. And then there’s everything in between.

Which brings me to today’s chocolate cake. This is the famous recipe from Epicurious, Double Chocolate Layer Cake. I’m tempted to call it Chocolate Heartthrob Cake because it’s so superhumanly popular with mostly positive reviews from over 1,400 readers. Since I’d never tried it, I thought I would see what everyone is talking about.

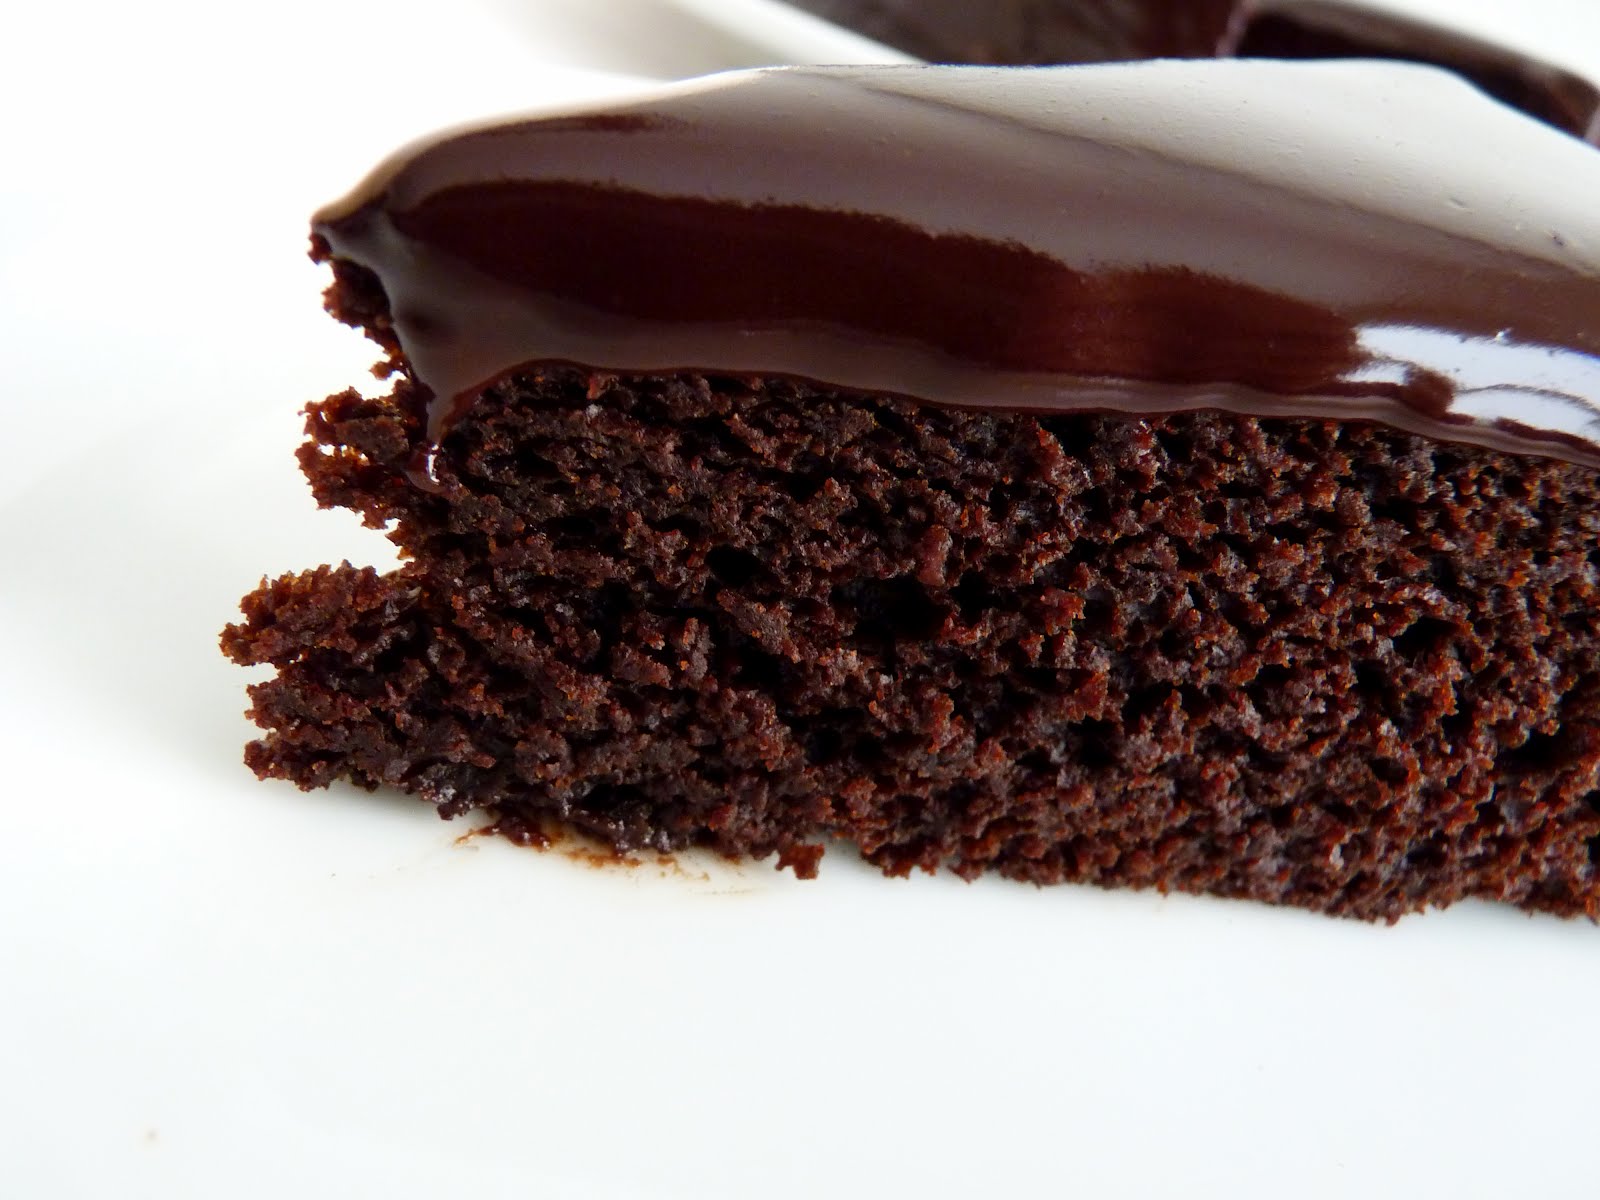
Well, to begin, this is a massively huge 10” cake that would serve 14 - 16, so I scaled back the ingredients to bake a single 8” layer. The cake is very easy to make. It has a little semisweet chocolate bolstered by natural cocoa for a fairly intense chocolate bite. It’s made with oil rather than butter, so you can expect it to be moist with an open crumb. And the very odd part is that it’s baked at 300 degrees for a longer period of time, but it works.

This is a very rich, very moist cake. It wasn’t quite there for me on the perfect texture side of the equation. I thought it was almost ever so slightly too moist, if that’s even possible to understand. But the flavor is very good and everyone who tasted it loved it, so it’s definitely easy to see why it’s gotten so much adoration. It will be another very good chocolate cake in my arsenal of good chocolate cakes.

So off we go. Let’s bake some cake.


Bench notes:
- Do take note: the oven temperature is not a typo. The cake bakes at 300 degrees fahrenheit.

- I first whisked the one egg in the bowl by hand to aerate it and give it some volume so it would be viable on a stand mixer.
- The original recipe calls for a rich chocolate ganache to finish the cake but I used a looser chocolate glaze for a lighter, creamier result. You can use bittersweet or semisweet chocolate, depending on your own desired level of flavor and sweetness. Or you can use half bittersweet and half semisweet.
- For the chocolate glaze, finely chopping the chocolate into small bits ensures it will melt more evenly and efficiently. When the hot cream is added, let it sit for about 2 – 3 minutes so the chocolate can absorb the heat. Then stir gently and slowly, starting in the middle and working outward in concentric circles, to prevent it from cooling down too fast and creating air bubbles. The glaze can be reheated over a low simmering bain marie. When it's ready, flood the center of the cake quickly and then move to the edges.
- The use of corn syrup adds to the viscosity and shine of the glaze. I rarely use corn syrup but in this preparation it is a fairly small amount. You can certainly leave it out if you wish.
- You can also bake this in a 9” pan for about 38 - 40 minutes. Or make cupcakes and bake for 22 – 25 minutes.


Dark Chocolate Layer Cake

scaled down and adapted from Epicurious

1 oz semisweet chocolate, finely chopped
1/2 C hot brewed coffee
3/4 C + 2 T all purpose flour
1/2 C cocoa powder
generous 1/2 t baking soda
1/4 t baking powder
generous 1/4 t salt
1 C sugar
1 large egg
1/4 C canola oil
1/2 C buttermilk
1/4 t vanilla extract [I used 1 t]

Chocolate Glaze

5 oz bittersweet chocolate (or 2 1/2 oz each of bittersweet and semisweet)
3/4 C heavy cream
1 T corn syrup

Preheat the oven to 300 degrees fahrenheit. Grease the bottom and sides of an 8” x 2 1/2” cake pan and line with a circle of parchment.

Finely chop the semisweet chocolate and place in a bowl. Pour the hot coffee over it and let it stand for a minute or so. Whisk until the chocolate is melted and the mixture is smooth.

In another bowl, sift the flour, cocoa powder, baking soda, baking powder, salt and sugar together.

Beat the egg at medium speed until it is pale yellow, about 1 minute. Add the oil, then the buttermilk and vanilla and beat until thoroughly combined. Mix in the melted chocolate and coffee mixture. Add the dry ingredients all at once, and beat on low speed until the batter is just combined. Using a rubber spatula, scrape down the sides and bottom of the bowl and stir to make sure all the dry ingredients are absorbed. Pour the batter into the prepared pan. Bake for about 45 minutes, or until a toothpick inserted in the center of comes out clean.

Cool the cake in the pan on a rack for 10 minutes, then turn it out onto an 8” cardboard round or removable tart pan bottom. Carefully peel off the parchment paper and cool completely. Place the cooled cake along with the cooling rack on a baking sheet lined with parchment.

For the chocolate glaze, finely chop the chocolate into very small pieces and place in a medium bowl.

Bring the cream and corn syrup to a simmer. Keep your eye on it because it will spill over if left unattended. Just as it begins to boil, take off heat and pour it over the chopped chocolate and let it sit for about 2 minutes. Then stir slowly and gently, starting in the middle until thoroughly combined and then working outward in concentric circles until the mixture comes together.

To glaze the cake, pour the glaze quickly in the center of the cake and then around the edges. Let it run for a few seconds and then gently jiggle and tap the baking sheet on the work surface to encourage the glaze to run down the sides of the cake. Just as it begins to dry, run a small flat spatula around the underside of the cardboard round to smooth the bottom edge and prevent “feet” from forming. Let glaze firm up before serving.