Thursday, December 24, 2009

Chocolate Caramel Tamales


Tamale making is a Christmas tradition in Latin America and in many areas of the West and Southwest, but I’d eat them any time of the year. There are so many versions of tamales from different regions and among different sub-cultures and each are delectable in their own way.

Since I’ve never made tamales before, I thought I’d get into the spirit and put together a dessert tamale that has all the wonderful flavors of Latin America. I've tucked a ganache of earthy rich chocolate, cinnamon, almond and chile powder into a lightly sweetened corn dough or “masa.” The tamales are served with a drizzle of light caramel sauce to finish the plate with a final note of allure.

These tidy little packages deliver a festive combination of flavors from both the New and the Old World. 'Tis the season. ¡Felicidades!


Bench notes:
- I’ve used Maseca brand masa instantanea de maiz since it seems to be widely available.
- To make the ganache, chop the chocolate into very fine bits so the melting process is thorough and even. Once you pour the hot cream onto the chocolate, let it sit for about 2 or 3 minutes, then stir very slowly so you don't cool down the mixture too quickly before all the chocolate has a chance to melt.
- You can make the chocolate filling ahead and refrigerate. The caramel sauce can also be made ahead or while the tamales are steaming.
- For the purposes of planning ahead, it takes about 15 minutes to make the ganache and an hour or so to chill; an hour for the corn husks to soak; about 20-25 minutes to mix the dough; about 45 minutes to 1 hour to assemble; and approximately 2 hours to steam.


Chocolate Caramel Tamales
Makes about 2 dozen tamales

Spicy Chocolate Filling

8 oz bittersweet chocolate, finely chopped
1 C heavy cream
1/2 t ancho chile powder
1/4 t chipotle chile powder
pinch of cayenne
1 t cinnamon
2 T + 2 t honey
3/4 t almond extract
1/2 t vanilla extract

Chop the chocolate into very small fine pieces and place in a bowl.
Gently heat the cream, spices and honey until just before it comes to a boil. Remove from heat, stir in the extracts and pour over the chopped chocolate. Let it sit for a couple of minutes.

Using a rubber spatula, gently and slowly stir the center and then slowly work out in concentric circles. Blend until there are no streaks and the mixture is smooth. Pour into a clean container and cool completely. Cover and refrigerate for an hour or two until firm.

Corn “Masa” (Dough)

24 corn husks

1 C water
1 C milk
1/2 t salt
1/2 t cinnamon
1/8 t freshly ground nutmeg
1 t vanilla
2 C Maseca masa instantanea de maiz
7 oz (14 T) butter @ room temp
1/3 C brown sugar
1 t baking powder

Soak the corn husks in large bowl of very hot water for 30 minutes. Weight them down with a heavy bowl or saucepan to keep them submerged. Once they are softened, separate the husks carefully to avoid tearing. Continue to soak in hot water until pliable, up to 30 minutes more. Drain and pat dry.

Bring the water, milk, salt, cinnamon and nutmeg to a slow simmer. Remove from heat and add vanilla. Gradually stir in the masa harina until it forms a very thick dough.

Cream the butter, sugar and baking powder until very light and fluffy, about 3 to 5 minutes. Add the masa harina dough in small walnut-sized pieces, one or two at a time. When all the dough has been added, continue beating until it is smooth, fluffy and light, about 6 to 8 minutes. You can test to see if it’s ready by taking about a tablespoon of the dough and placing it in a glass of warm water. It should float.

Place a dry corn husk on a clean work surface. Spread about a 1/4 C of the dough into the center lower half of the corn husk, leaving the upper half with the pointed tip free of any ingredients. Take about a tablespoon of the chocolate ganache, elongate it and place on top. Fold the long sides of the corn husk over filling, then fold the pointed tip over the filled half. Lay seam side down. Repeat the process until all the corn husks are filled.

Arrange a steamer rack in large stockpot and add water to just below bottom of the steamer rack. Cover and bring water to boil.

Place the tamales upright in the steamer, loosely leaning against one another. Lower heat to a simmer, cover and steam until dough is firm to touch and separates easily from the husk, about 1 1/2 to 2 hours. Keep a close eye on the water level to be sure there is enough throughout the steaming process.

Brown Sugar Caramel Sauce

3 oz (6 T) butter
1 C firmly packed brown sugar
1/2 C + 2 T heavy cream @ room temperature
1/4 t salt, to taste
1 t vanilla extract

Melt the butter in a saucepan and add the sugar. Cook without stirring for about 2 minutes to dissolve and caramelize. Then, whisking constantly, add the cream and salt and continue cooking and for another 2 minutes. Remove from heat and add the vanilla. Add more salt to taste.

Friday, December 18, 2009

Italian Almond Sbrisolona


In the grand and fairly populated Pantheon of Incredibly Stupendous Cookies, Sbrisolona surely has a very prominent place. Crunchy, chewy, crumbly, nutty and perfect for sharing, this is a recipe you absolutely can’t refuse. The endless crumbliness of it is half the fun and each morsel is irresistible.

Sbrisolona originates from the Lombardy region of Northern Italy. Italian pastries are most often distinguished by their texture, lower sugar content and rustic simplicity and Sbrisolona is no exception. With lots of almonds, a perfect blend of simple ingredients and a slow even toasting in the oven, you have a crunch to end all crunches. It has just the right amount of sweetness balanced by a good pinch of salt. The butter adds flavor without lending any greasiness or fat saturation and the indispensable inclusion of orange zest makes it absolutely perfecto.

Sometimes called a tart, this wonderful collection of crumbs comes together in just a few minutes. It’s baked in a pan like shortbread, so there is no rolling or slicing or chilling. You simply combine the ingredients, gently coax them into a rough crumb and then pour into a buttered pan and bake. The tradition is to break it apart with friends. If you wanted to make a gift of it you could probably carefully cut it into slices, but my guess is it won’t make it out the door.


Bench notes:
- I’ve also seen recipes that use semolina and orange blossom water, but this recipe from Suzanne Goin is perfection.
- Although the recipe says 4 oz or 3/4 cup of almonds, my 4 oz came to just shy of 1 cup.
- In Italy, Sbrisolona is often enjoyed with Vin Santo, but would go with just about any beverage you favor.
- Sbrisolona can be stored in an airtight container for 2 days.


Sbrisolona
adapted from Sunday Suppers at Lucques by Suzanne Goin

3/4 C natural almonds (4 ounces) (I used a scant cup)
1 large egg yolk
1 T finely grated orange zest (I used 1 large orange)
1/4 t pure almond extract
1/4 t pure vanilla extract
1 C + 2 T flour
6 T cornmeal
1/2 t salt
3 1/2 oz (7 T) cold butter cut into 1/2” pieces
1/3 C granulated sugar
3 T brown sugar

Preheat the oven to 350°. Butter an 8” springform pan.

Toast the almonds for about 10 minutes until golden. Coarsely chop into bite-sized pieces.

Combine the egg yolk, orange zest and the extracts.
In another bowl, whisk together the flour, cornmeal and salt. Cut in the butter with a pastry blender or rub it in with your fingers until the mixture resembles coarse meal.
Stir in both sugars and the chopped toasted almonds.
Pour the egg yolk mixture on top and work it in gently with your hands. Be careful not to over mix; the dough should be very crumbly and look like streusel.

Pour the crumbs into the prepared pan and very gently and loosely press the crumbs mostly around the edges and just very lightly across the top; the surface should be uneven and dimpled.

Bake for about 40 minutes or until it is a deep golden brown. Transfer to a rack and cool completely before unmolding. Place on a platter and dig in.

Friday, December 11, 2009

Walnut Brandy Cake


‘Tis the season for festive cakes that showcase lots of nuts and dried fruits and spice. These are the kinds of cakes that date back to ancient times. For those who don’t care for the standard seasonal fruitcake fare, this is a nice substitute when you want something festive but not fussy or too heavy. With so many things to accomplish in the days ahead, a few simple and basic ingredients plus the addition of brandy make this a snap to put together and serve or present as a gift to your favorite host or hostess.

Bench notes:
- Toast the walnuts in a 350 degree oven for about 10 minutes, until they are only slightly darkened and give off a toasty aroma.
- If you’re not a fan of walnuts, substitute toasted almonds, pecans or hazelnuts.


Walnut Brandy Cake


6 oz butter
1 C sugar
3 eggs @ room temperature
1/4 C milk @ room temperature
3 T brandy
1 t vanilla
1 1/2 C flour
1 t baking powder
1/4 teaspoon salt
1/4 t freshly grated nutmeg
1 C coarsely chopped toasted walnuts

Preheat oven to 350 degrees.

Prepare an 8 1/2" x 4 1/2” loaf pan with oil and a piece of parchment paper large enough to form an overhang along the length of the pan.

Toast and coarsely chop the walnuts.

Cream butter and gradually beat in sugar. Scrape down the sides of the bowl and beat until light and fluffy, about 3 to 5 minutes. Add eggs one at a time, making sure that each one is incorporated before adding the next and scraping down the bowl as necessary.

Combine milk, brandy and vanilla.
Sift flour, baking powder, salt and nutmeg.
Alternate adding a third of the flour to the butter and eggs with 1/2 milk mixture, beginning and ending with the flour. Once all the ingredients are in, mix just a minute or so then finish the mixing by hand. Fold in walnuts.

Pour the mixture into the prepared loaf pan. Bake the cake for about 50 – 60 minutes or until it tests done.

Cool the cake on a wire rack for about 30 minutes. Remove it from the pan and cool the cake completely. Peel off the paper and dust the top with confectioners' sugar.

Friday, December 4, 2009

Orange Sesame Tuile Ice Cream


It’s hard not to love the simplicity of sesame seeds. For this ice cream, I took some deliciously chewy Sesame Honey Tuiles and folded them into a vanilla ice cream base that is flavored with orange zest, a tiny hint of cardamom, honey and a splash of orange flower water. The result has a Middle Eastern feel to it but also seems like it could just as easily be discovered on the sidewalks of Italy. Whatever culture it recreates for you, I think you’ll enjoy the wonderful flavor and slight sweetness of the ice cream combined with the subtle but distinctive nuttiness of the sesame cookies, an indelible combination of flavors and textures in any world.

Sesame seeds have a long and storied history. They are mostly familiar to us through the cuisine of Asia and the Middle East or as a garnish on breads and crackers, but they were first domesticated in India and are thought to be a symbol of immortality in some Hindu legends. Sesame seeds were introduced in this country by African slaves and since the Mende name for sesame seed is bene or benne, you may find some pastry recipes from the south that use that term.

These cookies are great on their own. They’re very easy to mix and they take just a few minutes to bake. Once they cool, they turn into light, crisp and delicate celebrations of the chewy lightness of sesame seeds. But I highly recommend the ice cream in order to fully enjoy the intriguing flavors of both as they mingle together in absolutely blissful harmony.


Bench notes:
- Tuile is the French word for “tile” and in pastry the term usually represents a light, thin, crisp cookie that is sometimes shaped like a roof tile.
- The Sesame Honey Lace Tuiles are based on an old Gourmet recipe. I’ve reduced the sugar and added orange zest and a pinch of salt. If you're just making the cookies, you could also add some spice if you’re so inclined.
- You can make the Sesame Honey Lace Tuile batter ahead and store in an airtight container in the refrigerator. Bring to room temperature before forming the cookies.
- Chill the ice cream base overnight to let the flavors bloom.


Orange Sesame Tuile Ice Cream

1 1/2 C whole milk
1 C heavy cream
1/4 C + 2 T sugar, divided
1 T honey
2 cardamom pods, crushed
zest of 1 orange
zest of 1/2 lemon
pinch of salt
4 yolks
2 t orange blossom water
1 C chopped Sesame Honey Tuiles (recipe below)

Combine the milk, cream, 1/4 C sugar, honey, cardamom pods, citrus zest and pinch of salt in a saucepan. Bring to a slow simmer over medium low heat. Turn off the heat, cover and steep for about 20 minutes to a half hour. When the flavor is right, remove the cardamom pods.

Whisk the yolks with 2 T sugar until completely blended. Pour a bit of the warm cream mixture into the yolks, whisking constantly. Slowly add the remaining cream and return the mixture to the pan. Keeping the custard at a low simmer, cook over medium heat, stirring constantly until the custard is thick enough to coat the back of the spoon and leaves a clear trail when a finger is drawn through it, about 4 to 6 minutes. Do not boil. Strain through a fine-mesh sieve into a clean container. Whisk in the orange blossom water and cool completely. Cover the custard and refrigerate overnight.

Coarsely chop about 1 C of Sesame Honey Lace Tuiles into bite-sized pieces and set aside.

Freeze the ice cream according to your machine’s instructions.
Fold in the chopped tuiles. Pour the ice cream into a clean container, press a piece of plastic wrap onto the surface, cover and place in your freezer until firm.

Sesame Honey Lace Tuiles
based on a recipe from Gourmet
Makes about 30 cookies

1/4 C + 2 T confectioner’s sugar
1 1/2 T butter
1 1/2 T honey
1 T water
pinch salt
zest of 1/2 orange
1/2 C sesame seeds
2 T flour

Place confectioner’s sugar, butter, honey, water, salt and orange zest in a saucepan and bring to a boil over moderate heat, stirring. Boil for 1 minute. Remove pan from heat and stir in sesame seeds and flour until mixture is thoroughly combined. Cool to room temperature.

Preheat oven to 350°F and line 2 baking sheets with parchment paper. Take half-teaspoons of dough, shape into balls and arrange 4" apart on baking sheets. Bake cookies in batches in upper and lower thirds of oven, switching position of sheets halfway through baking, 7 - 8 minutes, or until cookies are flat and golden. Slide parchment with cookies to racks to cool. Cool baking sheets a couple of minutes and line with fresh parchment between batches.

Friday, November 27, 2009

Membrillo


In the wonderful realm of fruit and cheese combinations, it's back to the basics. It doesn’t get any more fundamental than pairing the wonders of Membrillo and Manchego from Spain.

Membrillo is a sweet paste made from cooking and caramelizing fresh quince. There is so much natural pectin in quince that it forms a thick paste when it is combined with sugar and cooked slowly over low heat. Membrillo takes a bit of time to prepare, but it keeps well for quite a long time. It also makes a great gift for your cheese loving friends.

Manchego is probably the most famous cheese from Spain and readily available just about anywhere. It’s made from sheep’s milk and has a firm, crumbly texture and an ivory color with a flavor that is piquant, buttery, salty and nutty. It’s made on the plain of La Mancha, sharing territory with our fictional Don Quixote. It’s sold at various stages of aging: fresh, known as Manchego fresco; moderately aged, known as Manchego curado; and Manchego viejo, aged up to a year. The rind always bears the characteristic basket weave pattern.

In some regions, the combination of Manchego cheese and Membrillo paste is known as Romeo and Juliet. It’s a wonderful exercise for the imagination to entertain the origin of this application with each fabulous bite. In this case, I’ve added a pinch of sel gris and chili powder to pique the flavors and take this storied couple out of Shakespeare’s quaint countryside and into the spicy mystery of Iberia.


Bench notes:

- Membrillo also goes very well with lots and lots of other cheese, such as chèvre, Garrotxa or Parmigiano-Reggiano.
- Raw quince are quite hard, so be careful when peeling and cutting into them. Use a very sharp chef’s knife and a non-slip work surface and watch your fingers. I find it easier to core if they are first cut in quarters.
- If you don’t have a scale, you can use volume measurements to roughly determine the right amount of sugar.
- If you love quince, you might also enjoy Goat Cheese Flan with Poached Quince or Quince Pound Cake.


Membrillo

4 – 5 fresh quince
juice of 1 1/2 lemons
equal weight or volume of sugar to pureed quince
salt to taste

To poach the quince, put enough water to cover the quince in a large pot and add the juice of one lemon. As you peel and core each quince, cut them into quarters and place them in the lemon water to keep the oxidation at a minimum. Bring the quince and lemon water to a boil. Reduce heat and simmer until the quince are tender and easily pierced with a fork, about a half hour or so. Drain completely and cool a bit, then puree the cooked quince in a food processor.

Prepare an 8” square pan with enough parchment for a short overhang on two sides.

Weigh the quince puree and add nearly the same amount of sugar. I had 780 grams of puree and added 700 grams of sugar. Add the juice a half lemon and a pinch of salt and stir the mixture to combine.

Cook the quince puree over medium low heat, stirring the whole pot routinely to prevent scorching. The mixture will bubble and thicken and caramelize, becoming thicker as the steam evaporates and darker as the mixture reduces and the flavor intensifies. Cook for about an hour or so, until you have a very deep bronzy orange color. Take off the heat and taste for additional salt.

Pour the quince paste into the prepared pan and let cool and set up. Membrillo can be stored for quite a long time. I wrap mine in parchment, then tightly in foil and keep in the refrigerator. Serve with your favorite cheese, Serrano ham, toasted nuts and a nice Cava or some delicious Albariño or Rioja.

Friday, November 20, 2009

Pecan Pillows


It’s hard to resist the rich buttery goodness of toasted pecans, especially during the holidays. These cookies are my idea of a cozy pillow of pure pecan luxury nestled inside a light and crumbly cookie. I stick with a few simple natural ingredients so the cookie isn’t too rich or gooey. I think they have just the right measure of sweetness and satisfaction for a deliciously simple but unforgettable little pastry.

This is a very forgiving dough. It comes together quickly in a food processor and after a bit of a rest in the refrigerator, it is very easy to handle even as it warms up at room temperature. The pecan filling doesn’t contain any extra fat and can be prepared in a food processor with just a few pulses.

It's time to bake! This is a dreamy formula for the winter season that will remind you just how much pleasure a cookie platter can bring.


Bench notes:
- To toast pecans, spread them out in a single layer on a cookie sheet and place in a 350 degree oven for about ten minutes, stirring them a couple of times to prevent burning.
- I use a small ice cream scoop #40 (the #40 refers to 40 scoops per quart) to portion the dough. This makes the job very quick and easy.
- For a wonderful and very intriguing walnut version, try Ma'amoul.


Pecan Pillows
Makes 18

Cookie Dough

1 3/4 C flour
3 T sugar
1/4 t salt
6 oz (12 T) cold butter, cut into small cubes
2 T milk
1 t vanilla

Pecan Filling

3/4 C toasted pecans
pinch of salt
3 T brown sugar
2 T + 2 t honey
scant 1/4 t cinnamon
zest of 1 orange
1/4 t vanilla

To prepare the dough, place the flour, sugar and salt in the bowl of a processor and mix. Add the butter and pulse until the butter is in pieces the size of small grain rice. Combine milk and vanilla and add to the flour butter mixture. Pulse just until the mixture starts to clump. Remove and place the dough on a piece of plastic wrap. Pull it together to finish blending and smoothing out. Pat it into a circle about 1” think, wrap and refrigerate to rest for a couple of hours or overnight.

Place the pecans, salt, brown sugar, honey, cinnamon and orange zest in the bowl of a processor and pulse just a few times to chop the pecans into smallish pieces and blend the ingredients. Don’t over process. You want small pieces but not paste. Pour into a bowl and add vanilla. Stir to combine.

Remove the dough from the refrigerator and let it sit for a bit just until it's malleable.

To shape the cookie dough, portion into 18 pieces and shape each into a ball that is about 1 1/2” in diameter. Take each portion and push your thumb in to form a cup for the filling. Continue to press it out with your thumbs to form a somewhat flattened open pocket about 2 3/4” in diameter. Place about a good half-teaspoon of filling in the center. Gather the ends and press them together to seal the cookie. Roll gently in your palms to even out the shape and place seam side down on a small parchment lined tray. Press the top of the cookie gently to flatten slightly and shape. Wrap the formed cookies with plastic and refrigerate until completely chilled.

Preheat oven to 325 degrees.

Bake on a cookie sheet lined with parchment or silpat for about 20 to 25 minutes. The cookies should not take on any color but the bottoms will brown a bit. When they are done, they will move easily without any resistance when nudged with your fingertip. Cool on a wire rack. Dust lightly with powdered sugar.

Friday, November 13, 2009

Chocolate Prune Cardamom Cake


This is a cake for the season. It combines the deep earthy comfort of cocoa and bittersweet chocolate with the haunting warmth of cardamom and the tart pleasure of dried fruit. And what a heavenly irresistible combination it is.

This cake is for anyone who loves the deliriously happy co-mingling of chocolate and spice and especially for those with a freaky fear of prunes. Fruit in all its forms is such a luscious element in pastry and here the dried plums add a great layer of chewiness and a wonderfully complex backnote of flavor. Factor in the supreme moisture of the cake and the silky texture of the glaze and you have a true treasure.

These ingredients were made for each other. The prunes are steeped in Earl Grey tea until softened. They lend a tart and acidic amplification of the chocolate as does a hint of lemon zest. The cardamom brings just the right level of mystique and helps to create such a complex yet balanced flavor profile that you won’t be able to keep yourself from taking another bite. It's rich without being heavy and the soft aromas that emanate from the oven will brighten your kitchen with enough temptation to bring in a whole host of wandering visitors.

This is one of those old-fashioned cakes that can be mixed in one bowl in just a few minutes. Once it’s baked and cooled, simply pour the glaze, let it set for a few minutes and serve. And bid adieu to any well-honed discipline or restraint. This is a cake made for its delicious unbridled enjoyment.

Bench notes:

- The prunes are steeped in a cup of unsweetened Earl Grey tea just until they are soft and pliable. They should still hold their shape and not be mushy. Drain them completely and discard or enjoy the liquid. As the cakes bakes, the chopped prunes will sink to the bottom to form a nice textural layer.
- I used regular undutched cocoa powder for the cake. I dusted the finished cake with dutched Valrhona cocoa powder and some ground cocoa nibs.
- To prepare the glaze, pour the hot cream over the chocolate and let the mixture sit for two or three minutes before stirring so it has a chance to begin to melt the chocolate. Then stir slowly to prevent the mixture from cooling down too fast so you're not left with any lumps.
- Corn syrup adds to the viscosity and shine of the glaze. I rarely use corn syrup and often substitute honey, but in this preparation it is a very small amount and I didn't want anything to interfere with the flavor of the cardamom.


Chocolate Prune Cardamom Cake

3/4 C prunes (about 20)
1 C water
2 t (or 2 tea bags) Earl Grey tea
1 C cake flour
1 1/2 T cocoa
1/2 t ground cardamom
1/2 t salt
1/2 t baking soda
1/2 C canola oil
3/4 C + 2 T sugar
1 egg @ room temperature
zest of 1/2 lemon
1/2 C buttermilk @ room temperature
1 t vanilla

Chocolate Cardamom Glaze

3/4 C heavy cream
1 T corn syrup
5 cardamom pods
6 oz bittersweet chocolate

dutched cocoa powder for dusting (optional)
ground cocoa nibs for dusting (optional)

Preheat the oven to 350 degrees. Prepare an 8” x 2” cake pan with a light coating of oil and a parchment paper circle.

Boil the water, add the tea and let steep. Chop the prunes into about a 1/2” dice. Remove the tea bags, add the chopped prunes and set aside for about 1/2 hour until they are softened but still hold their shape. Pour into a strainer and drain off all liquid.

Sift together the flour, cocoa, cardamom, baking soda and salt.

Whisk together the oil, sugar and egg until smooth and well blended. Add lemon zest, buttermilk and vanilla. Slowly sift in the dry ingredients, whisking until fully combined. Fold in the drained prunes.

Pour the cake batter into the prepared pan and bake for about 35 – 38 minutes or until a tester comes out clean. Cool cake in pan for 10 minutes. Run a thin bladed knife or small metal spatula around the edge of the cake and turn out. Peel off the parchment and invert the cake to cool completely on a wire rack.

When the cake is cooled, prepare the glaze.

Chop the chocolate into very small pieces and place in a medium bowl.

Bring the cream and corn syrup to a simmer. Crush the cardamom pods and add to the cream. Take off the heat, cover and let steep for about 1/2 hour.

To glaze the cake, place the cooled cake on an 8" cardboard round or removable tart pan bottom. Return the cake to the cooling rack and place over a baking sheet lined with parchment.

Strain out the cardamom and reheat the cream until just about to the boiling point. Keep your eye on it because it will spill over if left to boil. Pour the cream over chopped chocolate and let sit for about 3 minutes. Then stir slowly and gently, starting in the middle until thoroughly combined and then working outward in concentric circles until the mixture comes together.

Glaze the cake, pouring quickly in the center and around the edges. If necessary, tap the baking sheet on the work surface to encourage the glaze to run down the sides of the cake. Just as it begins to dry, run a small spatula around the underside of the cardboard round to smooth the bottom edge and prevent “feet” from forming. Let glaze firm up a bit before serving.

Friday, November 6, 2009

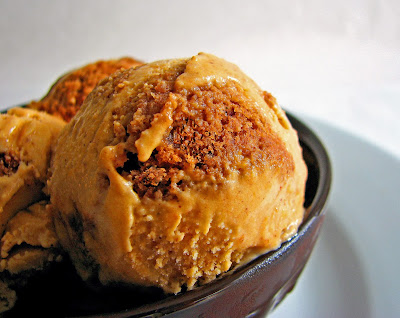
Pumpkin Gingerbread Ice Cream


At this point in time, pumpkin pie and gingerbread are among the many treats dancing through our thoughts, especially since they only seem to come around once a year.

This began as an experiment to deconstruct pumpkin pie. I had ideas about what I could do with luscious pumpkin and shards of buttery caramelized pâte brisée crust, but let’s face it, there really isn’t anything that can rightfully take the place of the simple iconic satisfaction of a pumpkin pie. But still wanting to mix it up a bit, I decided to blend the spicy warmth of both pumpkin and gingerbread in a soothing seasonal ice cream. It’s a rich custard base with a chewy bite of ginger and that touch of molasses that reminds us that we are surely heading into the middle of November.


Bench notes:
- This is a half recipe for gingerbread and can be baked ahead and wrapped or stored in an airtight container. You’ll only use about half for the ice cream so you’ll have a few bites leftover.
- It’s very important to taste for salt once the pumpkin, vanilla (and rum if using) is thoroughly mixed into the custard. Salt will really make the flavor pop, so keep adding a few grains at a time until you can tell the difference.
- When making a crème anglaise, do not let the mixture boil. Stir constantly and make sure you’re scraping the bottom of the pan continuously to distribute the heat and keep the mixture from becoming scrambled eggs. Pull off the heat if it starts heating up too fast.
- Now is a really good time to take inventory of your spices and replace any that may have lost their mojo.


Pumpkin Gingerbread Ice Cream

Gingerbread


2 oz butter @ room temperature
1/3 C brown sugar
1 1/2 t peeled and grated fresh ginger
zest of 1/2 orange
1 egg @ room temperature
3 T molasses
3/4 C flour
1/4 t + 1/8 t baking powder
1/4 t + 1/8 t baking soda
1/8 t salt
1/2 t cinnamon
1/4 t ground ginger
1/8 t ground cloves
1/4 C + 2 T buttermilk @ room temperature

Preheat the oven to 350 degrees. Prepare an 8 1/2" x 4 1/2” loaf pan with oil and a piece of parchment paper large enough to form an overhang along the length of the pan.

Sift together the flour, baking powder, baking soda, salt and spices.

Cream the butter and brown sugar on medium speed for about 4 minutes until it is smooth and pale. Add the grated ginger and orange zest and beat 1 minute. Scrape down the sides of the bowl, add the egg and continue beating until emulsified. Slowly pour in the molasses and mix thoroughly. The mixture will look like it’s broken but it will come together when the dry ingredients are added.

Alternately add a third of the flour mixture and half the buttermilk to the batter, starting and ending with the flour. Finish the mixing by folding the batter with a rubber spatula until the dry ingredients are just absorbed. Do not overmix. Pour the batter into the prepared pan and level the surface.

Bake for about 22 - 24 minutes or until a tester comes out clean.

Pumpkin Ice Cream

1 C heavy cream
1 1/2 C whole milk
1/2 C brown sugar
1/2 t ground cinnamon
scant 1/2 t ground ginger
pinch of freshly grated nutmeg
pinch of ground cloves
1/4 t salt
4 egg yolks
2 T granulated sugar
1 1/4 C pumpkin puree
1 t vanilla extract
1 t rum (optional)

Combine the cream, milk, 1/2 cup of the brown sugar, spices and salt in a saucepan and simmer over medium low heat until sugar is dissolved.

Whisk together the egg yolks and 2 T granulated sugar until smooth. Remove the cream mixture from the heat and slowly whisk into the yolks just a little bit at a time until smooth. Pour the egg mixture back into the pan. Keeping the custard at a low simmer, cook over medium heat, stirring constantly with a wooden spoon until the custard is thick enough to coat the back of the spoon and leaves a clear trail when a finger is drawn through it, about 4 to 6 minutes. Do not boil. Strain through a fine-mesh sieve into a clean bowl.

Whisk the pumpkin mixture into the custard. Add the vanilla (and rum, if using). Taste for salt and keep adding until you have a bright flavor. Cool the custard, pour into an airtight container and refrigerate for several hours or overnight.

Freeze according to your ice cream machine’s instructions.

Pour about a third of the ice cream into a clean container. Layer with 3/8" slices of Gingerbread, covering the whole surface. Pour another third of the ice cream over the Gingerbread and smooth out the surface. Place another layer of Gingerbread on top of that and pour remaining ice cream on top and smooth the surface. Press a piece of plastic wrap onto the surface, cover and place in your freezer until firm

To serve, scoop the ice cream and then let it sit for a bit to soften the Gingerbread.

Friday, October 30, 2009

Chocolate Vanilla Swirl Cookies


As we head into November, planning for the holiday season takes center stage and that invariably includes thoughts about cookies. The fun that comes along with this time of year is not only making our favorite cookies but also trying some new ones. There are so many different flavors and textures and traditions to consider for our gift boxes and adding to our repertoire keeps us fully engaged with the spirit of giving.

This cookie is for those who can’t seem to decide between chocolate and vanilla. Two doughs are stacked and swirled together to give a taste of each in every bite. The resulting cookie is light and crumbly and visually appealing enough for a holiday platter. And despite its complex Rorschach appearance, it’s incredibly easy to make. Measure out or weigh all the ingredients for each dough before you begin and preparation will go quickly and smoothly. The whole process can be done in less than an hour, including the 15 minute chilling time before shaping the cookie dough. Once the finished logs have a chance to firm up in the refrigerator for a few hours, you're set to bake.

The recipe comes from Flo Braker, who borrows it from Nora Tong. In a region that boasts so many great and accomplished bakers - Alice Medrich, Lindsey Shere, Emily Luchetti, Elizabeth Falkner, Marion Cunningham and many, many others - Flo Braker has contributed a very distinguished collection of recipes that are all about the great satisfaction of sharing delicious pastry with family and friends. Adding this fun and easy cookie to your holiday production line will make your season of giving all about pleasure.


Bench notes:
- If you have a scale, Flo Braker recommends that you weigh ingredients to perfect the flavor and texture.
- The logs of cookie dough can be frozen for up to one month. Instructions say to thaw in the refrigerator for several hours or up to overnight before baking.
- If you prefer to make less than the full recipe, divide it into thirds and make either one or two-thirds. It will be much easier to follow instructions that way.
- I always work the dough on parchment paper to make the handling and rolling easier. Each time you need to move the logs of dough, you simply lift the parchment and the log maintains its shape.
- Add your favorite spices to the chocolate dough or your favorite extracts to either dough.
- I’ve also tried making each dough in a food processor and they came out fine. Start with the vanilla and then make the chocolate. Just be sure not to overmix.
- To help keep their round shape, I use the leftover cardboard from a roll of paper towels to store the cookie logs. Just use a pair of scissors or a sharp knife to cut open the cardboard and slip the cookie log inside.


Chocolate-Vanilla Swirl Cookies
From Baking for All Occasions by Flo Braker
Makes about 12 dozen cookies

Vanilla Dough

2 3/4 C (11 ounces/310 grams) cake flour
1 C + 2 T (4 ounces/115 grams) powdered sugar
1/4 t salt
8 oz (2 sticks/225 grams) butter @ room temperature
1 t vanilla extract

Chocolate Dough

2 1/4 C (9 ounces/255 grams) cake flour
1 C + 2 T (4 ounces/115 grams) powdered sugar
1/2 C + 1 T (2 ounces/55 grams) natural or Dutch-processed cocoa powder
1/4 t salt
8 oz (2 sticks/225 grams) butter @ room temperature
1 t vanilla extract

2 C (about 15 ounces/430 grams) nonpareil sprinkles for decoration (I used 1 C raw sugar)

For the Vanilla Dough:
Combine flour, sugar and salt and mix on lowest speed just to blend. Stop the mixer and place the butter on top of the flour mixture. Wrap a kitchen towel around the mixer bowl to prevent the flour from flying out of the bowl. Mix on the lowest speed just until it starts to appear lumpy. Stop the mixer and add the vanilla. Mix on the lowest speed just until the mixture is combined. Transfer the dough to a bowl, cover and refrigerate for 15 minutes.

For the Chocolate Dough:
Use the same instructions above, placing the flour, sugar, cocoa powder and salt in the bowl and mixing on the lowest speed to blend. Add the butter and proceed as above, then add the vanilla. Transfer the dough to a bowl and if too soft, cover and refrigerate for 15 minutes.

To form into logs:
Divide the Vanilla Dough into thirds, with each piece weighing about 7 1/2 ounces (215 grams). Divide the Chocolate Dough the same way. You will work with one-third of each dough at a time.

On a piece of parchment or clean work surface, flatten one piece of Vanilla Dough into a 7" x 5" rectangle. Repeat this with a piece of the Chocolate Dough. Place the chocolate rectangle on top of the vanilla rectangle, then cut the stack in half crosswise to create 2 pieces, each about 3 1/2" x 5". Place one half on top of the other half to create 4 layers. (You may need a dough scraper to help with this.) Press or roll the stack into a 9" x 4" rectangle. Cut the stack in half lengthwise to create two 9" x 2" pieces. Place one piece on top of the other to create a long narrow stack with 8 layers.

Carefully twist each end of the dough once or twice, gently working toward the center. Use your hands to twist the pattern and shape the swirled dough into a log about 8 1/2 ” x 2”. Set aside. Repeat this process with the remaining pieces of each dough to form two more logs. Compress each log with your hands so it is compact, gently rolling back and forth until the log is round and uniformly shaped.

Roll each log in the sprinkles to coat. If the dough is soft, set the coated logs on a baking sheet and refrigerate for about 1 hour or until firm enough to handle. Wrap each log in plastic wrap and return to the refrigerator for a few hours to chill thoroughly.

When ready to bake, preheat oven to 325 degrees.

Use a sharp knife to cut generous 1/4” slices and arrange 1/2" apart on baking sheets lined with parchment or a silpat.

Bake one sheet at a time just until they are no longer shiny on top and are lightly golden on the bottom, about 10 - 12 minutes. Cool completely on wire rack.

Cookies can be stored in an airtight container at room temperature for up to 10 days.

Friday, October 23, 2009

Julia’s Apple Turnover


I think my first memory of Julia Child was her voice. And her arms. A strong husky voice and long animated arms that punctuated nearly all of her sentences. Oh, and the pearls worn with her shirtwaist dresses. The way she swayed when she was delighted, each word pronounced with exaggerated flair. I’d never seen or heard anyone like her. Every episode, every dish was an imaginative voyage across cultures and habits.

Although Julia is now gone, her legacy surely endures. We still celebrate her birthday and still ponder her recipes. The release of Nora Ephron’s film this year had everyone waiting in anticipation of how Meryl Streep might act out this great woman’s bigger-than-life ambition. There is still so much fun that surrounds her extraordinary life.

When I received a review copy of award-winning writer Laura Shapiro's Julia Child: A Life from Penguin, I was definitely curious to know more about how she spent her time in Paris and what she thought about how her life unfolded in the limelight. What was her real relationship to food and how did she reflect on her training? How did she handle her fame? Why do we feel so much affection for her?

The book follows Julia’s life from her early days to the end of her life. It chronicles her many trials and tribulations and reveals all the exciting developments that eventually spawned an industry. Although the publication of Mastering the Art of French Cooking was what possessed her for so many years, it wasn’t until Julia began her cooking shows on PBS that she came into her own in the public eye. She started with an omelette on the Today show and wound up with several television series, nearly all acclaimed for their own unique sense of exciting yet accessible adventure. Her audience flocked to her precisely because she was natural and unpolished. Julia's insatiable desire for good food was boundless and it was infectious.

As I turned the pages, what I found interesting about Julia’s robust life was her journey from absolute devotion to French cuisine to an eventual embrace of other ingredients and techniques. But she remained very opinionated about food and how food culture evolved over the course of her lifetime. Although some of her views are quite puzzling, in the end, what mattered most to her was that cooking should be taken seriously and the appropriate preparation time taken to honor the integrity of the ingredients. She shifted the American emphasis from time to taste, from convenience food to long hours over the stove. For her, it was never about opening a box, but about touch, taste and smell.

Since I had the great opportunity of working behind the scenes on a PBS food series a few years ago, one little aspect of the book I especially appreciated was the sense of detail that goes into preparing for a TV show. Shapiro captures the endless planning and production processes that go into successful food programming and it brought back some of my own memories of the intensity of that experience. And Julia’s penchant for her brand of perfection are on full display.

Julia’s legacy is about expanding our idea of what it means to be in the kitchen and to share the fruits of our labor. If the film piqued your interest in Julia’s life, this book unpacks the phenomenal story of how Julia pursued what every cook in the kitchen dreams of: proficiency and style. Shapiro carefully unfolds Julia’s rather pivotal journey and its overarching theme - that along with good instincts, it takes discipline, passion, love and time to produce soul-soothing results. The book also reveals some interesting secrets about her personal life. And one thing is certain - her strong sense of pride just about leaps off of every page. Julia’s work reminds us how we think about the consummate enjoyment of food and why we read and write cookbooks and, at this interesting moment in time, blogs.

This is Julia's Apple Turnover. It’s the one she’s holding on the cover of Julia Child and Company. It begins with a pâte brisée dough that is simply folded over a tidy bundle of thinly sliced apples. It's rustic yet elegant, a true and delicious harbinger of fall.

Bench notes:
- Use your favorite baking apple. I happened to have fujis.
- I omitted the shortening. If you don’t have cake flour, you can go with all-purpose.
- Another version of an apple turnover is the magnificent Chausson aux Pommes.


Julia’s Apple Turnover

adapted from Julia Child and Company

Pâte Brisée

1 1/2 C all-purpose flour
1/2 C cake flour
1/4 t salt
2 T sugar
6 oz cold butter
2 T chilled vegetable shortening
1/2 C ice water

2 – 3 large apples
3 T sugar
zest and juice of 1/2 lemon
1 T melted butter
1 egg + 1 t water for egg wash

Chop the cold butter into small cubes.

Put the flour, salt and sugar in a food processor and blend. Add cubes of butter and pulse a few times to break up the butter. Add the shortening and pulse until the mixture resembles coarse meal. Add 1/2 C ice water and pulse 2 or 3 times. The dough should be soft, pliable and will just hold together when you press a clump between your fingers. Be careful not to overmix.

Turn the dough out onto a piece of plastic wrap and form a press it into a disc. Wrap tightly and chill thoroughly.

Let the chilled dough rest on a lightly floured piece of parchment for a few minutes so it can soften just a bit to prevent cracking. Then roll the dough out to about 18” by 10” rectangle, moving the dough and keeping the parchment lightly floured as needed. When you have the desired rectangle shape, trim the edges with a sharp knife. Save the scraps if you’d like to make a design on top of the turnover. Lift and slide the parchment and pastry onto a sheet pan. Chill while you prepare the apples.

Place the lemon juice and zest in a bowl big enough to hold the apples. Peel and core the apples. Slice them fairly thin and toss them in the lemon juice as you go to prevent browning. Add sugar and toss thoroughly. Set aside.

Take the rolled out dough from the refrigerator and place it in front of you so the short side is closest to you. Make a slight mark at the halfway point on the long side so you know where the fold will be. Line up about 3 – 4 vertical rows of sliced apples on the lower half of the rectangle, leaving a 3/4” border along the 3 sides. Brush the apples with melted butter. Brush the borders of the dough with water. Fold the upper half of the rectangle over the apples and press to seal. Turn up the edges to make a small border and press again to seal. You can decorate with the tines of a fork or pastry scraps. Cut some air vents (along the sides of the pastry scraps, if using). Chill the finished turnover for 1/2 hour.

Preheat the oven to 400 degrees. Brush the turnover with egg wash and bake for 35 – 40 minutes, checking at 20 minutes to be sure it isn’t browning too fast. Cool on a wire rack.

Bon Appetit!

Friday, October 16, 2009

Oatmeal Ice Cream


This is probably one of the easiest and best ice creams you’ll ever make. Returning to one of my favorite ingredients, this is chock full of the simple and beautiful flavor of oatmeal and it is fantastic. It starts with a creamy milk and oatmeal brown sugar cinnamon base with a healthy pinch of salt into which eggs yolks are stirred and cream is added. The brown sugar builds a lovely caramel flavor, there’s just enough salt to perk it up, the cinnamon doesn’t overwhelm and the oatmeal lends a wonderful chewiness that is just perfect. A little splash of rum expands the earthiness but the final product does not taste of alcohol. If you can imagine all these warm and fabulous flavors harmonizing together in splendid bliss, I think you know what I’m talking about. Well, that is if you love oatmeal as much as I do.

I think this ice cream tastes really fabulous on its own. I know it’s going to be hard to resist the temptation to add various things to it. I’ve dressed it here with a very light drizzle of Saba, which is delicious and takes the simple homey quality of this ice cream into the realm of total elegance. But honestly, this ice cream is really great all by itself. Once this comes out of your freezer, you’ll be so busy tasting it that it will be gone by the time you think you might want to garnish it. Full speed ahead!


Bench notes:
- Be sure you use old fashioned rolled oats, not the instant variety.
- Be generous with the salt as this is what gives it its full flavor and balance.
- Chill this ice cream base overnight to give all the flavors a good chance at a happy marriage and ensure a very cold start when you go to churn it.
- Saba is a kind of super delicious slow cooked balsamic that is sweet and smooth, a bit lower in acid with a faint taste of raisin. It has a slightly thicker viscosity than vinegar but is not quite a heavy syrup. It's fabulous on ice cream (vanilla, chocolate, caramel, toasted walnut, etc, etc!). If you’d like to try Saba, I highly recommend the brand I received as a gift from a great pastry chef. It’s Guerzoni SABA BiodynamicTraditional Grape Syrup and it’s from Modena.


Oatmeal Ice Cream
Makes about 1 quart

2 C whole milk
1/2 C + 1/4 C brown sugar, divided
generous 1/2 t salt
1/2 C + 2 T old-fashioned rolled oats
1/4 t ground cinnamon
3 egg yolks
1 1/2 C heavy cream
2 t rum

Bring the milk, 1/2 cup of brown sugar and salt to a boil in a heavy medium saucepan over medium heat. Lower the heat and add the oats and cinnamon. Simmer for about 6-8 minutes, stirring constantly, until the oatmeal has thickened and has a creamy consistency but the oats are still chewy.

In a separate mixing bowl, whisk egg yolks with the remaining 1/4 C brown sugar until thoroughly combined.

Add just a bit of the hot oatmeal into the egg mixture and whisk. Continue adding slowly and whisking until completely blended. Whisk in the heavy cream and rum. Taste for additional salt. Cool. Refrigerate overnight in an airtight container.

Stir the mixture and churn in your ice cream machine. Pour into an airtight container, press a piece of plastic wrap into the surface, cover and place in your freezer to firm up.

Oatmeal Ice Cream! I hope you enjoy this as much as I do.

Friday, October 9, 2009

Panna Cotta and Grape Gelée


I really hate the feeling of walking into the market and seeing that all my favorite fruits have vanished into retirement for the season. My heart sank yesterday as I rushed around the corner to my organic market only to realize that figs are beginning to slip away. And no more nectarines. Sigh. But there are lovely bunches of grapes reclining everywhere!

I love good grapes, especially the Bronx grapes we get here in August. And who can resist the irresistible mustiness of Concord grapes? So here I use grapes in service to a molded dessert by topping a Panna Cotta with an easy and good Grape Gelée.

The recipe has to be staged a bit, but other than that, it’s very easy to do. I first got the idea from a recipe I saw in Gourmet a few years ago. And speaking of Gourmet, I was pretty shocked to hear that it will be no more. Although it has been a flagship for good writers and interesting food journeys for nearly 70 years, Condé Nast has decided to fold it. It was a uniquely American publication that defined the culinary landscape in new ways over the decades, so it is sad to see its passing. But sad as it is, we can only look forward to a future of continued fervor online for the wonderful culture of food and the incredible pleasure it brings to all of us.


Bench notes:
- This would be good to try with sliced plums, fresh figs, cherries or blueberries.
- If you don’t have ramekins, you can just set these up in some glasses as a parfait.
- I used four 4 1/2” ramekins. You can probably get 5 or 6 servings if you use 3 1/4” ramekins.


Panna Cotta and Grape Gelée
based on a recipe from Gourmet Magazine
4 servings

Gelée

vegetable oil for greasing ramekins
1 C 100% Concord grape juice
1 1/4 t unflavored gelatin
2 t fresh lemon juice
1 T port (optional)
1 C seedless red grapes, sliced in half

Lightly oil four 4 1/2” ramekins.

Sprinkle gelatin over 2 T grape juice in a small dish and let stand a couple of minutes to soften. Set the bottom of the dish in simmering water to melt the gelatin. Add to remaining grape juice and lemon juice (and port, if using) and combine thoroughly. Divide grape gelatin among the ramekins. Line the bottom of each ramekin with the sliced grapes. Place ramekins in the freezer for about 45 minutes or until set.

Panna Cotta

2 C plain yogurt
3/4 t vanilla
1 t fresh lemon juice
1 3/4 t unflavored gelatin
2 T water
1 C heavy cream
1/2 C packed brown sugar
pinch of salt

A few minutes before the gelée is ready, whisk together yogurt, vanilla and lemon juice until smooth. Set aside.

Place 2 tablespoons of water in a small dish. Sprinkle the gelatin over the water. Let sit for a few minutes to bloom. Bring the heavy cream and brown sugar to a slow simmer over moderately low heat, stirring until sugar is dissolved. Remove from heat. Set the bottom of the dish of bloomed gelatin in a pan of simmering water to melt, then whisk into cream mixture. Add the cream and pinch of salt to the yogurt mixture and whisk until thoroughly combined. Pour over set gelée and chill in the refrigerator overnight, or several hours until firm.

To unmold, run a clean very thin sharp knife or small metal spatula along the edge of the ramekins. Then one at a time, dip the bottom of the ramekins in a small bowl of very hot water for 6 – 10 seconds, or long enough to feel some warmth on the bottom of the ramekin but not too long to begin melting the gelatin. Place a plate over each ramekin and invert panna cotta. Gently lift off ramekins. Serve at room temperature.

Friday, October 2, 2009

Lemon Cakes


As all the beautiful fruit of summer fades from view, we can always turn to the bright spark of lemons. We are now definitely working our way into the fall season and the bounty of lemons in our fruit basket is the best consolation. Lemon desserts are among the most popular and satisfying on any menu any time of the year.

These little lemon cakes are a nice way to complete any meal. They are rather light and absolutely full of lemon flavor. If you love Lemon Meringue Pie, this is the next best thing. As these cakes bake, they finish with a very airy souffle cake-like crust on the bottom and a soft and tart lemon curd layer on the top. Add a dollop of whipped cream and some berries and you are set. Bright, light and sure to please the lemon lover in you.


Bench notes:
- I tried baking these in small deep ramekins and shallower larger ones. I think the shallower ones work best because the cakes are rather delicate and will tend to collapse if they have too much height. I used 4 1/2" diameter ramekins here.
- I’ve also successfully halved this recipe for 4 servings.
- This would be delicious with any sort of berry as an accompaniment.


Little Lemon Cakes with Soft Cream
adapted from Wine Country Cooking by Joanne Weir
Serves 8

melted butter as needed, for brushing ramekins
granulated sugar as needed, for dusting ramekins

5 T butter @ room temperature
6 T + 3/4 C sugar, divided
5 eggs @ room temperature, separated
grated zest of 2 lemons
6 T flour
1 1/4 C whole milk @ room temperature
2/3 C fresh lemon juice @ room temperature

1 C heavy cream, for garnish
1 T confectioner’s sugar
1/4 t vanilla extract
berries, for garnish

Brush eight 5-oz ramekins with butter. Dust the inside of each of the ramekins with granulated sugar and tap out the excess. Set aside.

Preheat the oven to 325ºF.

Cream the butter and 6 tablespoons of sugar until it is light in color and texture, about 2 minutes. Add the egg yolks one at a time, beating well after each addition. Stir in the lemon zest and flour until blended. Add the milk and lemon juice and beat thoroughly.

Whip the egg whites until soft opaque peaks form. Slowly drizzle in 3/4 cup sugar and whip until the meringue forms stiff glossy peaks. Gently fold the meringue into the lemon mixture.

Scoop the mixture into the prepared ramekins and gently smooth the surface of each. Place the ramekins in a large baking pan in the oven. Pour boiling water to within 1” of the sides of the ramekins. Bake 30 minutes or until a toothpick inserted into the center comes out clean. Remove the cakes from the water bath and cool completely.

Whip the cream to soft peaks with 1 tablespoon of confectioner’s sugar and the vanilla.

To serve, unmold the individual cakes onto dessert plates. Garnish with cream and berries. Serve immediately.

Friday, September 25, 2009

Raspberries with Sabayon and Hibiscus Granita


I seem to have a lot of beautiful fresh raspberries on my hands at the moment. They’re bright and juicy, so I thought I would leave them in their natural state and surround them in luxury. Sabayon always adds a level of lusciousness to any fruit and I thought a Hibiscus Granita would contribute another interesting layer of lovely earthy tartness. The mesmerizing textures of fresh raspberries, creamy sabayon and cool granita make this a fun and refreshing adventure. As the granita melts into the sabayon, it makes a delicious sauce that I’m finding irresistible. If you haven't discovered the wonder of hibiscus tea, start brewing!

Bench notes:
- Use your favorite hibiscus tea or Flor de Jamaica, which you can pick up at health food stores or Mexican grocers. Make the tea quite strong.
- For the sabayon, I recommend a good quality Muscat, Semillon, Viognier, Monbazillac or a Sauvignon Blanc. You can make the sabayon and chill overnight. Fold in the whipped cream just before serving.
- This would probably be good with any berry. And if you’d rather not make a sabayon, you might try this with a bit of sweetened whipped cream.
- For another delicious take on fruit and sabayon, try Oranges with Rosemary Sabayon.


Raspberries with Hibiscus Granita and Sabayon
Serves 4

Hibiscus Granita

2 C strong hibiscus tea
1/4 C sugar

Brew the hibiscus tea until it is quite strong. Add the sugar and stir to dissolve. Cool and place in the freezer. When the mixture has solidified, take a fork and scrape it across the surface to create slushy ice crystals. Return to freezer.

Sabayon

4 egg yolks
1/4 C sugar
1/2 C Muscat or other fruity white wine
1/2 C heavy cream, chilled

2 C fresh raspberries

Whisk egg yolks, sugar and wine in a stainless steel bowl. Place the bowl over a pot of simmering water, making sure that the bowl is not touching the water. Check periodically to see that the water is not boiling. Whisk constantly for 4 to 5 minutes, scraping the bottom and sides of the bowl. Cook until the mixture is thickened and expanded in volume. If you have a thermometer, you’re shooting for about 160 degrees. Remove from heat and continue whisking for a bit. Set aside to cool.

Whip the heavy cream just until soft peaks form. Fold gently into cooled sabayon.

To serve, place a small pile of raspberries in a dessert glass or bowl. Top with sabayon and a few more raspberries. Garnish with granita. Serve immediately.