Showing posts with label etudes. Show all posts

Friday, April 18, 2014

Strawberry Rhubarb Cream Cake


Nothing says spring like strawberries and rhubarb.  After a long season of winter, the bright pop of color and tart acidity of this fruit combination is more than welcome.  It's time for our annual spring pies, galettes and shortcakes!

This is a pretty simple cake but one that really delivers on the promise of spring.  It starts with a basic white cake.  I've tried lots of white cake recipes but they always seem to fall just short of what I'm looking for.  Sometimes they're too dry or too sweet or too dense or crumbly.  I set to work on a basic white cake formula and with just a few little tweaks and a couple of test runs, I'm pleased with these results.  The cake has a soft and tender texture with an open crumb.  The flavor is subtle and wonderful, just the sort of backdrop for all your favorite fillings and frostings.

The rhubarb in this recipe is cooked briefly on the stovetop with some sugar, orange zest and vanilla, flavors that really complement both fruits.  The strawberries are sliced and folded in fresh to brighten the mix.  It's an easy compote to layer in the middle of the cake.  Then the whole thing is slathered in whipped cream.  Light, fresh and simply delectable.

Happy spring!


Bench notes:
- It's important to use cake flour for this recipe to produce a lighter and more tender cake.  I buy it at my local bulk grocer where it's much less expensive than the box at the supermarket. You can also make your own cake flour using regular flour and cornstarch, which inhibits the formation of gluten.  Here is the basic formula: 1 cup of cake flour = 1 cup all-purpose flour minus 2 tablespoons plus 2 tablespoons cornstarch.  For the 1 1/2 cups of cake flour in this recipe, measure 1 1/2 cups of all-purpose flour and remove 3 tablespoons.  Add 3 tablespoons of cornstarch and sift a couple of times to be sure it's completely blended.
- This technique for mixing cake batter is called the "two-stage" method made popular by Rose Levy Beranbaum in The Cake Bible.  It's different from the creaming method in that all the dry ingredients are mixed with the butter and some of the liquid.  This mixture gets beaten for 1 1/2 minutes and then the eggs, vanilla and remaining liquid are added in three stages and mixed for 20 seconds after each addition.  The creaming method results in more aeration of ingredients and therefore cakes made using that method usually have a stronger structure and turn out with a higher rise.  This two-stage method results in less gluten development and yields a more tender cake with a delicate crumb, exactly what we're looking for in a basic white cake.
- For those who don't own a scale, I base my metrics on the "dip and sweep" method of measuring flour with the following important condition: Flour gets very compacted as it sits in our cupboards.  So when measuring flour by volume, it's important to first take a fork or a whisk and fluff the flour thoroughly to aerate it before each dip of your measuring cup.  Overfill it just a bit and then use a spatula to level the cup.  So to measure by weight, my 1 cup of all-purpose flour = 5 oz (142 grams).  My 1 cup of cake flour = 4 oz (113 grams).
- "Room temperature" butter means the chill has been take off and it's pliable but not soft to the touch.
- The cooked rhubarb will taste sweet but the added strawberries don't have any additional sugar.  You may want to use less sugar if your strawberries are sweet.
- I recycle a 3" piece of dried vanilla bean from my vanilla sugar jar to use for this compote.  If you don't have a vanilla bean, substitute 1/4 teaspoons vanilla.
- If you don't have creme fraiche,  just use an additional 2 tablespoons of heavy cream.
- What's the difference between heavy cream and whipping cream?  Heavy cream contains 36% milk fat; whipping cream has 30%.  For finishing a cake like this, use heavy cream because it whips up with a stronger loft and will hold its shape longer than whipping cream without weeping.  Cream whips best when it's very cold.
- Use a serrated knife and a gentle sawing motion to cut the cake into two layers. Start by making a small 1" cut into the side of the cake all the way around.  Then bring your knife around again, sawing a little deeper.  The cake will be cut in half very quickly.  If you try to cut straight across in one fell swoop, you'll wind up with a lot more crumbs.  Once the cake has been cut into two layers, I use a removable tart pan bottom to lift off the top half layer and set it aside.
- The cake can be made a day ahead and stored in an airtight container at room temperature.
- For a simpler presentation, dollop the cream on top of the cake and serve the compote on the side.  Or prepare individual servings by layering cake, fruit and cream in parfait glasses.
- For a larger cake, double the recipe and use two 9" cake pans.  These will bake for a bit shorter time, about 25 - 28 minutes.  You'll probably need about 1/3 C more whipped cream and a few more strawberries.
- Another very delicious cake along the same lines: Angel Food Cake Roll with Strawberries & Cream.  Or if you prefer chocolate: Chocolate & Balsamic Strawberry Cream Cake.


Strawberry Rhubarb Cream Cake
Serves 8

White Cake
3 large (3 oz) egg whites @ room temperature
1/2 cup (4 oz) whole milk @ room temperature, divided
1 teaspoon vanilla extract
1 1/2 cups (6 oz) cake flour
1 1/2 teaspoons baking powder
1/2 teaspoon salt
4 oz (8 tablespoons) unsalted butter @ room temperature
3/4 cup + 2 tablespoons (6 1/4 oz) sugar

Strawberry Rhubarb Compote
4 stalks (about 9 oz) rhubarb, cut into 1/2" pieces
1/4 cup + 2 tablespoons (2 3/4 oz) sugar
zest of 1/2 orange
1/3 vanilla bean or 1/4 teaspoon vanilla extract
12 oz fresh strawberries

1 cup (8 oz) cold heavy cream
2 tablespoons (1 oz) cold creme fraiche
1 1/2 tablespoons sugar
1/2 teaspoon vanilla extract

Preheat oven to 350 degrees F.  Lightly grease an 8" x 2 1/2" cake pan and line the bottom with a circle of parchment.

Whisk together egg whites, 1/4 cup milk and vanilla and set aside.

Combine cake flour, baking powder and salt in a mixing bowl and mix on low speed for 30 seconds to blend.  Cut the butter into 1/2" pieces and add to the flour mixture with the 1/4 cup remaining milk.  Mix on low speed until moistened.  Increase to medium speed and beat for 1 1/2 minutes.  Scrape down the sides and bottom of the bowl.  Gradually add the egg white and milk mixture in 3 batches, beating for 20 seconds after each addition to incorporate the ingredients and strengthen the structure.  Scrape the batter into the prepared pan and spread evenly to level it.

Bake until golden brown and a tester inserted into the center comes out clean, 30 - 32 minutes.  Place on a rack to cool for 10 minutes.  Run a knife around the edge to loosen. Invert the cake.  Carefully remove the parchment and invert again.  Cool completely.

For the compote, place the sliced rhubarb in a saucepan with the sugar, orange zest and vanilla bean.  Cook over medium low heat for about 10 minutes or until the fruit softens but still holds its shape.  Take off the heat and remove the vanilla pod.  Slice the strawberries into bite-sized pieces and toss with the rhubarb.

To assemble, whip the cold cream, creme fraiche, sugar and vanilla to a medium stiff peak.  Chill until ready to use.

Place the cake on a cake board, removable tart pan bottom or a serving platter.  Slice the cake in half horizontally and set the top half aside.   Spread the fruit compote on the bottom half to within 1/2" of the border.  Place the top of the cake over the fruit and press gently to secure.  Slather the cake with the whipped cream and chill until ready to serve.

Friday, February 28, 2014

Vanilla Pudding


With the Oscars set to air this Sunday, movie fanatics are gearing up for this year's tribute to the films and the stars that make so many intriguing stories come alive.  Movies are such a great escape that we willingly give a few moments of our undivided attention to immerse ourselves in another world.  They teach, they entertain, they move.  I admire the craft of writing, acting and direction and all that goes into building the mood and the tone of a film: location, set decoration, lighting, costume, cinematography, editing and sound.  Every bit a delicate balance.

In great contrast to the drama and elaboration of the silver screen, this Vanilla Pudding is a very unassuming dessert.  That is not to understate its elegance and beauty.  It has a quiet subtlety and simplicity that impresses on the first sumptuous taste.

Every now and then I like to get back to basics.  There aren't a lot of ingredients or embellishments in this pudding: fresh milk, sugar, cornstarch, salt, eggs, a little butter and a good vanilla, all in their own delicate balance.  The preparation takes about 15 minutes or so.   Then the puddings cool to a creamy consistency and you're in for a sublime dessert.

So let's celebrate the movies, enjoy our popcorn and, for dessert, grab a spoon.  For all its deliciously rustic and spare quality, this, too, is worthy of the spotlight.


Bench notes:
- Don't skimp on the salt.  It's necessary to enhance the flavor of the milk.
- For a richer hit of vanilla, use 1/2 vanilla bean instead of the vanilla extract.  To maximize the vanilla bean flavor, split the pod and work the seeds into the sugar with your fingers rather than simply adding them directly to the milk.  This helps ensure they get evenly distributed.  Place the vanilla sugar along with the vanilla pod in the saucepan with the milk.  Once the pudding is cooked, remove the pod before adding the butter and vanilla.
- I like to keep the heat on my gas stove at medium low for more control.  If the pudding is cooking too fast, just lift the pan off the heat to settle it down and be sure to lower the heat.
- When stirring the pudding over the heat, switch to a heatproof rubber spatula or flat-bottom wooden spoon.  As you're stirring, make sure you're covering the entire bottom of the pan to keep a thick coating from forming and scorching.  A whisk doesn't scrape the bottom of the pan in broad sweeps well enough to keep the mixture moving.  A whisk also creates a lot of air bubbles, which can make it difficult to see the thickening process.
- This pudding doesn't form a thick film on top but if you want to avoid any skin from forming, keep stirring it as it cools to break up the protein or press a piece of plastic onto the surface.
- Always use unsalted butter for pastry and desserts unless otherwise noted.  I'll start noting "unsalted" in my posts.
- The candied citrus in the photos is from the recipe for Olive Oil Cake with Candied Orange (as explained in the first bench note at the link).  The cookies are Plain Jane Cookies from my ecookbook, The Global Pastry Table, pasties & desserts with international style for the modern kitchen.


Vanilla Pudding
Makes 4 half-cup servings

2 cups (16 oz) whole milk
1/4 cup + 2 tablespoons (2 3/4 oz) sugar
2 tablespoons (18 grams) cornstarch
1/4 teaspoon salt
2 large egg yolks
1 oz (2 tablespoons) unsalted butter @ room temperature, cut into 1/4" pieces
1 teaspoon vanilla extract

Whisk together the cold milk, sugar, cornstarch and salt in a saucepan and set over medium low heat.  Switch to a heatproof rubber spatula or flat-bottom wooden spoon and bring the mixture to a simmer, stirring constantly.  When a light foam begins to form around the edges, cook for 3 minutes, stirring constantly, until thickened.  Take off the heat.

In a separate bowl, whisk the egg yolks to break them up and slowly add about 1/4 cup of the hot milk mixture, whisking constantly until thoroughly combined.  Add the remaining milk and blend.  Pour back into the saucepan and return to medium low heat.  Using the heatproof rubber spatula or flat-bottom wooden spoon and stirring constantly, bring to a very slow boil and cook for 2 - 3 minutes until the mixture is thickened.  The pudding is ready when it coats the back of the spoon and a finger traced through it leaves a clean track.  It will thicken more as it cools.

Remove from the heat and add the pieces of butter and vanilla.  Stir until smooth.  Pour into four ramekins or a bowl to cool.  Serve warm or refrigerate for about 2 hours to chill.


Friday, January 31, 2014

Chai Rice Pudding


It seems like a week that calls out for the quiet satisfaction of comfort food.  Extreme weather conditions are delivering a bitter cold in so many parts of the country.  This is a dessert designed to take the edge off a blizzard.  

If you find yourself snowed in, you probably have rice on hand since it's a staple in cupboards throughout the world and an integral part of meals in just about every culture.  Rice pudding has the benefit of being relatively inexpensive as desserts go and it delivers a soothing pleasure for times like these.

My rice pudding errs on the side of being cushy and creamy.  Pre-cooking the rice for a few minutes shortens the simmering for quicker preparation.  I choose long grain rice, which is less starchy than short grain.  And for a low simmer, I use milk because it reduces more evenly than cream, which can leave the pudding with a fatty and dense chewiness.  You can always add cream at the end of the cooking if you want more richness.

I love the aromatic spices found in a steaming hot cup of Indian masala chai, so I add them to this mixture for more flavor and warmth.  And since chai is personal to the maker, you can add or subtract spices to your own taste.

Bundle up and share a hearty bowl of warm rice pudding.  Stay safe out there.


Bench notes:
- Traditionally, chai is made from Assam tea but any good black tea will do.  Tea bags are definitely convenient but there is a difference in quality with loose leaf tea, which tends to have a brighter taste.  Tea bags contain much of the fannings, the smallest pieces of broken tea with essential oils that are dimished.
- If you don't have a vanilla bean, add about 1/2 teaspoon of vanilla extract at the end when you've taken it off the heat.
- Rice pudding doesn't require much sugar in order to taste sweet but add or subtract to your own taste.
- Cook the rice pudding at a very low simmer to keep it from boiling. Your goal is to tenderize the rice and reduce the milk.  Stir gently to prevent the grains from breaking.
- The pudding will look soupy but resist the urge to cook it longer or it may become too gloppy and thick.
- Salt is very important in dairy desserts.  If the pudding has a flat taste, keep adding a few more grains of salt until the flavor pops.
- Rice pudding tightens a lot as it cools, especially if refrigerated.  Add a splash of warm milk or cream to loosen it up.
- For added richness and a more custardy texture, once the pudding is finished cooking, place about a cup of it in a bowl and thoroughly whisk in 2 egg yolks.  Pour this back into the pan and cook very gently on low heat, stirring constantly to prevent scrambling, for 2 additional minutes.


Chai Rice Pudding
Makes 6 servings

3/4 cup (5 1/4 oz) long grain rice
1 cup + 2 tablespoons (9 oz) water
4 cups (1 quart) milk
2 teaspoons or 2 bags black tea
1/4 cup + 2 tablespoons (2 3/4 oz) sugar, to taste
1/4 teaspoon salt
1/4 vanilla bean, split and seeded
4 cardamom pods
1/2 cinnamon stick
2 whole cloves
4 whole peppercorns
1/2 star anise
2 quarter-sized slices fresh ginger
pinch of freshly grated nutmeg
zest of 1/2 orange

Place the rice and water in a saucepan and bring to a boil.  Lower heat to a bare simmer, cover the pan and cook the rice for 8 minutes.

Warm the milk on medium low heat just until bubbles form around the edges.  Remove from the heat and add the tea.  Steep for 8 - 10 minutes, depending on the quality of your tea.  Strain out the loose tea or remove the tea bags and add the remaining ingredients, stirring to combine.

Bring the mixture to a boil and then reduce the heat.  Cook at a very low simmer for 20 - 25 minutes until the rice is tender.  Stir frequently to keep the rice from sticking to the bottom of the pan, especially toward the end of the cooking time.  The pudding should be a bit soupy.  It will firm up more as it cools.

Take off the heat and remove the spices.  Taste and adjust for salt, if necessary.  Serve warm.

Friday, January 24, 2014

Pears Belle Helene


Whenever you're in the mood for a classic dessert, this pairing of poached pear and chocolate is a delicious answer.  It's simple, satisfying and a great reminder of how good this kind of basic preparation can be.  It doesn't require that you turn on your mixer or oven and it's a wonderful dessert for those who are looking for something gluten free.

Pears Belle Helene have an interesting little story.  It starts with the great August Escoffier in the era of the late 1800s - early 1900s. A French chef and restauranteur, he was among the first to take the lead in culinary writing and cookbook development, the modernization and accessibility of French cuisine and the professionalization of kitchen organization and management.  His work to interpret and simplify Marie-Antoine Careme's methods and technique is legendary.  He was also instrumental in the creation and partnership of the professional kitchens of the Ritz-Carlton in 1898-1899.

Escoffier created Poires Belle Helene in 1864 in celebration of the popularity of the operetta, La Belle Helene, which was based on the life and times of Helen of Troy.  Escoffier served the poached pears with chocolate sauce and vanilla ice cream and embellished them with crystallized violets.  Later versions replaced the violets with sliced almonds.

I chose to simplify the plating with a dollop of sweetened whipped cream along with the note of color and tartness of some fresh raspberries.  I've changed up the chocolate sauce only ever so slightly by adding a touch of cardamom and allspice just to introduce some intrigue.  These are easily omitted if you care to stay with the classical approach.


Bench notes:
- Fresh pears should be ripe but firm.  Bosc pears hold up best for poaching but I've also used d'Anjous.
- Poaching pears is fairly simple.  Make sure your poaching liquid covers your pears by about an inch or so.  The ratio for the liquid is roughly 4 parts liquid to 1 part sugar.  You can replace some of the poaching water with wine.  Flavorings can be thyme or rosemary, cinnamon sticks, star anise, clove, peppercorn or sliced ginger, with various combinations therein.
- When poaching pears, cut out a circle of parchment to fit the diameter of your saucepan.  Place it directly on the surface of the liquid to keep the moisture on the fruit.  This will ensure slow, even poaching and help to keep the pears from turning brown.
- Pears can be stored submerged in their poaching liquid in the refrigerator for about 4 - 5 days.  Bring to room temperature to serve.
- Keep the poaching liquid at a low and gentle simmer to preserve the flavor and structure of the fruit.  How long it takes to poach pears depends on their ripeness.  They should be tender and easily pierced with a knife but not mushy.  Turn off the heat when you think the pears are nearly done.  They will continue to soften slightly as they cool in the liquid.  Undercooked pears may turn brown.
- You can reduce the poaching liquid until slightly thickened and syrupy.  Use it to flavor drinks or to serve over cake, yogurt or ice cream.


Pears Belle Helene
Serve 4

4 cups (1 quart) water
1 1/3 cups (9 1/2 oz) sugar
juice of 1/2 lemon
1 bay leaf
1 vanilla bean, split and seeded
4 pears

3 1/2 oz bittersweet or semisweet chocolate (62% - 72%)
1/2 cup (4 oz) heavy cream
1 tablespoon (3/4 oz) corn syrup
scant 1/2 teaspoon ground cardamom
pinch allspice

1/2 cup (4 oz) heavy cream
1 teaspoon sugar
1 pint fresh raspberries

Combine the water, sugar, lemon, bay leaf and vanilla bean in a saucepan over medium heat.  Bring to a boil until the sugar is dissolved.  Lower the heat so the liquid is at a low simmer.

Peel and core the pears.  Slice just a bit off the bottom so they can stand upright on a plate.  Add them to the poaching liquid and place a circle of parchment directly on top of them.  Poach at a low simmer until tender, about 25 - 30 minutes.  Remove from the heat and cool the pears in the liquid.

For the chocolate sauce, finely chop the chocolate and place in a heatproof bowl.  Add the cream, corn syrup and spice and place over a pan with about 2" of barely simmering water.  Stir gently until the chocolate is melted and glossy.  Remove from the heat.

To serve, drain the pears on a paper towel.  Whip the cream with the sugar until soft peaks form.  Place each pear on a serving plate and pour warm sauce over them.  Garnish with raspberries and whipped cream.

Friday, November 2, 2012

Rustic Chocolate Pie

If you crave a good and unusual chocolate pastry, this is definitely one to add to your list of delicious things to bake.  It's a recipe from Alice Medrich, so you know all the elements are in balance with plenty of deep chocolate buzz.  But I have to say, it sort of defies description.

This "pie" is built upon a very buttery pastry.  It's rolled out into a thin free-form base like a galette and it's very delicate and flaky.  The filling is a billow of meringue folded into melted chocolate and nuts.  Once baked, it's not dense like a truffle or brownie nor soft and airy like a mousse.  It's gooey and rich without being too heavy.  So it's a very offbeat sort of pie.  In fact, it's not really a pie so much as a very simple but interesting composition of pastry, chocolate and nuts that's incredibly easy to compose and super delicious to consume.  And it's fun to set it on your table and slice into it randomly and watch the crumbs fly.

I'm sure you can find an occasion to celebrate the wonders of good chocolate sometime soon.  This is a grand treat sure to elicit sighs of pure pleasure and good cheer.


Bench notes:
- The dough can be made ahead and stored in your refrigerator for 2 - 3 days.  Any longer and it begins to oxidize and discolor.
- I know a lot of people really fear working with pastry doughs.  Handling dough can be trying if you don't have any practice.  But just remember a few important tips: 1) Keep the butter and water very cold.  As you mix, work quickly to make sure the butter doesn't warm up and get soft.  Once the dough is mixed, chill it to relax the gluten, firm up the butter and allow the flour to absorb the moisture.  2) It may seem counterintuitive, but once the dough has been thoroughly chilled, you need to set it out and let it rest for a few minutes at room temperature to warm up enough to roll it out without a lot of resistance and cracking.  So chill it thoroughly but then let it sit at room temperature to take the chill off.  3) Keep your work surface and the surface of the dough lightly floured as you roll it out.  You don't want it to stick at all.  After each roll, lift the dough to make sure it isn't sticking.  Handle it gently and continue to dust with flour.  This is important because I think this is where people begin to get discouraged.  If the dough is sticking, it raises the possibility of tearing, which is very, very frustrating.  So lift it often and keep it lightly dusted with flour.  Once you've rolled it out to the desired shape and size, dust off any excess flour.  I use a 3" wide paint brush with soft bristles.  4) If at any time the dough starts to get too soft, don't hesitate to return it to the refrigerator for a few minutes.  It's important that it remain firm enough to handle without the butter getting warm and softening.  5) For ease of handling, I always roll out doughs on parchment paper.  It makes it easier to form the pastry and then simply slide it onto a baking sheet without having to lift the dough and risk stretching, tearing or misshaping.  Once you've made a few doughs with these tips in mind, you'll find your own zone with tarts, pies and galettes.  It just takes some practice to get the feel for the right temperatures and a light touch.
- There's a good ratio of butter in this dough but oddly it doesn't take on much browning at all even though it's pre-baked at 400 degrees.  The temperature gets lowered to 350 degrees once the filling is added but it only bakes for 10 additional minutes.
- I used a mix of 4 oz of semisweet chocolate and 2 oz of bittersweet.  Alice Medrich suggests either bittersweet or semisweet but also says the chocolate you choose shouldn't exceed 62%.
- Egg whites are 1 oz each so if you have a stash, weigh out 2 oz.
- Nuts are definitely important for texture and flavor.
- Bake for just 10 minutes so the interior is gooey.  The surface should look dry and a bit shiny and may look slightly cracked in places but still have a soft interior.
- The recipe suggests 3 tablespoons of toasted pine nuts and chocolate shavings as optional garnishes.  I just used a portion of the same nuts I folded into the filling.


Rustic Chocolate Pie
adapted from Alice Medrich for Better Homes & Garden
Makes 10 servings

3/4 C flour
1/4 t salt
2 1/2 oz (5 T) cold butter
1 1/2 T - 2 T cold water [I used 2 T]

6 oz bittersweet or semisweet chocolate
2 egg whites at room temperature
1/8 t cream of tartar
1/4 C sugar
1/8 t salt
1/2 t vanilla
3/4 C chopped pecans or walnuts

For the crust, toss together the flour and salt.  Cut the cold butter into small pieces and add to the flour, tossing to coat the butter thoroughly.  With a pastry blender or your fingers, incorporate the butter into the flour until you have some larger pieces the size of pine nuts and smaller pieces that resemble coarse bread crumbs.  Don't let the butter get too soft or blend completely into the flour.  Drizzle the cold water over the flour mixture.  Toss and mix just until moist enough to hold together when pressed. Turn out onto a piece of plastic wrap.  Gather and consolidate the dough into a flat disc.  Wrap and refrigerate 30 minutes or up to 3 days.

Preheat oven to 400 degrees.

Unwrap the pastry dough and place on a floured piece of parchment or work surface.  Let it sit for a few minutes at room temperature until pliable enough to roll without cracking.  Roll the dough out to a 14" x 9" oval about an 1/8" thick.  Brush off excess flour.  If you didn't roll it out on parchment, fold the dough in half to transfer to a baking sheet lined with parchment or a silpat.  Unfold the dough and loosely roll up the edges to form a rimmed crust without pinching or pressing too firmly.

Bake 10 - 12 minutes or until you see some browning.  The crust edge will still be a little raw inside.  Place on a wire rack.

Reduce the oven temperature to 350 degrees.

For the filling, chop the chocolate into small pieces and place in a heatproof bowl.  Place the bowl on top of a pan of barely simmering shallow water, making sure the bottom of the bowl isn't touching the water.  Stir until the chocolate is melted.  Remove from heat and set aside.

Beat egg whites with cream of tartar until opaque and soft peaks form.  Gradually add sugar and salt.  Beat until the whites form stiff peaks that are not dry, adding the vanilla in the last few seconds.  Fold the whipped egg whites into the melted chocolate until it is nearly blended.  Add the nuts and fold until there are no streaks.

Dollop the filling onto the baked crust and spread evenly to the edges.  Bake for 10 minutes.  Cool on a wire rack.  Garnish the top with extra nuts and serve warm or cool.

Friday, August 17, 2012

Buttermilk Biscuits


You're probably wondering what Buttermilk Biscuits have to do with the Kingdom of Pastry. Well, in pastry school, you also have to learn how to make breads, crackers and biscuits as well as cake, custards, tarts, cookies, ice cream, confections, jams and a lot of other assorted pastries. So when I was thinking about making something to go with my fresh fruit compotes of the season, I decided to whip up a batch of simple biscuits.

This is a baking powder biscuit that can be on your table in the amount of time it takes for your oven to heat up. I like the rich tang of buttermilk, so it's the star in this particular version. The biscuits are hearty with a crisp crust and an interior that is tender and buttery. And, of course, rather than honey or preserves, these biscuits would make excellent bacon and egg sandwiches or a perfect vehicle for your favorite gravy. This is an occasional indulgence for those lazy weekends when you'd like something a little more soul-soothing. Go for it!


Bench notes:
- There are just a few things to remember when mixing biscuit dough. 1) Both the buttermilk and the butter must be very cold to produce a flaky biscuit. The colder the butter, the less likely it will be absorbed by the flour, which means as it bakes off that separation will form nice flaky layers. Dice the butter and put it in the freezer while you prepare the other ingredients. 2) Once you add the cold butter, work fast to incorporate it into the flour so that it stays cold. You can use a pastry blender or your hands to get the butter reduced down to pea-sized pieces. 3) When you add the buttermilk, use a fork to stir it together. It shouldn't take more than 10 or so rounds of stirring. The dough will look lumpy. 4) Lightly dust your work surface and your hands with flour. Pour the biscuit mix onto the work surface and pull the dough together with about 3 - 4 very light kneads. You don't want to overwork the dough but you also don't want a pile of clumps. So be gentle and you'll see it come together very quickly. 5) Pat the dough to form a round that's about 1 1/4" thick. Use a 2 1/2" cutter and press down to form the biscuits and lift straight up when you're done. To prevent sealing the edges and to preserve the flakiness of the biscuit, no twisting or turning the cutter.
- My oven runs a bit hot, so my biscuits baked in 11 minutes. Start checking about that time. The bottoms should be crisp and a rich golden brown.
- There are all kinds of theories about using part cake flour. I prefer straight all-purpose flour but if you'd like to experiment for biscuits that are less sturdy and more tender, you can easily find a recipe that will do the trick.
- Add your favorite chopped herbs or chives to the dry ingredients. I like freshly ground black pepper.
- For something more in the realm of pastry, try Cream Scones. They are perfect for the traditional whipped cream, jam and tea. Or another pastry in the biscuit family is shortcake. Some of my variations are Cinnamon Pecan Biscuits with Peaches and Cream, Oatmeal Shortcake with Plums, Blue Cheese Walnut Biscuits with Pear Compote and Cream, Cornmeal Shortcake with Peaches and Gingerbread Shortcake with Pears.
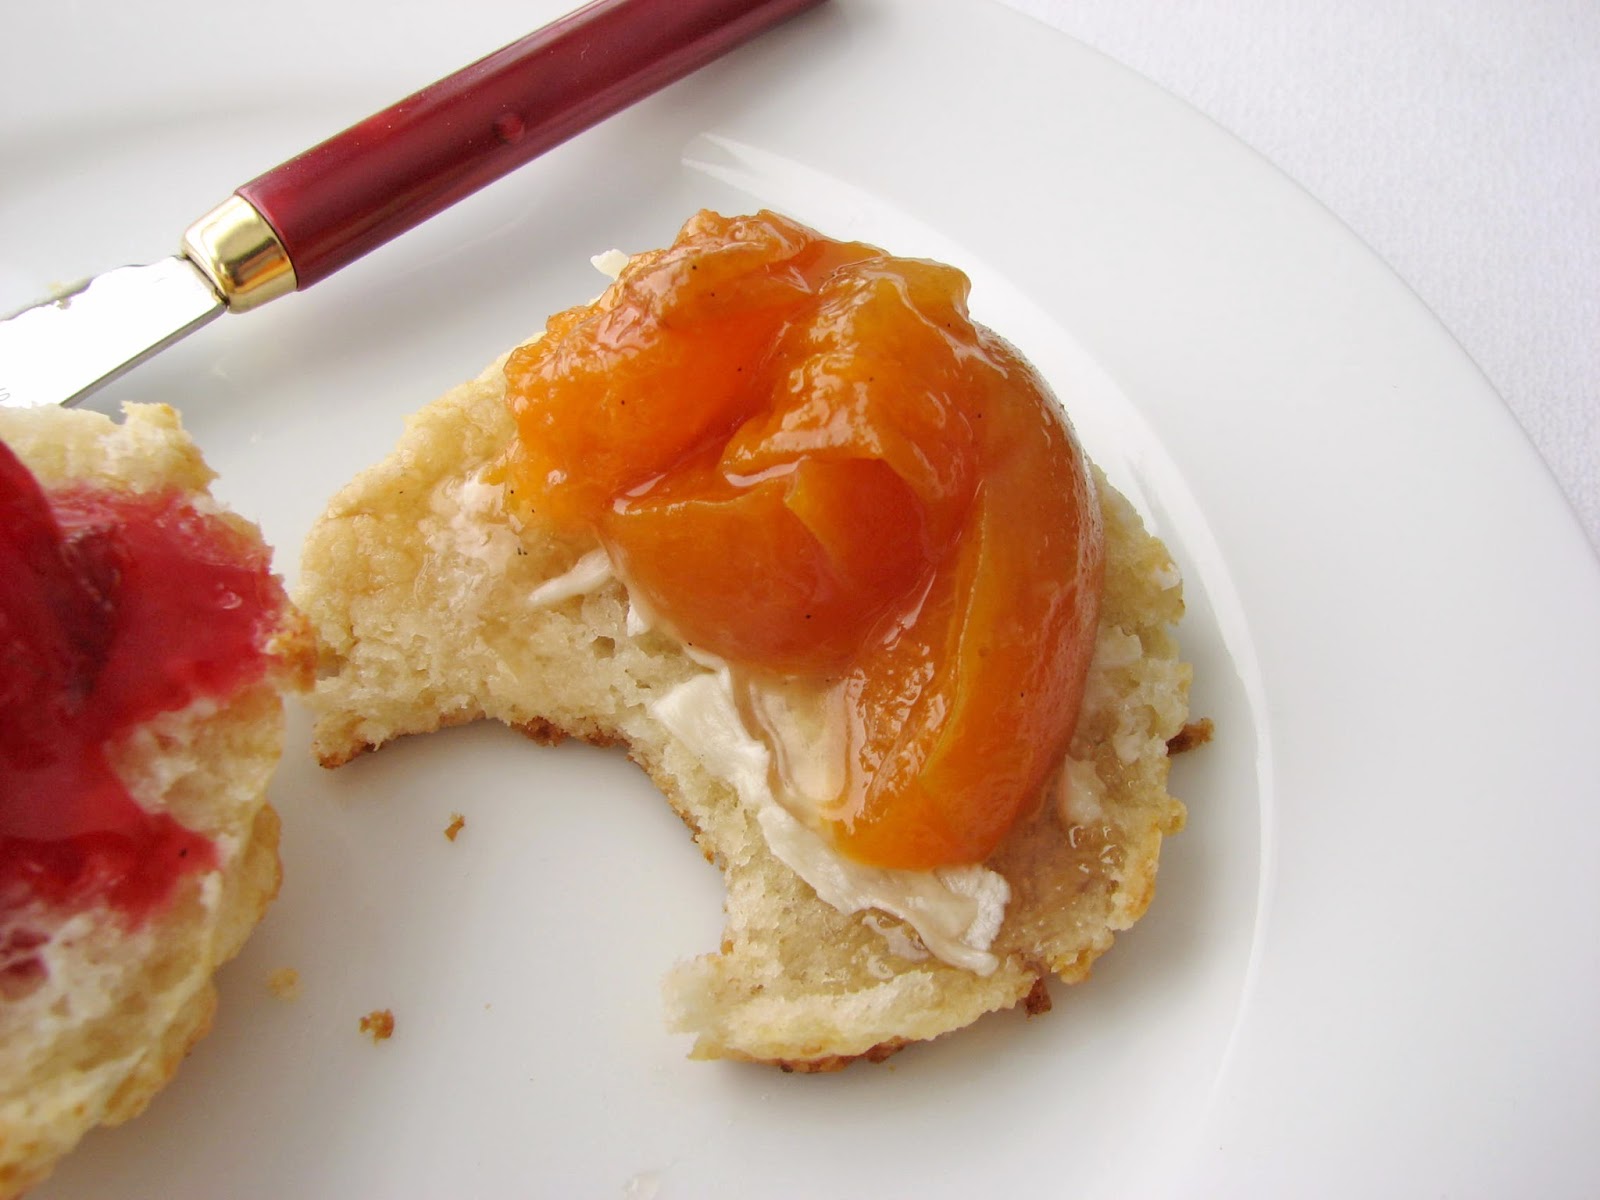
- This is a really great Apricot Compote made with vanilla, honey and cinnamon.


Buttermilk Biscuits
Makes about 8 - 10 biscuits

2 C flour
1 T baking powder
1 t salt
1 t sugar
1/4 t baking soda
4 oz (8 T) cold butter, cut into small pieces
1 C cold buttermilk

1 T melted butter for brushing on the tops

Preheat oven to 425 degrees F. Prepare a baking sheet with parchment or a silpat.

Sift the flour, baking powder, salt, sugar and baking soda together in a bowl. Add the small pieces of cold butter and, using your hands, toss to coat all the pieces of butter with flour. Working quickly with a pastry blender or your fingers, pinch and flatten the butter into the dry ingredients until the mixture looks like pebbles the size of peas with some smaller crumbs.

Make a well in the middle of the flour mixture and pour the cold buttermilk into the well. Using a fork, fluff the flour into the center and gently stir and turn the ingredients until you have a soft dough.

Lightly dust the work surface and your hands with flour and turn out the dough. Give it a gentle kneading; about 3 - 4 turns should be enough to consolidate the dough. Pat it into a round about 1 1/4" thick. Use a 2 1/2" cutter to form the biscuits, pushing straight down and lifting up to cut rather than twisting. Place the biscuits on the prepared baking sheet. Gather the scraps and stack them. Gently press and pat them into a piece about 1 1/4" thick and cut out additional biscuits.

Brush the tops lightly with melted butter. Bake the biscuits for 11 - 14 minutes or until they are puffed and the bottoms are golden brown. Serve warm.

Friday, June 29, 2012

Almond Dacquoise with Nectarines & Cream


If you're in the market for something to do with those spare egg whites, I have an idea for you. Now that stone fruit is in abundance, it's just about time to celebrate our bounty with an almond dacquoise.

Dacquoise is a meringue that contains toasted nuts. It's another versatile pastry component for your repertoire that is very simple to make. It's classically used as a layer in cake construction along with buttercream. I was first introduced to it in pastry school in the form of Gateau Marjolaine, a complex French cake created by Chef Fernand Point and made of layers of dacquoise, hazelnut and almond praline buttercreams and finished with chocolate ganache. A very big project.

For something much easier and not so rich, I like to layer dacquoise with a billow of whipped cream and fruit or serve with ice cream and a drizzle of chocolate. The toasted nuts provide depth of flavor and texture to the sweet crunchy chewy meringue.

The method for this dessert is simple. Just whip the egg whites with sugar to stiff peak and fold in the almonds, which have been ground with sugar and a touch of cornstarch. Bake the disc until it's nicely browned, then compose the dessert with cream and fruit. You get a nice crispy/creamy dessert with a good dose of freshness and acidity from the nectarines.

This almond dacquoise would be good with just about any spring/summer fruit: apricots, plums, peaches, cherries, raspberries or figs. Or pair it with vanilla, caramel or coffee ice cream and garnish with a dark chocolate sauce. So keep this dessert in mind the next time you have some egg whites waiting on your refrigerator shelf looking for something fun to do.

Bench notes:
- To toast the almonds, place them in a single layer on a baking sheet in a 350 degree oven for about 10 minutes. Cool.
- Raw egg whites can be stored in an airtight container in your refrigerator up to four days. Each egg white is 1 ounce, so weigh out 3 ounces for this recipe if you have a stash in your refrigerator.
- Egg whites will whip with greater volume if they are at room temperature. Begin the process by whisking the whites with a pinch of salt until they are foamy and opaque. For a stable meringue, slowly add the sugar and then keep whipping until they are glossy and form a stiff peak. You test this by lifting your whisk with a dollop of meringue. It should hold its peak without slumping over. If the meringue starts to look dry and grainy and begins to separate, you've gone too far.
- Use brown sugar instead of granulated in the dacquoise for a richer, caramel taste.
- Substitute walnuts or hazelnuts for the almonds for a different flavor profile.
- For a Coffee Almond Dacquoise, add 1/2 t instant espresso powder to the dry ingredients.
- As an alternative, add a dash of cinnamon or a splash of rum to the whipped cream.
- Use a sawing motion with a serrated knife to cut into the finished dessert.
- I baked my dacquoise in a springform pan for a more finished presentation but you can simply spread the meringue on a parchment lined baking sheet in whatever shape you wish. Individual meringues are nice, too.

Almond Dacquoise with Nectarines & Cream
Serves 8 - 10

1/2 C almonds, toasted
1/2 C sugar, divided
1 1/2 t cornstarch
3 egg whites @ room temperature
pinch salt

4 fresh ripe nectarines
1/4 C dark brown sugar, packed
1 1/2 t fresh lemon juice

3/4 C heavy cream
1 T sugar
1 t vanilla

Preheat oven to 300 degrees. Line bottom of a 9" springform pan with a round of parchment.

Place the almonds, 1/4 cup sugar and cornstarch in a food processor and process until most of the almonds are finely ground with a few larger pieces.

Whip egg whites with a pinch of salt until foamy and opaque. Slow add the remaining 1/4 cup sugar and beat until the meringue is stiff, glossy and holds a firm peak. Fold the dry ingredients into the meringue. Pour into the prepared pan, spread out to the edges and smooth the surface.

Bake for 35 - 45 minutes until dry and golden brown. Place on a wire rack and cool. Release the springform ring and gently remove the dacquoise from the parchment paper. Place on a serving platter and set aside.

Cut nectarines in half and remove the pit. Cut into thin slices and toss with brown sugar and lemon juice. Set aside to macerate for about 20 minutes, stirring once or twice to distribute the juices and coat the fruit.

Whip the heavy cream with the sugar and vanilla to soft peak. Spread evenly on top of the almond dacquoise. Layer the nectarines on top of the cream. Serve with a spoonful of the fruit juices.


Friday, June 10, 2011

Creamy Custard


The ultimate beauty of custard is found in its simplicity – eggs, dairy, sugar, a bit of flavoring and not much else. But how you work with these ingredients makes all the difference in the world. If you’ve tried baking custard and have been less than thrilled with your results, you’ll want to try these techniques and see if you don’t fall in love with the melt-in-your-mouth texture and sublime flavor of these baked custards.

What makes custard such a desirable dessert is its velvety luxuriousness. Because one of the basic ingredients of custard is eggs, the silkiness of baked custard comes from controlling both the temperature of the mixture before it’s baked and during the baking process.

Shuna Lydon is a pastry chef known for her wonderful custards and her engaging personal and work life confessionals at her blog, Eggbeater. And now, lucky for us, she illustrates her method for perfect custard in a series of very short videos she shot with Food52. Shuna delivers a few indispensable procedures that will change your custards forever. You’ll learn why eggs need gentle and delicate prodding and how best to create a terrific finished product. I urge you to watch all of these fun and very informative short clips to see how simple it can be to improve your game.

Perfect Custard, part 1: Maximizing vanilla bean flavor, the ratio of cream to milk and the process of infusion. (1 minute, 50 seconds)
Perfect Custard, part 2: How to achieve great texture starting with a cold mixture and treating the eggs with complete care. (1 minute, 18 seconds)
Perfect Custard, part 3: Portioning with a scale for uniform baking. (1 minute, 6 seconds)
Perfect Custard, part 4: Steam and the proper bain marie technique for the very best baked custard. (1 minute, 16 seconds)
The Big Reveal, part 5: Tasting the final product (1 minute, 35 seconds) and a link to Shuna’s Butterscotch Pot de Crème.

So now that we’ve seen some of the techniques for producing the silkiest custard, it’s time to put it all to the test. This is my recipe for a basic but very delicious Vanilla Custard. It’s also a perfect medium for all kinds of variation. You can flavor it however you wish by infusing the cream with your favorite flavorings. My photos here are of a lime version I made by steeping the warm cream, milk and sugar mixture with lime zest.

I hope these lessons and suggestions contribute to perfect custards in your future!


Bench notes:

- In addition to vanilla custard, branch out and flavor with zest of lime, lemon or orange, whole or ground spices, fresh ginger, coffee beans, tea or your favorite fresh herbs (fresh bay leaf is nice; 1 leaf per cup of liquid). For citrus, I grind the zest with the sugar in a food processor to infuse the sugar with the citrus oils, then add this to the warm cream mixture. Steep as long as it takes to get the right concentration of flavor depending on what and how much you’re steeping.  Taste as you go to get the right strength. Strain before mixing with the egg yolks.
- Use the freshest cream, eggs and flavorings for the best possible results.
- Baking custard in a bain marie or water bath ensures slow and even baking.
- My recipe has the level of cream to milk ratio that I like. Vary according to your own taste and desired level of richness. Same applies to the measurement of sugar.
- I ran out of good professional plastic wrap as I was making this custard so I went with foil. Still got really luscious results. If you use foil, be VERY careful when lifting it up to check on the custards. Make sure you let the steam out in a direction away from you, wear an oven mitt or use tongs. Steam burns really do hurt.
- Sometimes using a large roasting pan for a water bath can feel a little unwieldy. When I’m making a larger recipe, I use two smaller pans and fit 3 - 4 ramekins in each. This makes it a lot easier to remove from the oven without splashing water into your custards and damaging all your careful work.
- Custards are best eaten the same day without refrigeration, although they will keep for a couple of days in the refrigerator as long as there aren't any strong aromas lingering from other food items.


Creamy Custard
Makes 4 servings

1 1/4 C heavy cream
3/4 C whole milk
1/2 vanilla bean or 1 1/4 t vanilla extract
1/4 C sugar (add another 1 T sugar if flavoring with citrus zest, coffee, tea or herbs)
4 egg yolks
pinch of salt, to taste

Slice open vanilla bean lengthwise and scrape the seeds into the sugar. Work the vanilla seeds into the sugar with your fingers so they are evenly distributed. Place the vanilla sugar along with vanilla pod, cream and milk in a saucepan. Bring this mixture to a slow simmer. Take off the heat and infuse for about an hour.

Warm the cream mixture just until it feels warm to the touch. Do not simmer. Remove the vanilla bean pod and whisk egg yolks together. Gradually whisk warm cream into egg yolks and combine thoroughly. Whisk in salt, to taste. (Add the vanilla extract at this point, if using). Let the mixture cool completely in a bowl or container set in an ice water bath.

Preheat oven to 325 degrees. Place four 4 oz ramekins or custard cups in a small roasting pan.

Ladle or pour custard into ramekins or custard cups. If you have a scale, use it to be sure each dish has an equal portion. Pour enough hot water into the roasting pan so that it comes halfway up the sides of the ramekins. Tightly wrap foil or plastic wrap over the roasting pan. Carefully set in the center of the oven.

Bake the custards until just set, about 35 – 40 minutes. When you tap a ramekin, the whole surface should jiggle a bit. The edges should not soufflé.

Remove foil or plastic carefully, avoiding the hot escaping steam by pulling the wrap so the steam escapes away from you and your hands. Remove the ramekins from water using an oven mitt or a pair of tongs and cool on a wire rack. Serve slightly warm or at room temperature.

Friday, December 10, 2010

Profiteroles with Eggnog Ice Cream and Rum Sauce


I’m one of those people that likes the idea of eggnog, but can never really manage to taste more than a sip or two because it’s so incredibly rich. But since I like the flavors quite a bit I decided to make an ice cream that showcases the same ingredients but cuts back on some of the eggs and cream while still maintaining the desired creaminess and luxury of eggnog.

Profiteroles are such a delicious way to enjoy ice cream, so this is my preferred vehicle to enhance this presentation. A great pâte à choux adds texture and balances the richness of the ice cream. The Rum Sauce is made with brown sugar, butter, a little cream and a dash of rum and brings a level of delicious festivity that is completely irresistible.

Pâte à choux is a wondrous pastry. Legend has it that a chef by the name of Panterelli invented it in 1540, years after accompanying Catherine de' Medici and her court from Florence to France for her marriage to King Henry II. In the nineteenth century, Antoine Carême, who was the very first celebrity chef and responsible for the emergence of haute cuisine, perfected the recipe that is most commonly used today.

If you’re looking for a fun and delicious idea for a holiday dessert over the next few weeks, I highly recommend this truly luscious combination. I think you’ll find it will bring a collective sigh of pure enjoyment from just about everyone at your table. In fact, you may want to double the profiterole recipe for a repeat performance in case you receive a standing ovation. Cheers!


Bench notes:
- Pâte à choux is a classic light pastry that forms the base for éclair, croquembouche and cream puffs. It’s not difficult to make. It just requires that you try not to hurry the process. What makes it all work are a few simple techniques. 1) Once you add the flour to the water and butter, make sure you stir and cook the dough for a couple of minutes so there is a steam rising and a film appears on the bottom of the pan. This cooks out the taste of the flour. 2) Take the dough off the heat and beat it in a mixer or with a wooden spoon until there is no longer any steam rising. This helps to dry out the dough in preparation for incorporating the eggs. 3) Add the eggs 1 at a time and mix thoroughly before adding the next. The dough will look lumpy at first but will smooth out beautifully. Scrape down the bowl after each addition. 4) The pâte à choux is ready when it is smooth and shiny and falls from a spoon in gloppy sheets. 5) Always use an egg wash to ensure even, pretty browning. 6) The test for baked pâte à choux is when a piece feels very light and sounds hollow when tapped.
- If you don’t have a stand mixer, you can easily use a wooden spoon to beat the mixture.
- I love the experience of opening the oven door and finding this lovely soft piped dough transformed into all these beautiful billowy pastries that are so light and gorgeous. The term choux means cabbage in French, so these little gems are meant to look like rustic visions of cabbage. In some cultures the dough is fried, such as beignets and churros.
- I use a serrated knife to slice the profiteroles.
- The principal spice in the ice cream is nutmeg. I add just a small dash of cinnamon and a smaller pinch of cloves to warm it up and echo the spiciness of eggnog.
- The ice cream and the sauce can be made ahead of time. I prefer fresh profiteroles eaten the same day but you can freeze the baked profiteroles in an airtight container. Thaw, cut in half and crisp in a 350 degree oven for about 5 – 10 minutes.


Profiteroles with Eggnog Ice Cream and Rum Sauce

Eggnog Ice Cream

1 1/2 C milk
4 egg yolks
1/2 C sugar
1 1/2 C heavy cream
1 t rum
1/2 t vanilla
generous 1/4 t freshly grated nutmeg
slight pinch of cinnamon
even slighter pinch of ground cloves
salt, to taste

Bring milk to a simmer over moderate heat.

Whisk the yolks and sugar together in a bowl until thickened and light yellow. Gradually add the hot milk, whisking constantly. Pour the mixture back into the pan and cook the custard over moderate heat, stirring constantly, until it coats the back of a wooden spoon. Be very careful not to let the mixture heat too quickly or boil.

Immediately pour the custard through a fine-mesh sieve into a clean container and stir in the cream, rum, vanilla and the spices. Whisk thoroughly. Add salt to taste. Cover and refrigerate until chilled thoroughly.

Freeze in an ice cream maker. Transfer to an airtight container and place a piece of plastic wrap on the surface. Cover and put in the freezer to firm up.

Profiteroles
Makes about 1 dozen small profiteroles

1/2 C water
2 oz (1/2 stick) butter, cut into pieces
1/8 t salt
1/2 C flour
2 eggs

egg wash:
1 egg
splash of water
small pinch of salt

Preheat oven to 425 degrees.

Bring the water, butter and salt to a boil. Reduce heat and add flour all at once. Cook and stir the mixture with a wooden spoon until it’s smooth, pulls away from the sides of pan and leaves a noticeable film on the bottom of the pan. This will take a couple of minutes.

Pour the mixture into the bowl of a stand mixer and beat with a paddle for a few minutes until there is no longer any steam rising from the dough. Beat in the eggs one at a time, beating well after each addition. The dough will go from looking lumpy to very smooth. Continue to add eggs one at a time and beat until you have the same results, scraping down the bowl after each addition. While the dough is mixing, make an egg wash combining an egg, a splash of water and a tiny pinch of salt. Set aside.

Line a baking sheet with a silpat or parchment. Place the pâte à choux into a pastry bag fitted with 1/2" plain tip. Pipe 1 1/2" mounds. Wet your index finger with cold water and smooth the tops of each piece of piped dough. Brush each piece lightly with egg wash.

Bake until golden brown and puffed, about 22 to 24 minutes. Remove from the oven and cool completely.

Rum Sauce

1 oz (2 T) butter
1/4 C dark brown sugar, firmly packed
3 T heavy cream
1 t vanilla extract
1 1/4 t rum
salt, to taste

Melt the butter over medium heat and combine with the brown sugar. Lower heat a bit and cook for 2 minutes. Then add the cream and continue cooking for another 2 minutes, whisking constantly. Remove from heat and add the vanilla and rum. Add a pinch of salt, to taste. Cool.

To serve, gently slice the profiteroles in half crosswise and put 3 on each plate. Place a scoop of Egg Nog Ice Cream into each profiterole and replace the tops. Drizzle lightly with the Rum Sauce and serve immediately.

Friday, March 5, 2010

Yogurt & Banana Caramel Mousse


I love mousse. I love the light airiness that seems to float off the spoon. I love that it’s such a great medium to showcase simple ingredients. So when I heard about an interesting way to make banana caramel, I immediately thought it might be a great thing to try as the base for a mousse.

Caramel syrups and sauces are some of the basic tools of pastry. Making caramel can be tricky until you’ve put in some practice to learn how it works. After working for a pastry chef who used caramel quite a bit to flavor lots of different dessert elements, I really got comfortable with it because I had to make it every day. Since caramel adds such a wonderful flavor to so many pastries and desserts and can be flavored in a number of different ways, I hope you’ll try to master its production.

Once you’re able to recognize the size of the bubbles forming on the surface to gauge when it’s ready to color, how quickly it cooks from that point forward and how dark it should go, it’s really pretty simple. It’s also important to bear in mind the darker the caramel, the less sweet and more complex the flavor. But take it too far and it will taste burnt and bitter.

Here are some simple suggestions and techniques to produce caramel:

• I use medium high heat and watch it closely.

• To prevent crystallization, have a glass of water and a pastry brush handy to wash down the sides of the pan a couple of times as the sugar is heating up.

• Once caramel starts to get near the right color, there are 2 ways to stop the cooking process: from below and from above. To stop the cooking of caramel from below, you can set the bottom of the pan in ice water to cool off the pan. However, it will stop cooking much faster if you cool from above, which means adding another ingredient, such as room temperature cream or water. For caramel syrup, you would add water. For caramel sauce you would add various ratios of cream and butter or orange juice, liquor, cider or other flavored liquid. You can expect the mixture to expand and sputter quite a bit for about a minute, so caution is in order. Wear an oven mitt or rubber glove if you’re worried about getting burned from the caramel or from the steam. The other important thing to remember about caramel is never turn your back on caramel once it begins to show the slightest hint of color. For better control, I like to let it get to a medium amber or honey color and when it starts to smoke, I take it off the heat. At this point, the temperature of the caramel is so high that it will continue to cook, darken and smoke. When it looks like it’s reached the right color after about another minute or so, I add the next ingredient to stop the cooking.

• If you’re adding an ingredient to stop the cooking, make sure the pan is big enough to contain the expansion and sputtering.

• Ingredients added to stop the cooking should be at room temperature to avoid seizing the caramel.

• If you're adding cream, you can steep with spices for additional flavor. Vanilla or liquor also add flavor and should be added last, always off the heat.

• Salting – I think salt is an important ingredient in good caramel. Add to taste when the caramel has cooled.

• Always remember that you are cooking the sugar to a very, very high temperature. Caramel burns are quite painful because the cooked sugar will stick to your skin. Always use an abundance of caution.

• Caramel syrups are handy to have on hand for flavoring ice cream, sauces, custards and lots of other dessert elements. The sugar to water ratio is 1 to 1. You cook the sugar with just enough water to moisten and then add the rest when you want to stop the cooking.

• Storing - Refrigerate and keep caramel sauce for about 3 weeks. Caramel syrup will keep for quite a long time.

To make Banana Caramel for this recipe, some very ripe bananas are pureed and used to stop the cooking of the caramel. The mixture bubbles up and sputters vigorously but smoothes out nicely. If you’re a fan of bananas, you’ll enjoy this combination. Since the Banana Caramel Mousse is quite rich, I pair it with a plain Yogurt Mousse. They complement and balance each other quite well.


Bench notes:

- To prevent clumping when blooming gelatin, always sprinkle it slowly into cold water rather then pouring cold water on the powder. I prefer sheet gelatin, which comes in 2 strengths (silver and bronze), but I recognize that most home cooks use powdered.
- Be sure your bananas are quite ripe. The skins should have plenty of brown spots and the bananas should be quite soft with a strong scent of ripeness.
- The chocolate shavings really add to the flavor, so don’t skip this garnish.
- If you enjoy mousse, be sure to try Herme’s Chocolate Mousse, a supremely amazing dessert.


Yogurt & Banana Caramel Mousse
Makes 6 servings

Yogurt Mousse


2 C (16 oz) plain Greek yogurt
1/2 C sugar
1 t lemon juice, to taste
1 1/2 t gelatin
1 C heavy cream

Banana Caramel Mousse

2 very ripe bananas
1 C sugar
1/2 C water
1 T butter
1/2 t vanilla
pinch of salt
3/4 t gelatin
3/4 C heavy cream

bittersweet chocolate shavings for garnish

For the yogurt mousse, whisk together the yogurt and sugar. Add the lemon juice.
Bloom the gelatin in a small bowl with 1 tablespoon of cold water.
Whip the heavy cream just to a very soft peak.
Liquefy the gelatin by placing the bottom of the bowl in a pan of simmering water.
Add the gelatin to the yogurt mixture and blend thoroughly.
Fold in the whipped cream.
Pour the Yogurt Mousse into a serving dish or 6 individual parfait glasses.
Chill for about 1 1/2 hours or until set.

To make the banana caramel, puree the 2 ripe bananas until they are the consistency of a smooth pancake batter. Pour into a bowl and set near the stove.

Bloom the gelatin in a small bowl with 1 tablespoon of cold water.

Whip the heavy cream just to a very soft peak and keep in the refrigerator.

Bring the sugar and water to a boil in a saucepan. Continue boiling until the sugar starts to turn a medium amber color. Pull off the heat and let it continue to darken a bit more. Once it reaches a medium dark caramel, carefully pour in the pureed bananas. Stir with a long handled utensil like a wooden spoon until thoroughly combined. If there are any clumps of caramel, return to low heat until the clumps are melted and the mixture is smooth. Remove from heat and add butter, vanilla and salt to taste.

Liquefy the gelatin by placing the bottom of the bowl in a pan of simmering water.

Add gelatin to banana caramel and let sit for a few minutes to begin to firm up just a bit, stirring occasionally.

Fold whipped cream gently into caramel-gelatin mixture until streaks disappear. Pour over Yogurt Mousse and chill for a couple of hours until set. To serve, garnish with chocolate shavings.

Friday, September 7, 2007

Of Mirth and Meringue


If you ever want to have some silly fun, whip up a batch of meringue. As far as the basics are concerned, it’s a great lesson on whipping egg whites and one where you can immediately see the enchanting results – billows and billows of white clouds that look like they’re about to float far, far away into the stratosphere.

Meringue is a fundamental pastry tool you can use to garnish a pie or a tart, make marshmallows, pipe meringue cookies, create some faux mushrooms for your Bûche de Noël or fashion an airy Pavlova.

A dessert created for Anna Pavlova, the famous Russian ballerina of the early 20th century, the Pavlova is a light cloud of meringue that is dried in the oven and typically topped with whipped cream, fresh strawberries, passion fruit, and kiwi. But create your own favorite fruit combinations. Here I use fresh berries because they were calling out to me at the farmer’s market and because I love them. Unequivocally.


Bench notes:
- Egg whites are easiest to separate when cold, but achieve their best volume at room temperature.
- There are three methods for making meringue: whipping the egg whites when they are at room temperature (Classic Meringue); warming them with sugar before they are whipped (Swiss Meringue); and whisking in a cooked sugar syrup after they’ve been whipped (Italian Meringue). They all have different uses and when you vary the level of sugar added, you get variations in the final texture. Bake a cloud of meringue at a low temperature for a couple of hours to dry it out and it becomes a crunchy dessert element for added texture.
- When whipping egg whites, fat is the enemy. Be sure your mixing bowl and whisk are clean, dry and free of any fat. For example, there should not be any traces of egg yolk, butter, oil, nuts, or chocolate present. If there is even a speck of fat, egg whites will not whip. At all. Minutes will tick by and you will have a soupy mess. However, once they’ve been successfully whipped to a stiff peak, you can carefully fold in chopped chocolate or espresso, for example. Or fold in nuts to create a disc of dacquoise.
- Most recipes for meringue include salt and/or an acid. A pinch of salt helps to firm up the egg protein. An acid, such as cream of tartar, lemon juice or vinegar, stabilizes the meringue by preventing the bubbles from bursting once you stop beating. Cream of tartar is an acid salt.
- Once egg whites are whipped to the desired consistency, work quickly to use them as intended. They will start to deflate if allowed to sit.
- You can make smaller Pavlovas for individual platings or pipe bite-sized meringues filled with crème fraiche and topped with a berry.
- An optional raspberry sauce or coulis adds an additional layer of fruity tartness to balance the sweetness of the Pavlova.


Pavlova
6 to 8 servings

4 egg whites @ room temperature
1 C sugar
pinch of cream of tartar

2 pint of raspberries
1 pint of blackberries

1 c heavy cream, chilled
1 T sugar
1 t pure vanilla extract

Raspberry Coulis (optional)
1 pint of raspberries
sugar to taste
lemon juice to taste

Preheat oven to 180 degrees. Trace two circles with an 8” diameter on a piece of parchment paper using a dark pencil. Place parchment pencil side down on a baking sheet.

Place the egg whites in the bowl of an electric mixer and whisk on medium low speed. Add cream of tartar when they are foamy. Increase speed to medium high and continue whisking until they form a soft peak. Slowly add sugar a couple of tablespoons at a time and continue whipping until meringue forms very stiff shiny peaks that hold their shape.

Drop meringue by spoonfuls onto the parchment-lined baking sheet. Spread to the penciled outlines, using a light touch and letting it take its own cloud-like form. Place in the oven and bake for about 1 1/2 to 2 hours or until meringue easily releases from the parchment. Turn off the oven, leaving the oven door closed, and continue to let meringue dry while the remaining ingredients are prepared.

Place 1 pint of raspberries in a blender or food processor and puree. Add sugar to taste and a splash of lemon juice and blend thoroughly. Taste and adjust sugar and lemon juice as necessary. Strain into a container and set aside until ready to serve.

Whip the cream. When it starts to thicken, add the sugar and vanilla and continue to beat just until it forms soft peaks.

Place a disc of meringue on a serving platter. Spread a layer of cream and distribute half the berries. Top with the second meringue and a second layer of whipped cream and berries. Serve immediately with raspberry coulis on the bottom of each plate or on the side.


meringue cookie photography courtesy of Jennifer Kanter/Semaphore Fine Preserves & Films

Friday, August 31, 2007

Peaches Royale


Just when I thought I would never get over the end of apricot season, I seem to have found instant resuscitation in the bountiful glories of peaches and berries. Fresh, sweet, tart, colorful, these are some of the best tools in my pastry toolbox.

In one of my recent pastry reveries, I was thinking about Peach Melba. Created in 1892 at the Savoy Hotel by Auguste Escoffier for the famed Australian opera star Dame Nellie Melba, Peach Melba is simply composed of a dish of vanilla ice cream with fresh peaches and raspberry sauce. But I wanted something slightly saucier - a dish of peaches layered with raspberries and sabayon, an easy, quick, elegant and utterly delicious expression of the natural world.

Sabayon, or zabaglione in Italy, is a light dessert cream made by gently whisking egg yolks, sugar and wine over a water bath. It is easy to prepare, takes just a few minutes and is a perfect complement for just about any fruit.

Legend has it that zabaglione originated in 16th century Florence in the court of the Medici. The classical Italian flavoring for zabaglione is Marsala, but you can easily vary the type of wine used. Try it with your favorite fruity wine, Muscat, port, Madeira, cognac or champagne. Since zabaglione takes its primary flavor from the wine, use only the best and adjust the sugar in the recipe according to the sweetness of the liquor you choose. The texture of the sauce can also be loosened with whipped egg whites or whipped cream. Let your imagination work according to the fruit you are pairing.

So let’s console ourselves with a pillow of Peaches Royale. Only nine months until apricot season.

Bench notes:
- For the sabayon, choose a wine that will go well with peaches and raspberries. I recommend a good quality fruity white wine, such as Beaume de Venise, Semillon, Sauvignon Blanc, Prosecco or champagne. I used a Monbazillac, a wine with aromas of honey, apricot, orange and a taste similar to Sauternes.
- Another variation on this theme is fruit gratin, which is fruit layered on top of a bit of pastry cream, topped with sabayon and lightly broiled. It’s a truly incredible thing of sheer beauty and complete speechless surrender.


Peaches Royale
6 servings

3 fresh ripe peaches
1 pint raspberries
sugar to taste

4 egg yolks
1/4 C sugar
1/2 C fruity white wine
1/2 C heavy cream, chilled

Peel the peaches if you prefer and slice into thin wedges. Toss peaches and raspberries with about 1 1/2 T of sugar, to taste.

Whisk egg yolks, sugar and wine in a stainless steel bowl. Place the bowl over a pot of simmering water, making sure that the bowl is not touching the water. Check periodically to see that the water is not boiling. Whisk constantly for 4 to 5 minutes, including the bottom and sides of the bowl. Cook until the mixture is thickened and expanded in volume. If you have a thermometer, you’re shooting for about 160 degrees. Remove from heat and continue whisking for a bit. Set aside to cool.

Whip the heavy cream just until soft peaks form. Fold gently into cooled sabayon. Divide into each serving dish. Top with fruit and their juices.
Voila.