Friday, March 28, 2014

Lemon Blueberry Rolls


Today's mantra: when life hands you lemons, make lemon curd.  Which is to say, since I was recently gifted with a bagful of lemons from my mother's tree, I couldn't be happier to find ways to use them in pastries and desserts.  I have a sneaking suspicion she feels the same way.

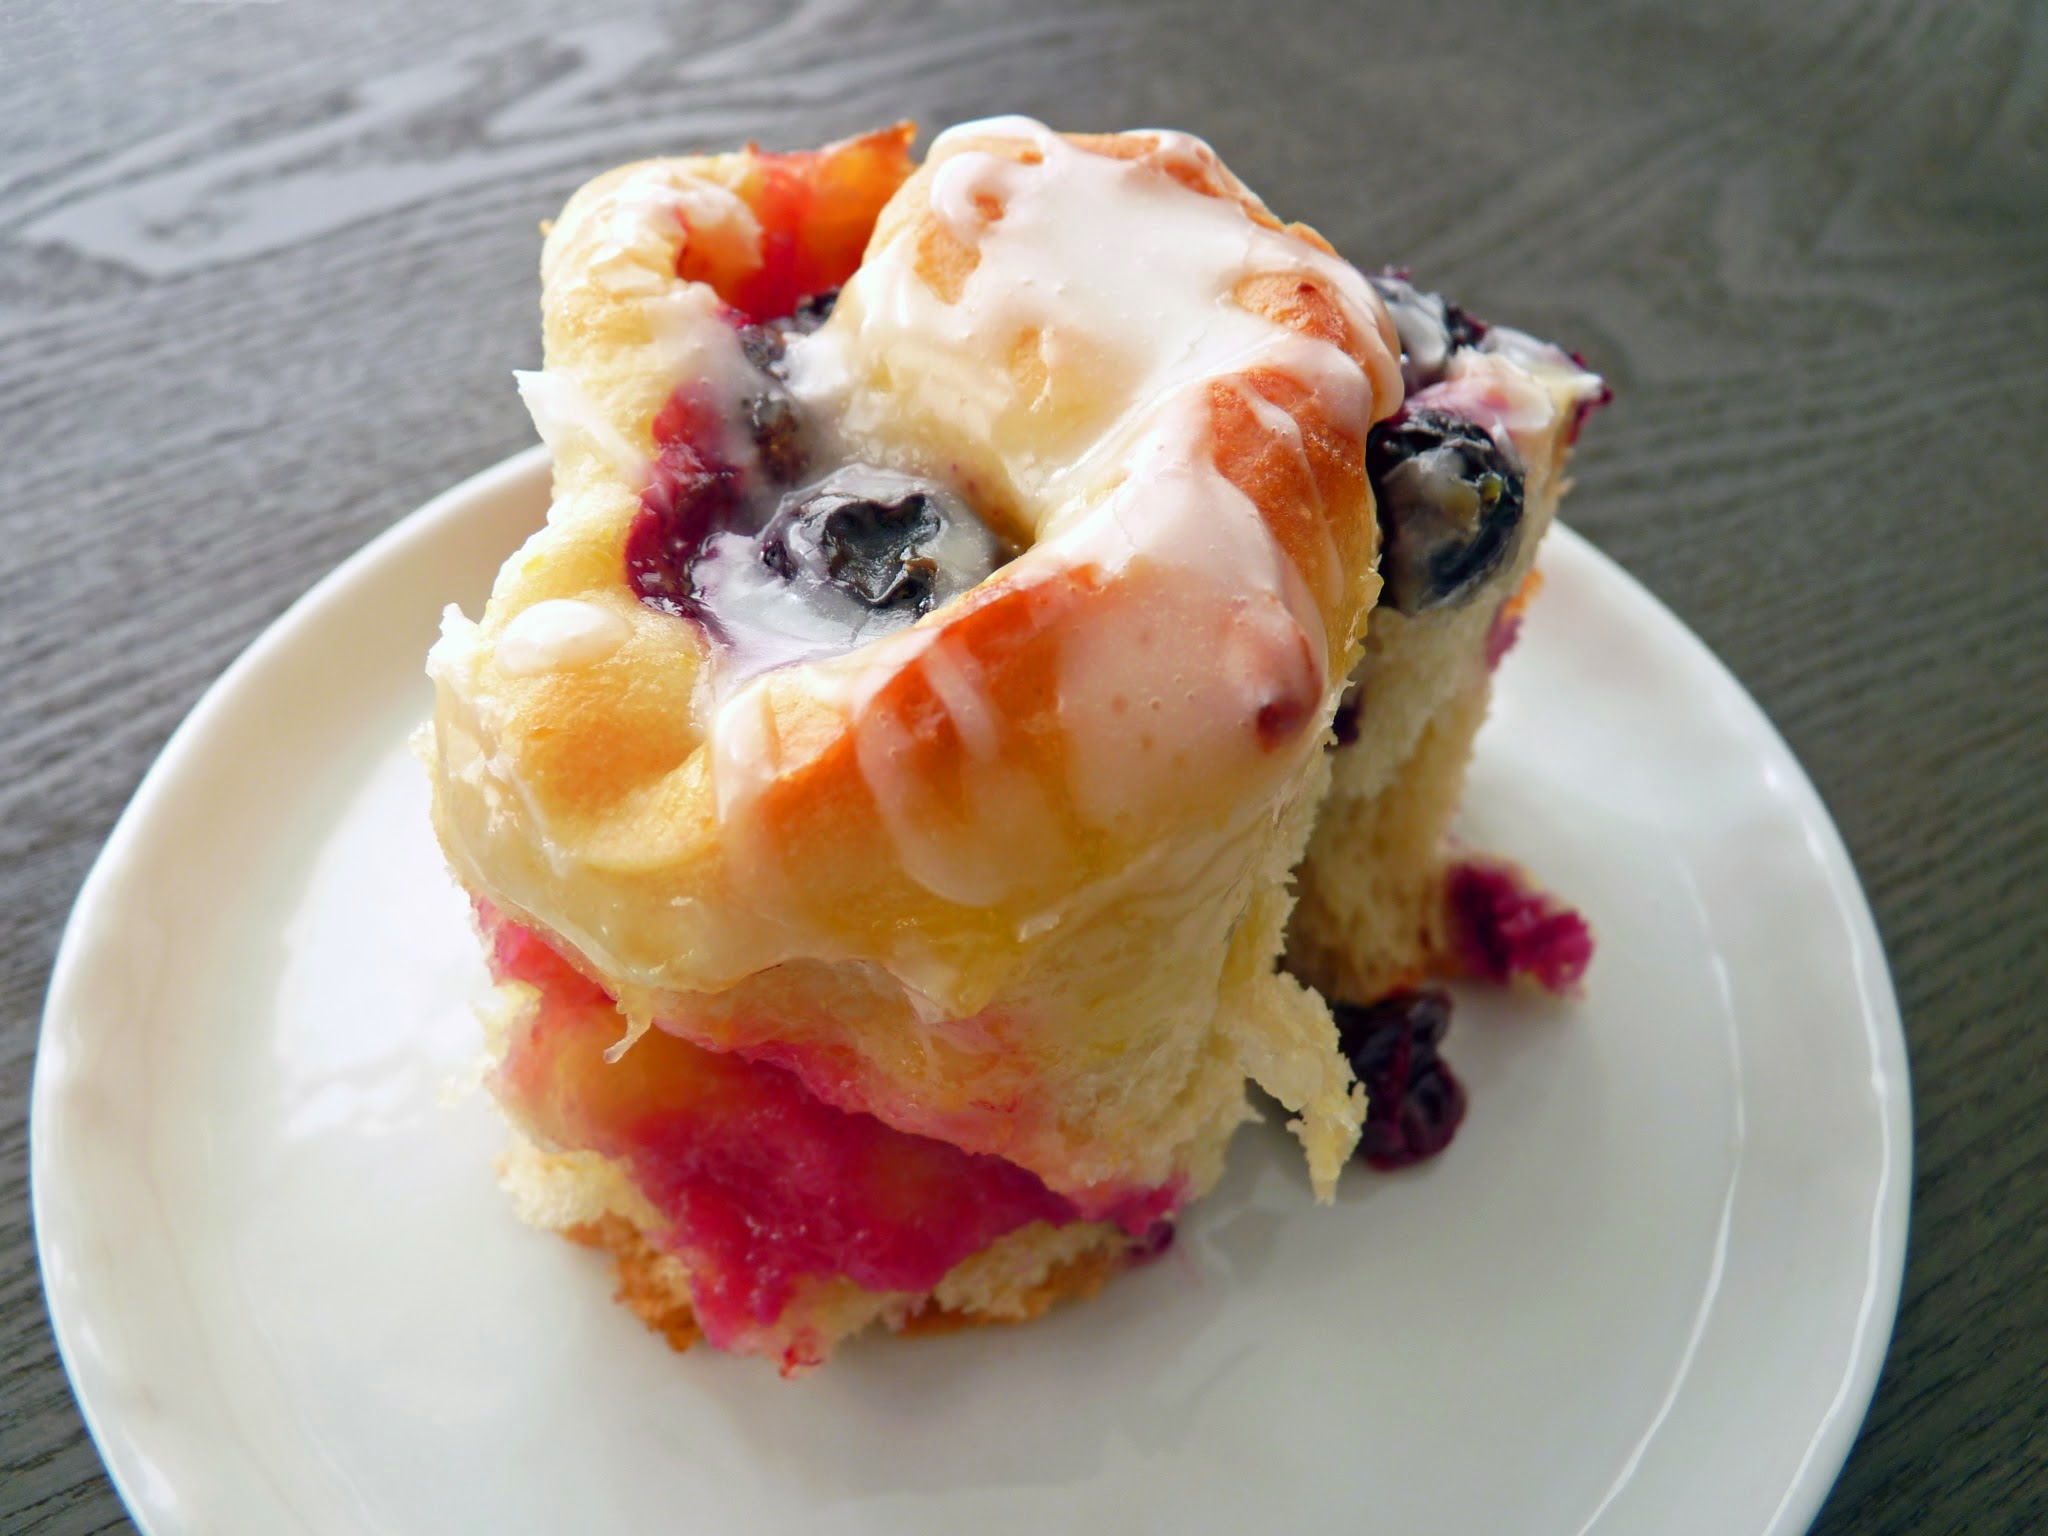
Spring always puts me in the mood for lemon and berries.  And as we head into April, May and June, there likely will be several brunch opportunities so I thought I'd make some yeast rolls that would fit right in.  With each tart and luscious bite, these Lemon Blueberry Rolls are a little diversion from the usual cinnamon.  But they are made the same way: instead of smearing the dough with butter, sugar and spice, you spread a thin layer of lemon curd and blueberries.  Roll it all up, cut into slices and set them aside in a warm place to go through their second rise.  Then into the oven for about 25 - 30 minutes to fill your home with an irresistible aroma, a grand reward in and of itself.

Making lemon curd takes about 10 minutes.  Simply whisk together lemon juice, zest, sugar and eggs and cook over a double boiler or bain marie for about 3 - 5 minutes until thickened.  Add butter and let it cool.  It can be made ahead and stored in your refrigerator.  It's great spread on toast, scones or biscuits or used as a topping for vanilla ice cream or plain yogurt.  Fold it into whipped cream and serve with fresh strawberries or gingerbread, swirl it into cheesecake or use as a filling for sandwich cookies, a lemon tart or between cake layers.

If you're leery of working with yeast, this is a pretty simple formulation and one that isn't likely to cause any panic.  The simple and most important rule to follow is to dissolve your yeast in liquid that is 110 - 115 degrees F.  It should feel warm, not hot.  I usually just let my tap water run to its hottest temperature, measure out what I need and place a thermometer in the measuring cup.  I let it cool just a bit and when it reads 110 - 115 degrees, I whisk in the yeast and then a pinch of sugar.  (Yeast feeds on sugar but yeast activity may decrease if it comes into direct contact with sugar or salt, so dissolve the yeast in water first, then add the sugar.)   I then set it aside to proof for about 10 minutes while I prepare my baking pan and assemble all the other ingredients.  By the time I'm set to work on the recipe, the yeast is foamy and ready to go.

I do hope you'll stretch your pastry skills and get into the swing of working with yeast.  It's such a joy to experience the magic of seeing how it transforms and then finally pulling out a luscious pan of freshly baked yeasted pastry.

Here's to the coming of Spring!


Bench notes:
- The recipe for lemon curd makes twice as much as you'll need for this recipe.  Store in an airtight container and press a piece of plastic wrap onto the surface.  Cover and refrigerate up to 1 week.
- If you like lemon curd with less pucker, add the zest of just 1 lemon.
- Be sure to use a non-reactive heatproof bowl when cooking the lemon curd, such as stainless steel or glass.  Acidic or alkaline ingredients cooked in aluminum will pick up a metallic flavor and discolor.
- Cook the lemon curd, stirring constantly, until it coats the back of a spoon but is still liquid enough to pour (It will continue to thicken as it cools).  Unlike pastry cream, which has flour and/or cornstarch to stabilize it, do not let lemon curd come to boil or it will curdle. Cooking it over a bain marie helps to control the temperature.
- Lemon curd can be frozen in an airtight container for several months.
- Don't be tempted to use more than about 1/2 cup of lemon curd in this recipe or your rolls will be too gooey and the centers won't bake thoroughly.
- Everything you wanted to know about working with yeast is here from Red Star.  Lots of links and troubleshooting info.
- If you're not sure whether the dough is ready after the first rise, just press your index finger about 1 1/2" into the dough.  If the indentation stays, the dough has completed the first rise.
- After the first rise, the dough is "punched down" to release the carbon dioxide and even out the temperature.  But rather than punching, gently press the air out with your hands.
- If you're using a glass pyrex baking pan, check the rolls after about 20 minutes in the oven.  Glass conducts heat more efficiently than metal.
- I place the pan on a baking sheet before it goes into the oven to prevent the bottom of the rolls from getting too brown.
- More really delicious yeast breads: Chocolate Orange Cardamom Pull-Apart, Whole Wheat Honey Oatmeal Rolls, Challah Knots and Pumpkin Cinnamon Swirl Yeast Bread.


Lemon Blueberry Rolls
Makes 12 rolls

Lemon Curd
Makes 1 - 1 1/4 cups

1/2 cup (4 oz) lemon juice
zest of 2 lemons
1/2 cup + 2 tablespoons (4 1/2 oz) sugar
2 egg yolks
1 egg
2 oz (4 tablespoons) unsalted butter @ room temperature

Yeast Dough
1 pkg (2 1/4 teaspoons) active dry yeast
1/4 cup (2 oz) warm water (110 -115 degrees F; warm but not hot on your wrist)
pinch sugar
1/2 cup (4 oz) milk
3 oz (6 tablespoons) unsalted butter, cut into 1/2" pieces
1/4 cup (1 3/4 oz) sugar
1/2 teaspoon salt
1 1/2 teaspoons vanilla
2 eggs @ room temperature
2 3/4 (13 3/4 oz) - 3 cups (15 oz) flour

1/2 cup lemon curd
1 1/2 cups (11 oz) fresh blueberries

1/3 cup (40 g) powdered sugar
1 tablespoon milk
1 1/2 teaspoons lemon juice
few grains salt

For the lemon curd, whisk the lemon juice, zest, sugar and eggs in a non-reactive heatproof bowl.  Place the bowl over a pan of simmering water, making sure the bottom of the bowl isn't touching the water.  Cook, stirring constantly, until the mixture begins to thicken, about 3 - 5 minutes.  Pour through a strainer into a bowl and add the butter.  Stir thoroughly to combine.  Press a piece of plastic wrap onto the surface and set aside to cool completely.  Refrigerate.

For the dough, whisk together 1/4 cup warm water (110 - 115 degrees F), yeast and a pinch of sugar.  Set aside for 10 minutes.

Place the milk, butter, sugar and salt in a saucepan on low heat just until the butter is melted, whisking to combine all the ingredients.  Take off the heat, add the vanilla and cool to room temperature.

Combine the proofed yeast with the milk mixture.  Whisk in the eggs.  Switch to a fork and stir in 2 3/4 cups of flour.  Keep adding 1 tablespoon of flour at a time until the dough is no longer sticky.  Transfer to a lightly floured work surface and knead until the dough is soft and elastic, about 8 - 10 minutes.

Wash and dry the mixing bowl and lightly grease with canola oil.   Place the dough in the bowl, turning it over once to lightly coat the entire surface with oil.  Cover the bowl with a piece of plastic wrap and set in a warm draft-free place to rise for 2 hours.

Lightly grease a 10" round cake pan or a 9" square pan and line the bottom with parchment.

When the dough has completed its first rise, press down on it to release the air.  Transfer to a lightly floured work surface and dust the dough lightly with flour.  Roll out to a 12" x 15" rectangle, lightly dusting with flour as needed.

Using 1/2 cup of lemon curd, spread a thin layer over the surface of the dough to within 1/2" of the top of the long edge.  Evenly distribute the blueberries.  Starting with the long side nearest you, roll the dough into a log.  Slice into 12 equal pieces using a serrated knife.  Arrange them in the prepared baking pan, leaving enough space around each one for the second rise.  Set the pan in a warm place for 1 hour.

When the rolls are just about finishing with the second rise, preheat the oven to 350 degrees F.

Place the pan on a baking sheet and bake until the rolls are a golden brown, about 25 - 30 minutes.  Place the pan on a wire rack to cool for about 15 minutes.  Remove from the pan and let cool completely.

For the glaze, whisk the powdered sugar, milk, lemon juice and a few grains of salt until smooth.  Drizzle over the top of the cooled rolls.

Friday, March 21, 2014

Coffee Caramel Frozen Mousse with Chocolate Crunch


Placing a spoonful of mousse on your palate is one of the most ethereal experiences on earth.  Light and foamy, creamy without being too rich or too sweet, it's one of my favorite desserts any time of the year.

Don't let the elegance and the French throw you off.  Mousse is incredibly easy to prepare.  All you need is a few minutes and your favorite ingredients and you're off and running.

Since coffee, caramel and chocolate are among my cherished tools, this mousse makes me swoon.  It's simply egg whites whipped with brown sugar to deliver some caramel notes and whipped cream folded together with instant espresso powder and Kahlua.  For some texture, I melted chocolate and mixed in Rice Krispies.  Easy peasy.

This is a dessert for those moments when you find yourself desiring luxury without a lot of guilt attached.  It's simple and sure to send you straight to heaven.

Bench notes:
- You will get more loft if your egg whites are at room temperature.  To start, whip the whites on medium speed to a foamy soft peak to unfold and stretch out the proteins before adding the sugar.   Increase the speed and drizzle in the sugar a few sprinkles at a time to ensure they are stabilizing the foam.  Beat the meringue to a stiff peak, which means it should stand up when lifted without falling over.
- Fat is the enemy of egg whites, so beat them first to ensure there is no fat remaining on the whisk.  If there is even a speck of fat, egg whites will not whip.
- Heavy cream should be beaten when cold.  Whip the cream just until soft peaks form.  The cream should have a soft lilt that is droopy.  If you go too far, it will become grainy.  Folding whipped cream also stiffens it more.
- I used 54% semisweet chocolate.  You can also use 72% bittersweet or 2 oz of each.
- Replace the Rice Krispies with toasted chopped almonds, hazelnuts or walnuts.
- As always, exercise caution when using raw egg whites.  They should be not served to small children, pregnant women or individuals who are at risk due to compromised immune systems.
- For more mousse pleasure, try the exquisite Pierre Herme's Chocolate Mousse and Lemon Mousse Tartlets.


Coffee Caramel Frozen Mousse with Chocolate Crunch
Makes about 6 servings

4 oz semisweet (54%) chocolate
1/2 oz (1 tablespoon) unsalted butter
1/2 cup (1/2 oz) Rice Krispies

1 tablespoon instant espresso powder
1 tablespoon Kahlua
3 large egg whites (3 oz) @ room temperature
1/3 cup (2 1/2 oz) dark brown sugar, packed
1/2 teaspoon vanilla
1 cup (8 oz) heavy cream, chilled
1 1/2 tablespoons (20 g) granulated sugar

Line baking sheet with a silpat or a piece of parchment.  Finely chop the chocolate and place in a heatproof bowl with the butter.  Set the bowl over a pan with an inch or two of barely simmering water, making sure the bottom of the bowl isn't touching the water.  Stir to combine until melted.  Remove from heat and stir in the Rice Krispies.  Pour onto the lined baking sheet and spread out to about a 6" x 5" rectangle.  Chill about 1/2 hour to firm up.  When the chocolate is set, cut it into small bite-sized pieces.  Set aside about a third of the chopped chocolate for garnish.  Keep chilled until ready to use.

Combine the espresso powder and the Kahlua and set aside.

Whip the egg whites until they are opaque and hold soft peaks.  Increase to high speed and add the the brown sugar a little bit at a time.  Add the vanilla and beat until the meringue holds stiff glossy peaks.

Whip the chilled cream with granulated sugar just until it holds soft peaks.

Using a rubber spatula, gently fold about 1/2 cup of whipped cream into the meringue.  Fold in the Kahlua/espresso.   Scrape the remaining cream on top and fold everything together until there are just a few streaks left.  Fold the chopped chocolate into the mousse until there are no streaks.

Pour the mousse into an airtight container.  Smooth the top until it's level and press a piece of plastic wrap onto the surface.  Cover and place in your freezer for 4 - 6 hours or overnight.

To serve, garnish with remaining chopped chocolate and serve immediately.

Friday, March 14, 2014

Best Chocolate Chip Cookies from J. Kenji Lopez-Alt


Does the world really need another chocolate chip cookie recipe?  To be honest, I've often wondered that myself.  But when you think about all the particulars of personal preferences for flavor, texture, density, edges vs. center, etc., etc., etc., it's clear we need different formulations that appeal to the myriad of individual must-haves.  And since chocolate chip is the quintessential American cookie, there's a billion solutions out there to answer the search for the perfect one.

It all started when I happened to notice a tweet from J. Kenji Lopez-Alt, the Chief Creative Officer of Serious Eats and author of The Food Lab, which linked to a piece he'd written about his search for the perfect chocolate chip cookie.  The article reads like both a science experiment and a love letter, chock full of useful information and detailed notes about his process for tackling lots of questions about cookie-making.  At the end of his research, there's his recipe for the ultimate formula for The Best Chocolate Chip Cookie.  It's a fun read for pastry geeks and, if you're anything like me, his professed love for his final product will have you heading to your kitchen immediately.  When you see what a thorough and committed job he's done, you can't help but be persuaded to join in the fun and satisfy your own curiosity about his journey to cookie greatness.  I strongly recommend checking out his very useful discussion of all the elements that contribute to a delicious cookie.  His ideas and suggestions will likely affect the way you think about methods and ingredients.

To be sure, it's not essential or even likely that you choose just one and only one version of chocolate chip cookie to adore.  But I really love this cookie.  I think it has all the right ratios of ingredients.  The flavor is a really fantastic combination of buttery toffee with pockets of melted chocolate, hints of butterscotch and just the right balance of salty/sweet.   The texture is crisp around the edges with a chewy middle.  It's absolutely become my favorite recipe of its kind.

There are a couple parts of his method that some might consider a bit fussy.  But once you go through the process and taste the results, it won't seem like any fuss at all.  It does require extra time to let the cookie dough rest at least 24 hours in the refrigerator to break down the starches and proteins and develop the flavor.

Here's how these cookies are different: You start with browned butter, which is a BIG win.  It's one of my favorite techniques and adds so much extra flavor to the mix.  However, it does also add to the prep time because the browned butter needs to re-solidify.

The other thing that makes a big difference in producing great flavor is the eggs and granulated sugar are beaten to the ribbon stage to be sure the sugar is completely dissolved.  Then the brown sugar gets added separately with the butter to heighten the caramel notes.

What I did differently:  I like cookies on the smaller side, so I used a #40 scoop (1 tablespoon).  And although I love chocolate, there was too much chopped chocolate for me.  I wanted to taste more cookie, so I cut back the chocolate from 8 oz to 6 oz.  I also added chopped pecans because NUTS.  I also scooped the dough before refrigerating.  As you can see from my photos, I got smooth rather than the desired jagged tops.  On my second testing, I made the suggested size cookies, let my butter cool until it was solidified and also tried bumping up the temperature of the oven to 350 degrees F.  But those alterations didn't seem to help. Nevertheless, my cookies were super delicious and wonderful.  I'll keep trying for the desired look and texture.

So go and have some fun delving into J. Kenji Lopez-Alt's lovely adventure.  And then try out his formulation and see what you think.


Bench notes:
- Be sure to read the comments section.  He answers a lot of questions there.
- For a good illustration of how to brown butter, see the guidance at Simply Recipes.  Use a stainless steel pan so you can watch the butter carefully; it can take just a moment to burn.  Once you begin to detect a nutty aroma, it's just about ready.  I lift the pan off the heat and swirl for more control if I think it's browning too fast or nearly done.  It will continue to brown once you take it off the heat.  Pour immediately into a heatproof bowl to stop the cooking.
- Since browned butter loses some of its water content, an ice cube (2 tablespoons of frozen water) is added back in to provide that essential moisture.
- The cooled browned butter should be opaque and firm around the edges.
- I didn't sprinkle any additional salt after they came out of the oven but I really liked the amount of salt in the cookie as is.  I'll definitely try a light sprinkle of coarse sea salt next time just to see what happens.
- I used 54% semi-sweet chocolate and table salt.
- Store cooled cookies in an airtight container up to 5 days.


The Best Chocolate Chip Cookies
adapted from J. Kenji Lopez-Alt at Serious Eats
Makes 28 cookies

Note: For best results, ingredients should be measured by weight

8 oz (16 tablespoons) unsalted butter
1 standard ice cube (2 tablespoons frozen water)
10 oz (2 cups) flour
3/4 teaspoon baking soda
2 teaspoons kosher salt or 1 teaspoon table salt
5 oz (3/4 cup) granulated sugar
2 large eggs @ room temperature
2 teaspoons vanilla extract
5 oz (1/2 cup + 2 tablespoons, tightly packed) dark brown sugar
8 oz semi-sweet chocolate, roughly chopped into 1/4" - 1/2" chunks   [I used 6 oz]
1 3/4 oz (1/2 cup) pecans, coarsely chopped   [my addition]
Coarse sea salt for garnish   [I skipped this]

Cut the butter into small pieces and melt in a saucepan over medium heat.  Swirl the butter carefully as the foam subsides and the butter begins to brown.  The flecks on the bottom of the pan will turn golden brown.  Lift the pan periodically to check on the browning and to avoid burning.  When the butter has turned a rich golden brown, pour immediately into a heatproof bowl to stop the cooking.  Whisk in the ice cube and place in your refrigerator to cool completely.

Whisk together the flour, baking soda and salt.  Place the granulated sugar, eggs and vanilla in the bowl of a stand mixer with the whisk attachment.  Whisk on medium-high speed until the mixture is pale and thickened and holds a thick trail for a few seconds when you lift the beater, about 5 minutes.

Exchange the whisk attachment for the paddle and add the brown sugar and cooled brown butter to the egg mixture.  Mix on medium speed just until combined, about 15 seconds.  Add the flour mixture and mix on low speed just until barely combined with some dry flour streaks, about 15 seconds.  Add the chopped chocolate (and nuts, if using) and mix on low until the dough comes together, about 15 seconds.  Transfer to an airtight container and chill at least overnight or up to 3 days.

To bake, preheat the oven to 325 degrees F with oven racks in the upper and lower third of the oven.  Line baking sheets with parchment.

Scoop out 3 tablespoons of cookie dough and place 6 - 8 per baking sheet.  Bake, rotating pans half way through, until golden brown around the edges but still soft, about 13 - 16 minutes.

Place the baking sheets on a wire rack to cool.  While cookies are still hot, sprinkle very lightly with course salt and gently press to embed.  Let cool for 2 minutes, then transfer cookies to a wire rack to cool completely.


Friday, March 7, 2014

Cornmeal Buttermilk Biscuits


If you just barely whisper the word "biscuits" in a crowded room, you will likely get everyone's attention.  When it comes to a breakfast or brunch indulgence, biscuits are among the first thing that comes to mind.  And there are so very many luscious biscuit recipes out there, it's fun to try something new every once in a while.

Biscuits are similar to scones, a tradition from the United Kingdom.  However, judging from early 19th century cookbooks, it appears the American South is the home of the biscuit, where they were intended to be sturdy enough to hold up to scooping any gravy lingering behind on a plate.

Biscuits are so easy and quick to make and require such basic and simple ingredients, it's a great pleasure to practice making them in your own kitchen.  They are so far superior to anything pre-made at the market, I'm betting you won't go back.  There really is nothing like a biscuit fresh out of the oven.

I've replaced some of the flour in this recipe with finely ground cornmeal.  It adds just a hint of flavor and texture and goes well with any other breakfast items on your plate.  I think these would also be great with a dollop of honey or a drizzle of maple syrup.


Bench notes:
- I like a finely ground cornmeal for these biscuits, which I buy at my local bulk grocery.  You can use medium ground for more texture.
- Cornmeal can sometimes have a bitter taste in baked goods, so the sugar is there to compensate.
- Work the butter in quickly so it stays cold and doesn't get absorbed by the flour.
- Cornmeal doesn't absorb liquid in the same way that flour does so the dough will be very soft and sticky, not like regular biscuit dough.  Dust your hands and work surface lightly with flour before handling and shaping the dough.
- You want to just pat the dough together until it holds its shape.
- I like to shape the dough on a piece of parchment so I can just lift or slide the whole thing onto a sheet pan without handling the biscuits too much.
- Once the biscuits are cut out, turning them upside down to bake gives them better loft.
- Also try the basic Buttermilk Biscuits recipe.


Cornmeal Buttermilk Biscuits
Makes 8 biscuits

1 1/4 cups (6 1/4 oz) flour
3/4 cup (3 3/4 oz) cornmeal  [I used finely ground]
1 tablespoon baking powder
1/4 teaspoon baking soda
1/2 teaspoon salt
1 tablespoon + 1 teaspoon (17 g) sugar
4 oz (8 tablespoons) cold unsalted butter
1 cup (8 oz) cold buttermilk

Preheat oven to 425 degrees F.  Prepare a baking sheet with parchment or a silpat.

Sift the flour, cornmeal, baking powder, baking soda, salt and sugar together in a bowl.  Cut the cold butter into 1/4" pieces and add to the flour mixture.  Toss to coat all the pieces of butter with flour.  Working quickly with your fingertips, pinch the butter into flat pieces, breaking it up until it looks like oat flakes.

Make a well in the middle of the flour and pour the cold buttermilk in the well.  Using a fork, fluff the flour into the center and gently stir and turn the ingredients until you have a soft wet dough.

Lightly dust a piece of parchment or a work surface and your hands with flour and scrape out the dough.  Gently pat it together with your hands into a rectangle that is about 9" x 5".

Use a bench scraper or a sharp knife to cut the dough into 8 biscuits, each one about 2 1/2" x  2 1/4".  Turn the biscuits over (bottom side up) and use a pastry brush to dust off any excess flour.  Place them bottom side up on the prepared baking sheet.  Brush lightly with melted butter.

Bake the biscuits until they are puffed and the bottoms are golden brown, about 12 - 14 minutes.  Serve warm.