Friday, January 29, 2010

Winter Fruit Crisp


There are some really lovely pears and apples in abundance right now. The pears I bought were especially succulent to eat as is, but since it’s been raining and overcast for several days over the last week, it’s time to conjure up a simple and comforting winter harvest dessert to shake the cold!

This Winter Fruit Crisp is a version made mostly of ingredients out of our good old-fashioned American pantry. To start, I use apples and pears tossed with lemon juice. Since I love tart things, I added a handful of dried cranberries. But for a spot of intrigue, I decided to throw in a few chopped dates, which are cooked for a couple of minutes with brown sugar, the spicy warmth of cinnamon and cardamom, a splash of Amontillado sherry, a perk of orange zest and finished with a dab of butter, all of which conspire to create a very lovely spicy caramel. For textural contrast, the streusel topping includes some oatmeal and walnuts.

The proportion and blending of these flavors and textures really plays out beautifully. Each bite has layers of luscious fruit, heady spice and soft, chewy, crunchy texture. The aromas and flavors that emanate from each spoon are very much in keeping with the season. It’s rustic and familiar but in a very different and delicious way, a quintessentially winter treat so good you could certainly offer it to your best friend. Or anybody you’d like to be your best friend. As the rain beats on our windows, light the fireplace and curl up with this Winter Fruit Crisp for a kind and soothing song of warmth and comfort.

Bench notes:
- Pears should be ripe but firm. I used D’anjou pears and Fuji apples.
- I used a Lustau Amontillado Los Arcos Sherry, which has a roasted nut bouquet and a trace of caramel.
- You could certainly omit the walnuts in the streusel, but they really do add a great earthy/toasty goodness.


Winter Fruit Crisp

Serves 6

3 apples
2 ripe pears
2 T freshly squeezed lemon juice (1 lemon)
1/4 C granulated sugar
2 T flour

1/2 C Amontillado sherry
3 T water
1/4 C brown sugar
zest of 1 orange
3/4 t ground cinnamon
1/2 t cardamom
pinch of salt
1 T butter
6 medjool dates, diced into small pieces
2/3 C dried cranberries

For the topping:

1/3 C flour
1/3 C light brown sugar, only lightly packed
1/4 t salt
1/2 C oatmeal
1/4 t cinnamon
1/2 t orange zest
1/2 C walnuts, chopped into small pieces
2 oz (1/2 stick) butter, diced into small pieces

6 4” ramekins or 1 9” baking dish

Preheat the oven to 375 degrees.

To make the topping, whisk together the flour, brown sugar, salt, oatmeal, cinnamon, orange zest and chopped walnuts. Place the butter in the mixture and work it in with your fingers until the mixture is combined into large crumbles. Set aside.

Peel, core and cut the apples and pears into medium-sized chunks. Place the fruit in a bowl and toss with the lemon juice, granulated sugar and flour.

Place sherry, water, brown sugar, orange zest, spices and salt in a saucepan over low heat. Bring to a boil for about 2 or 3 minutes, stirring. Add the chopped dates and dried cranberries and lower heat. Cook for another minute or two to blend flavors. Cool for a couple of minutes, then gently toss together with the apples and pears until all ingredients are combined.

Divide the fruit into 6 ramekins or pour into a baking dish. Sprinkle the topping evenly over the fruit and out to the edges of the dish so the fruit is completely covered.

Place the baking dish on a sheet pan and bake for about 30 minutes, until the topping is browned and the fruit is bubbling vigorously. Serve warm.

Friday, January 22, 2010

Ancho Ice Cream with Dark Chocolate Cake


The use of spicy chile powders in desserts is nothing new. There are all kinds of delicious cakes, cookies, truffles and ice cream that incorporate the kick of chile. Most of the time they include chocolate, but I thought I’d work on spicing up a vanilla ice cream because I wanted to see if I could get a true chile flavor that would be enhanced by a chocolate component. Since I love the taste of chile, I wanted to be able to distinguish the chile flavor on its own.

This recipe is inspired by all those tasty adventures. I start with a simple vanilla ice cream that contains a dusting of ancho and chipotle chile powders. It’s an intriguing combo that introduces a really wonderful smokiness with a little kick of heat in a creamy base. And when it cozies up to the chocolate, the full effect is remarkable. This is a very adventurous way to enjoy a nearly seamless blend of all the amazing sensations of spice, heat, deep dark cocoa and vanilla. It’s been one of my favorite recent experiments.


Bench notes:
- I used 1 teaspoon of ancho chile powder and 1/2 teaspoon of chipotle chile powder. I think it’s the right level of heat and I love the luscious and complex smokiness that the chipotle brings to the combination. But every palate is different, so add a bit of the chile powders at a time and see what you think. It’s going to increase in intensity as it sits in the base overnight but the flavor of the ice cream also mellows out nicely over time in the freezer.
- If you don’t want to make the cake, try the ice cream with the Chocolate Sauce.
- I can also imagine this ice cream with a light caramel drizzle.
- The high ratio of sugar to butter in the cake recipe requires you to cream the mixture for about 6 to 7 minutes until it is light in color and fluffy in texture. At first you’ll wonder how it’s going to come together but it will. Honest!
- I added 1/4 teaspoon of cinnamon to the cake recipe in keeping with the theme.


Ancho Ice Cream with Dark Chocolate Cake

Ancho Ice Cream

1 1/2 C whole milk
2/3 C sugar
pinch salt
5 yolks
1 1/2 C heavy cream, chilled
1/2 t vanilla extract
1 t Ancho chile powder, to taste
1/4 t – 1/2 t chipotle chile powder, to taste

Combine the milk, sugar and salt in a medium saucepan. Heat slowly over low heat, until the sugar is dissolved and the milk is steaming a bit, stirring to fully combine.

Whisk the yolks in another bowl.

Take off the heat and add some of the hot liquid into the egg yolks. Whisk constantly to combine and temper the two elements. Add the remaining milk and whisk thoroughly. Return to the saucepan and cook on low heat, stirring constantly with a wooden spoon or heatproof rubber spatula until it begins to thicken and coats the back of a spoon, leaving a clean trace.

Remove from heat and strain into the cold heavy cream, whisking to mix and cool. Add the vanilla extract and the chile powders, tasting as you go. Cover and chill thoroughly, preferably overnight.

Freeze in your ice cream maker. Pour into a clean airtight container, press a piece of plastic into the surface, cover and place in the freezer to firm up.

Devil’s Food Cake
adapted from The Simple Art of Perfect Baking by Flo Braker

Makes 1 8” cake

1 C cake flour
1/2 t baking soda
1/8 t salt
1/4 t cinnamon (optional)
1/4 C cocoa powder
1/4 C lukewarm water
2 oz (4 T) butter @ room temperature
1/2 C granulated sugar
1/2 C brown sugar
1 t vanilla
1 egg @ room temperature
1/4 C buttermilk @ room temperature
1/4 C water

Preheat your oven to 350 degrees. Prepare an 8” cake pan with butter, parchment and a very light dusting of flour.

Sift together flour, baking soda, salt and cinnamon.
Whisk cocoa and water together until thoroughly blended.
Combine buttermilk, vanilla and water.

Cream butter and slowly add sugars. Cream mixture until light and fluffy, about 6 to 7 minutes on a stand mixer. Stop and scrape down the bowl at regular intervals.
Add egg and blend well. Scrape down the bowl.
Add cocoa mixture and combine thoroughly.
Gently add dry ingredients in 3 additions, alternating with buttermilk, beginning and ending with the dry ingredients. Stop mixing just before it is fully blended and finish by folding gently with a rubber spatula until there are no streaks. Be careful not to over mix. Pour into prepared pan and smooth batter evenly.

Bake @ 350 for 20 to 25 minutes or until a toothpick tests with a few moist crumbs adhering. Cool 10 minutes. Run a thin bladed knife around the edges to loosen and turn out the cake. Cool completely.

Chocolate Sauce

1 C water
3/4 C sugar
3/4 C cocoa
1/2 t vanilla
1/4 C heavy cream
1/4 t salt, to taste

Bring water and sugar to a boil to dissolve. Add cocoa and salt and bring to a boil. Reduce heat to medium and boil for about 3 minutes, whisking constantly to prevent scorching. Once it has thickened, remove from heat and add vanilla and cream. Add salt to taste. Cool.

Friday, January 15, 2010

Whole Wheat Honey Cake


It’s back to basics. Although I’ve been reading various predictions about the latest food trends for the coming year, lately I’ve been more in the mood to keep things pretty basic. It’s been great to see a resurgence of wholesome ingredients over the last decade and I think as we begin a new one, it would be especially nice to start off with a rather simple but extraordinary Whole Wheat Cake. And in keeping with the theme, I’ve sweetened it with honey. Nothing could be more simply satisfying.

Whole wheat pastries of the past have often suffered from being too dense or dry, but I think recipe development using whole wheat flours has improved dramatically. For this cake, I use King Arthur Traditional Whole Wheat Flour for its superb flavor and easy availability. It’s milled from the hard red spring wheat of the northern Great Plains and uses 100% of the wheat berry, which provides the full flavor and nutrients of the bran and germ. I think it’s the best of its kind out there and I highly recommend it.

I also use honey to sweeten the cake. There are over 300 types of honey produced in the United States and it’s a great pleasure to explore so many distinctive varieties. One of my favorite indulgences is sourwood honey, which is widely regarded as the queen bee of honey. Tupelo, lavender, sage and eucalyptus are also favorites. Use your own favorite in this recipe.

If you’re in the mood to return back to the basics, I think you’ll find this pastry a beautiful reminder of the delicious goodness of quality whole wheat flour.


Bench Notes:

- I think this cake is very nice on its own. Once you try it, you’ll find it could also serve as a great basic palette for other natural complements. I think it would be really delicious with a fresh blackberry coulis or fresh fig compote in spring and summer or sautéed apples or pears or bananas in winter. You can top with sliced almonds for extra texture or add a pinch of spice to the batter. But do try it plain to see how it strikes you.
- The ground wheat germ in whole wheat flour contains oil that can become rancid over a long period of time. Whole wheat flour will keep 1 to 3 months at room temperature. For longer storage, place it in an airtight container or freezer bag in your refrigerator. It will maintain good quality for about 6 months in the refrigerator and up to 12 months in the freezer. If you place it in the freezer, be sure to bring it to room temperature before using it. The very cold temperature of frozen flour will discourage the baking properties of yeast or baking powder.


Whole Wheat Honey Cake

1 1/4 C whole wheat flour
1/4 C all-purpose flour
1 1/2 t baking powder
1/4 t salt
4 oz (1 stick) butter @ room temperature
1/4 C sugar
1/2 C honey
1 t vanilla
2 eggs @ room temperature
1/2 C buttermilk @ room temperature

Preheat oven to 350 degrees. Grease and flour an 8” x 2 ” cake pan.
Sift flours, baking powder and salt together.

Cream butter and sugar until thoroughly combined. Add honey and beat until light and fluffy, about 4 minutes, scraping down the sides of the bowl as needed. Add vanilla and blend.

Beat in eggs one at a time, mixing thoroughly after each addition.

Add a third of the flour mixture alternately with the buttermilk, beginning and ending with the flour. Scrape down the bowl to be sure everything is incorporated. Do not overmix. Pour into prepared pan and spread into an even surface with a spatula.

Bake for about 35-37 minutes until a toothpick tests clean. Run a thin knife around the edge of the pan to loosen cake. Cool in the pan on a wire rack for about 10 minutes. Invert cake, turn right side up and place on the rack until completely cool.

Honey Glaze

1/4 C honey
2 T water
pinch salt
1/2 T butter
1 C confectioner’s sugar, sifted
2 T fresh lemon juice, to taste

Place the honey, water and salt in a saucepan and warm over low heat until dissolved and blended. Whisk in the butter. Remove from heat and whisk in the confectioner’s sugar. Add lemon juice to taste. Place cake on platter and top with the glaze.

Friday, January 8, 2010

Chocolate Olive Oil Madeleines


The beginning of a new year always brings along with it some time to reflect on all the possibilities that lie ahead. If you find yourself sitting at your kitchen table gazing out the window and ruminating over last year’s accomplishments and this year’s opportunities, you just might enjoy some company. I highly recommend a Chocolate Olive Oil Madeleine to go along with your reverie. Not exactly Proustian, but every bit as delicious and enjoyable and thought-provoking.

The marriage of dark chocolate, extra virgin olive oil and salt is a miraculous one. Somehow these three ingredients have managed a rendezvous that can only be described as a thing of unique beauty. The complex earthy richness of cocoa blended with the rich bright lusciousness of extra virgin olive oil is only brought to a higher level with a generous pinch of salt. To make the best of it, I chose to highlight these ingredients in a simple recipe for madeleines to keep the flavors pure and easy without a lot of extra frill.

The recipe can be assembled in just a few minutes. If you love the sprightly tango of chocolate and fruity olive oil, these petite cakes will brighten your step. Here's to great memories!


Bench notes:
- I used California Olive Ranch Arbosana Extra Virgin Olive Oil for this recipe and it is perfect. It’s refined yet assertive enough to complement the cocoa. The results are really delicious.
- These bake pretty fast, so keep your eye on them. Mine baked in 11 minutes. The cakes should spring back when lightly tapped.
- Salt is very important in chocolate recipes. It really enhances the flavor considerably. I used 1/8 teaspoon of salt in the mixing and then added about half as much again when I tasted the batter. So I recommend that you slowly keep adding salt to taste once you have the batter blended.
- Madeleines are meant to be eaten the same day.


Chocolate Olive Oil Madeleines

1/2 C flour
1/4 C cocoa powder
1/2 t baking powder
1/8 t salt + another generous pinch, to taste
2 eggs @ room temperature
1/2 C sugar
1/2 t vanilla
1/4 C extra virgin olive oil

Preheat the oven to 375 degrees. Generously grease a madeleine pan.

Sift the flour, cocoa powder, salt and baking powder. Beat the eggs until thoroughly blended. Slowly add the sugar and continue beating until the mixture is thick and pale, about 3 minutes. Add vanilla. Using a rubber spatula, gently fold in the flour mixture until just combined. Fold in olive oil. Taste for additional salt.

Scoop into madeleine pan and bake for 10 to 12 minutes.

Cool the pan for a few minutes and then flip out the madeleines.

Friday, January 1, 2010

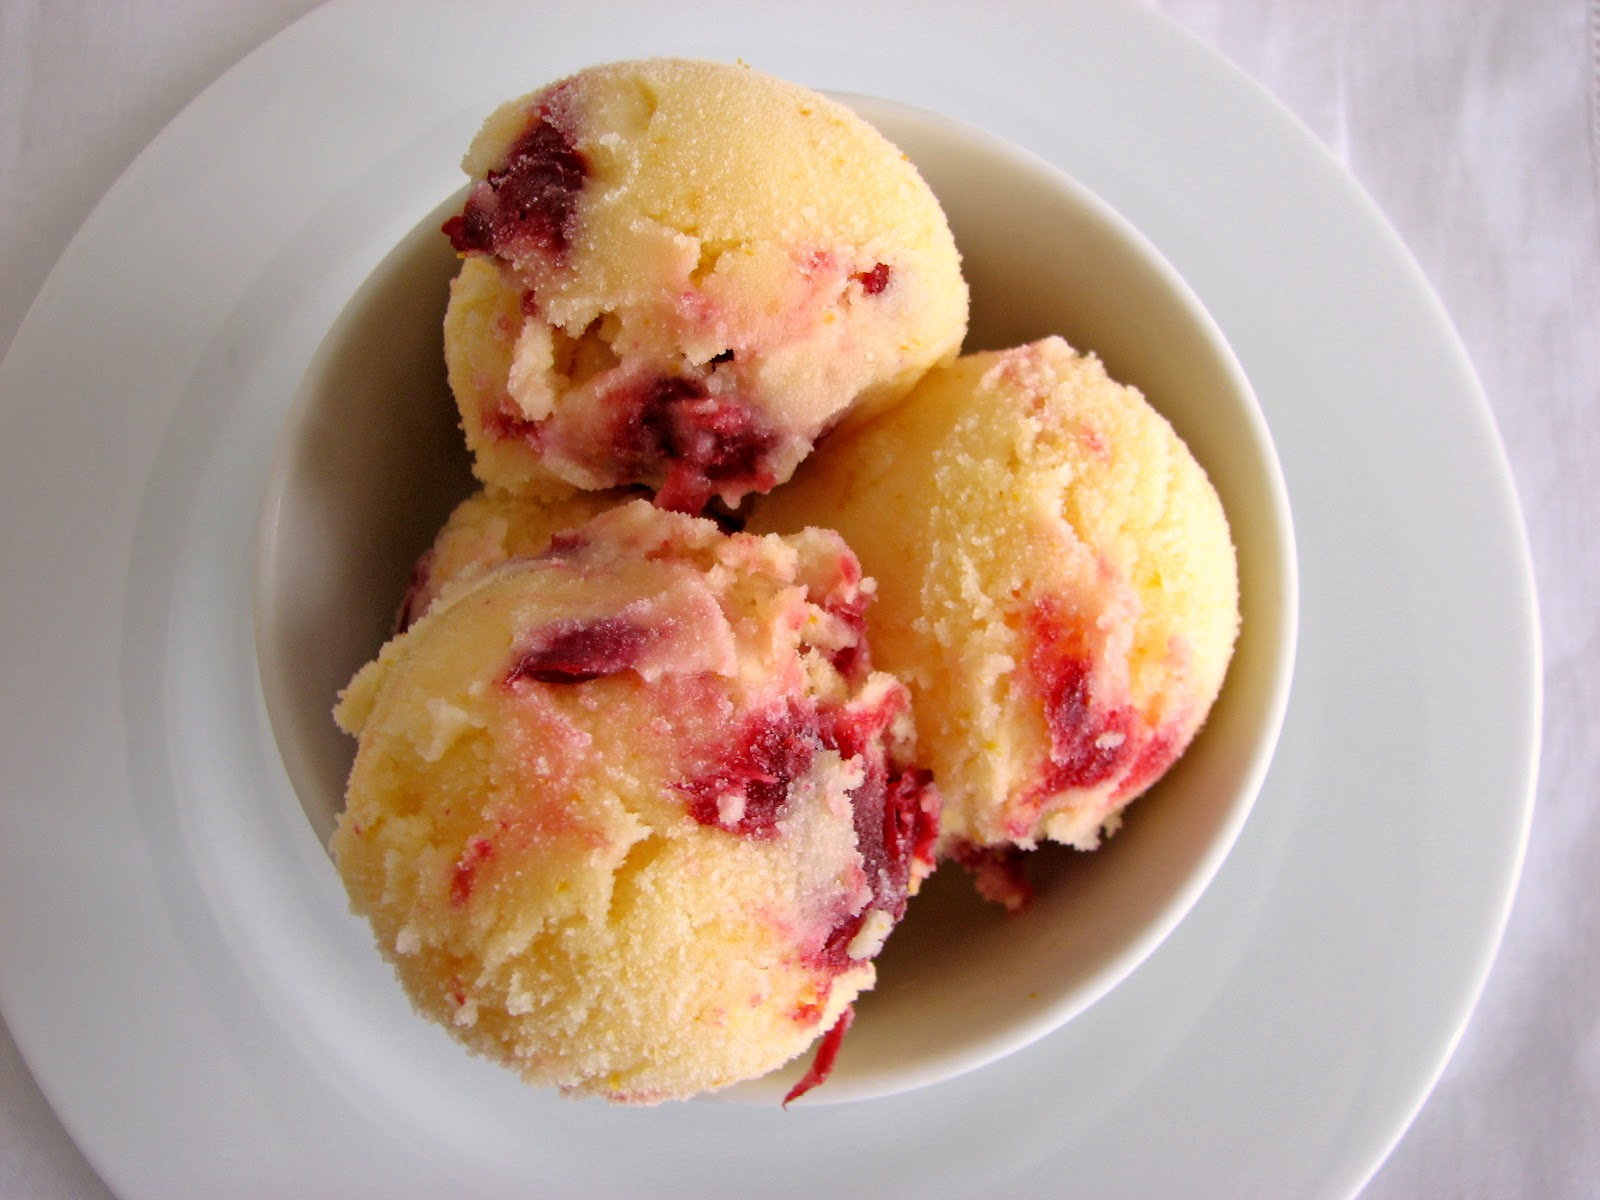
Tangerine Cranberry Sherbet


OK, it’s time for some color and spark! And along with that, a good measure of tartness along with the sweet.

Sometimes I get an ingredient in my head and I just have to do something with it. This is one of those times when I really couldn't resist the goodness of tangerines. Winter is the best time for gorgeous citrus fruit and tangerines in particular are delicious and juicy and plentiful right now. This bright sherbet brings the best of the season forward in a tantalizing mix of cool and tangy refreshment.

To my amazing family, wonderful friends, incredible blog buddies and all my fabulous readers, thank you so much for such a grand year full of inspiration and prosperity. It's been a great pleasure discovering all your beautiful blogs. Here's to another very exciting year full of optimism, hope, love and lots and lots of delicious little morsels. Happy New Year!

Bench notes:
- If you don’t have access to tangerines, substitute fresh orange juice.
- Sorbets and sherbets take a bit longer to churn in your ice cream machine. I churned this for about 20 minutes. It will still be soft and slushy but will firm up in your freezer.
- To preserve the bright color contrast, it’s best to layer the sherbet with the cranberry mixture. If you try to fold it in, the sherbet will turn a bright pink.
- Although you may be tempted, lowering the sugar in either component will result in an icy sherbet and icy cranberries. The lemon juice helps to balance the sweetness.
- I’ve also tried brown sugar in the cranberry compote for a more distinct flavor.


Tangerine Cranberry Sherbet

3/4 C sugar
zest of 1 large orange
2 C tangerine juice
1 T lemon juice
pinch salt
1 1/4 C whole milk
1/2 t vanilla

Cranberry Compote

1/4 C + 2 T sugar
1/4 C + 2 T water
1 t orange zest
2 t lemon juice
1 C fresh cranberries

To make the sherbet, combine the sugar and orange zest in a food processor and pulse until the sugar is aromatic and moist. Add the tangerine juice, lemon juice and salt and process until sugar is dissolved. Pour into a clean container. Whisk in the milk and vanilla. Cover and place in the refrigerator until thoroughly chilled.

Place all the ingredients for the Cranberry Compote in a saucepan and stir over medium low heat for about 10 minutes until the cranberries have softened and the mixture is thickened. Pour into a clean container, cover and place in the refrigerator to chill. The compote will thicken more as it cools.

Freeze the sherbet according to your machine’s instructions. It will be soft and slushy but will firm up in the freezer.

Pour about a third of the sherbet into a clean container. Dot the surface with the cranberry mixture. Pour another third of the sherbet on top. Add another layer of cranberries and then finish with the last of the sherbet. Press a piece of plastic wrap onto the surface, cover and place in your freezer until firm.

Thursday, December 24, 2009

Chocolate Caramel Tamales


Tamale making is a Christmas tradition in Latin America and in many areas of the West and Southwest, but I’d eat them any time of the year. There are so many versions of tamales from different regions and among different sub-cultures and each are delectable in their own way.

Since I’ve never made tamales before, I thought I’d get into the spirit and put together a dessert tamale that has all the wonderful flavors of Latin America. I've tucked a ganache of earthy rich chocolate, cinnamon, almond and chile powder into a lightly sweetened corn dough or “masa.” The tamales are served with a drizzle of light caramel sauce to finish the plate with a final note of allure.

These tidy little packages deliver a festive combination of flavors from both the New and the Old World. 'Tis the season. ¡Felicidades!


Bench notes:
- I’ve used Maseca brand masa instantanea de maiz since it seems to be widely available.
- To make the ganache, chop the chocolate into very fine bits so the melting process is thorough and even. Once you pour the hot cream onto the chocolate, let it sit for about 2 or 3 minutes, then stir very slowly so you don't cool down the mixture too quickly before all the chocolate has a chance to melt.
- You can make the chocolate filling ahead and refrigerate. The caramel sauce can also be made ahead or while the tamales are steaming.
- For the purposes of planning ahead, it takes about 15 minutes to make the ganache and an hour or so to chill; an hour for the corn husks to soak; about 20-25 minutes to mix the dough; about 45 minutes to 1 hour to assemble; and approximately 2 hours to steam.


Chocolate Caramel Tamales
Makes about 2 dozen tamales

Spicy Chocolate Filling

8 oz bittersweet chocolate, finely chopped
1 C heavy cream
1/2 t ancho chile powder
1/4 t chipotle chile powder
pinch of cayenne
1 t cinnamon
2 T + 2 t honey
3/4 t almond extract
1/2 t vanilla extract

Chop the chocolate into very small fine pieces and place in a bowl.
Gently heat the cream, spices and honey until just before it comes to a boil. Remove from heat, stir in the extracts and pour over the chopped chocolate. Let it sit for a couple of minutes.

Using a rubber spatula, gently and slowly stir the center and then slowly work out in concentric circles. Blend until there are no streaks and the mixture is smooth. Pour into a clean container and cool completely. Cover and refrigerate for an hour or two until firm.

Corn “Masa” (Dough)

24 corn husks

1 C water
1 C milk
1/2 t salt
1/2 t cinnamon
1/8 t freshly ground nutmeg
1 t vanilla
2 C Maseca masa instantanea de maiz
7 oz (14 T) butter @ room temp
1/3 C brown sugar
1 t baking powder

Soak the corn husks in large bowl of very hot water for 30 minutes. Weight them down with a heavy bowl or saucepan to keep them submerged. Once they are softened, separate the husks carefully to avoid tearing. Continue to soak in hot water until pliable, up to 30 minutes more. Drain and pat dry.

Bring the water, milk, salt, cinnamon and nutmeg to a slow simmer. Remove from heat and add vanilla. Gradually stir in the masa harina until it forms a very thick dough.

Cream the butter, sugar and baking powder until very light and fluffy, about 3 to 5 minutes. Add the masa harina dough in small walnut-sized pieces, one or two at a time. When all the dough has been added, continue beating until it is smooth, fluffy and light, about 6 to 8 minutes. You can test to see if it’s ready by taking about a tablespoon of the dough and placing it in a glass of warm water. It should float.

Place a dry corn husk on a clean work surface. Spread about a 1/4 C of the dough into the center lower half of the corn husk, leaving the upper half with the pointed tip free of any ingredients. Take about a tablespoon of the chocolate ganache, elongate it and place on top. Fold the long sides of the corn husk over filling, then fold the pointed tip over the filled half. Lay seam side down. Repeat the process until all the corn husks are filled.

Arrange a steamer rack in large stockpot and add water to just below bottom of the steamer rack. Cover and bring water to boil.

Place the tamales upright in the steamer, loosely leaning against one another. Lower heat to a simmer, cover and steam until dough is firm to touch and separates easily from the husk, about 1 1/2 to 2 hours. Keep a close eye on the water level to be sure there is enough throughout the steaming process.

Brown Sugar Caramel Sauce

3 oz (6 T) butter
1 C firmly packed brown sugar
1/2 C + 2 T heavy cream @ room temperature
1/4 t salt, to taste
1 t vanilla extract

Melt the butter in a saucepan and add the sugar. Cook without stirring for about 2 minutes to dissolve and caramelize. Then, whisking constantly, add the cream and salt and continue cooking and for another 2 minutes. Remove from heat and add the vanilla. Add more salt to taste.